This is explained in a desktop environment.
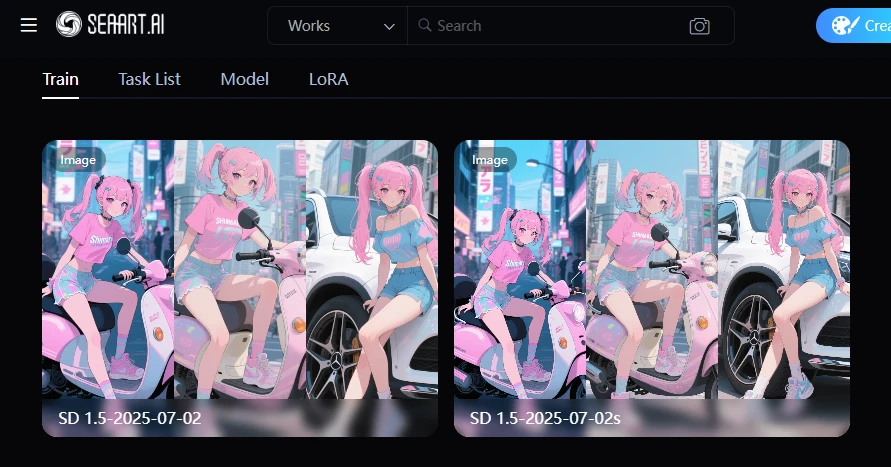
Since I'm writing in chronological order, the image of the completed model is at the bottom.
SD1.5 can train a LoRA model using a lot of images.
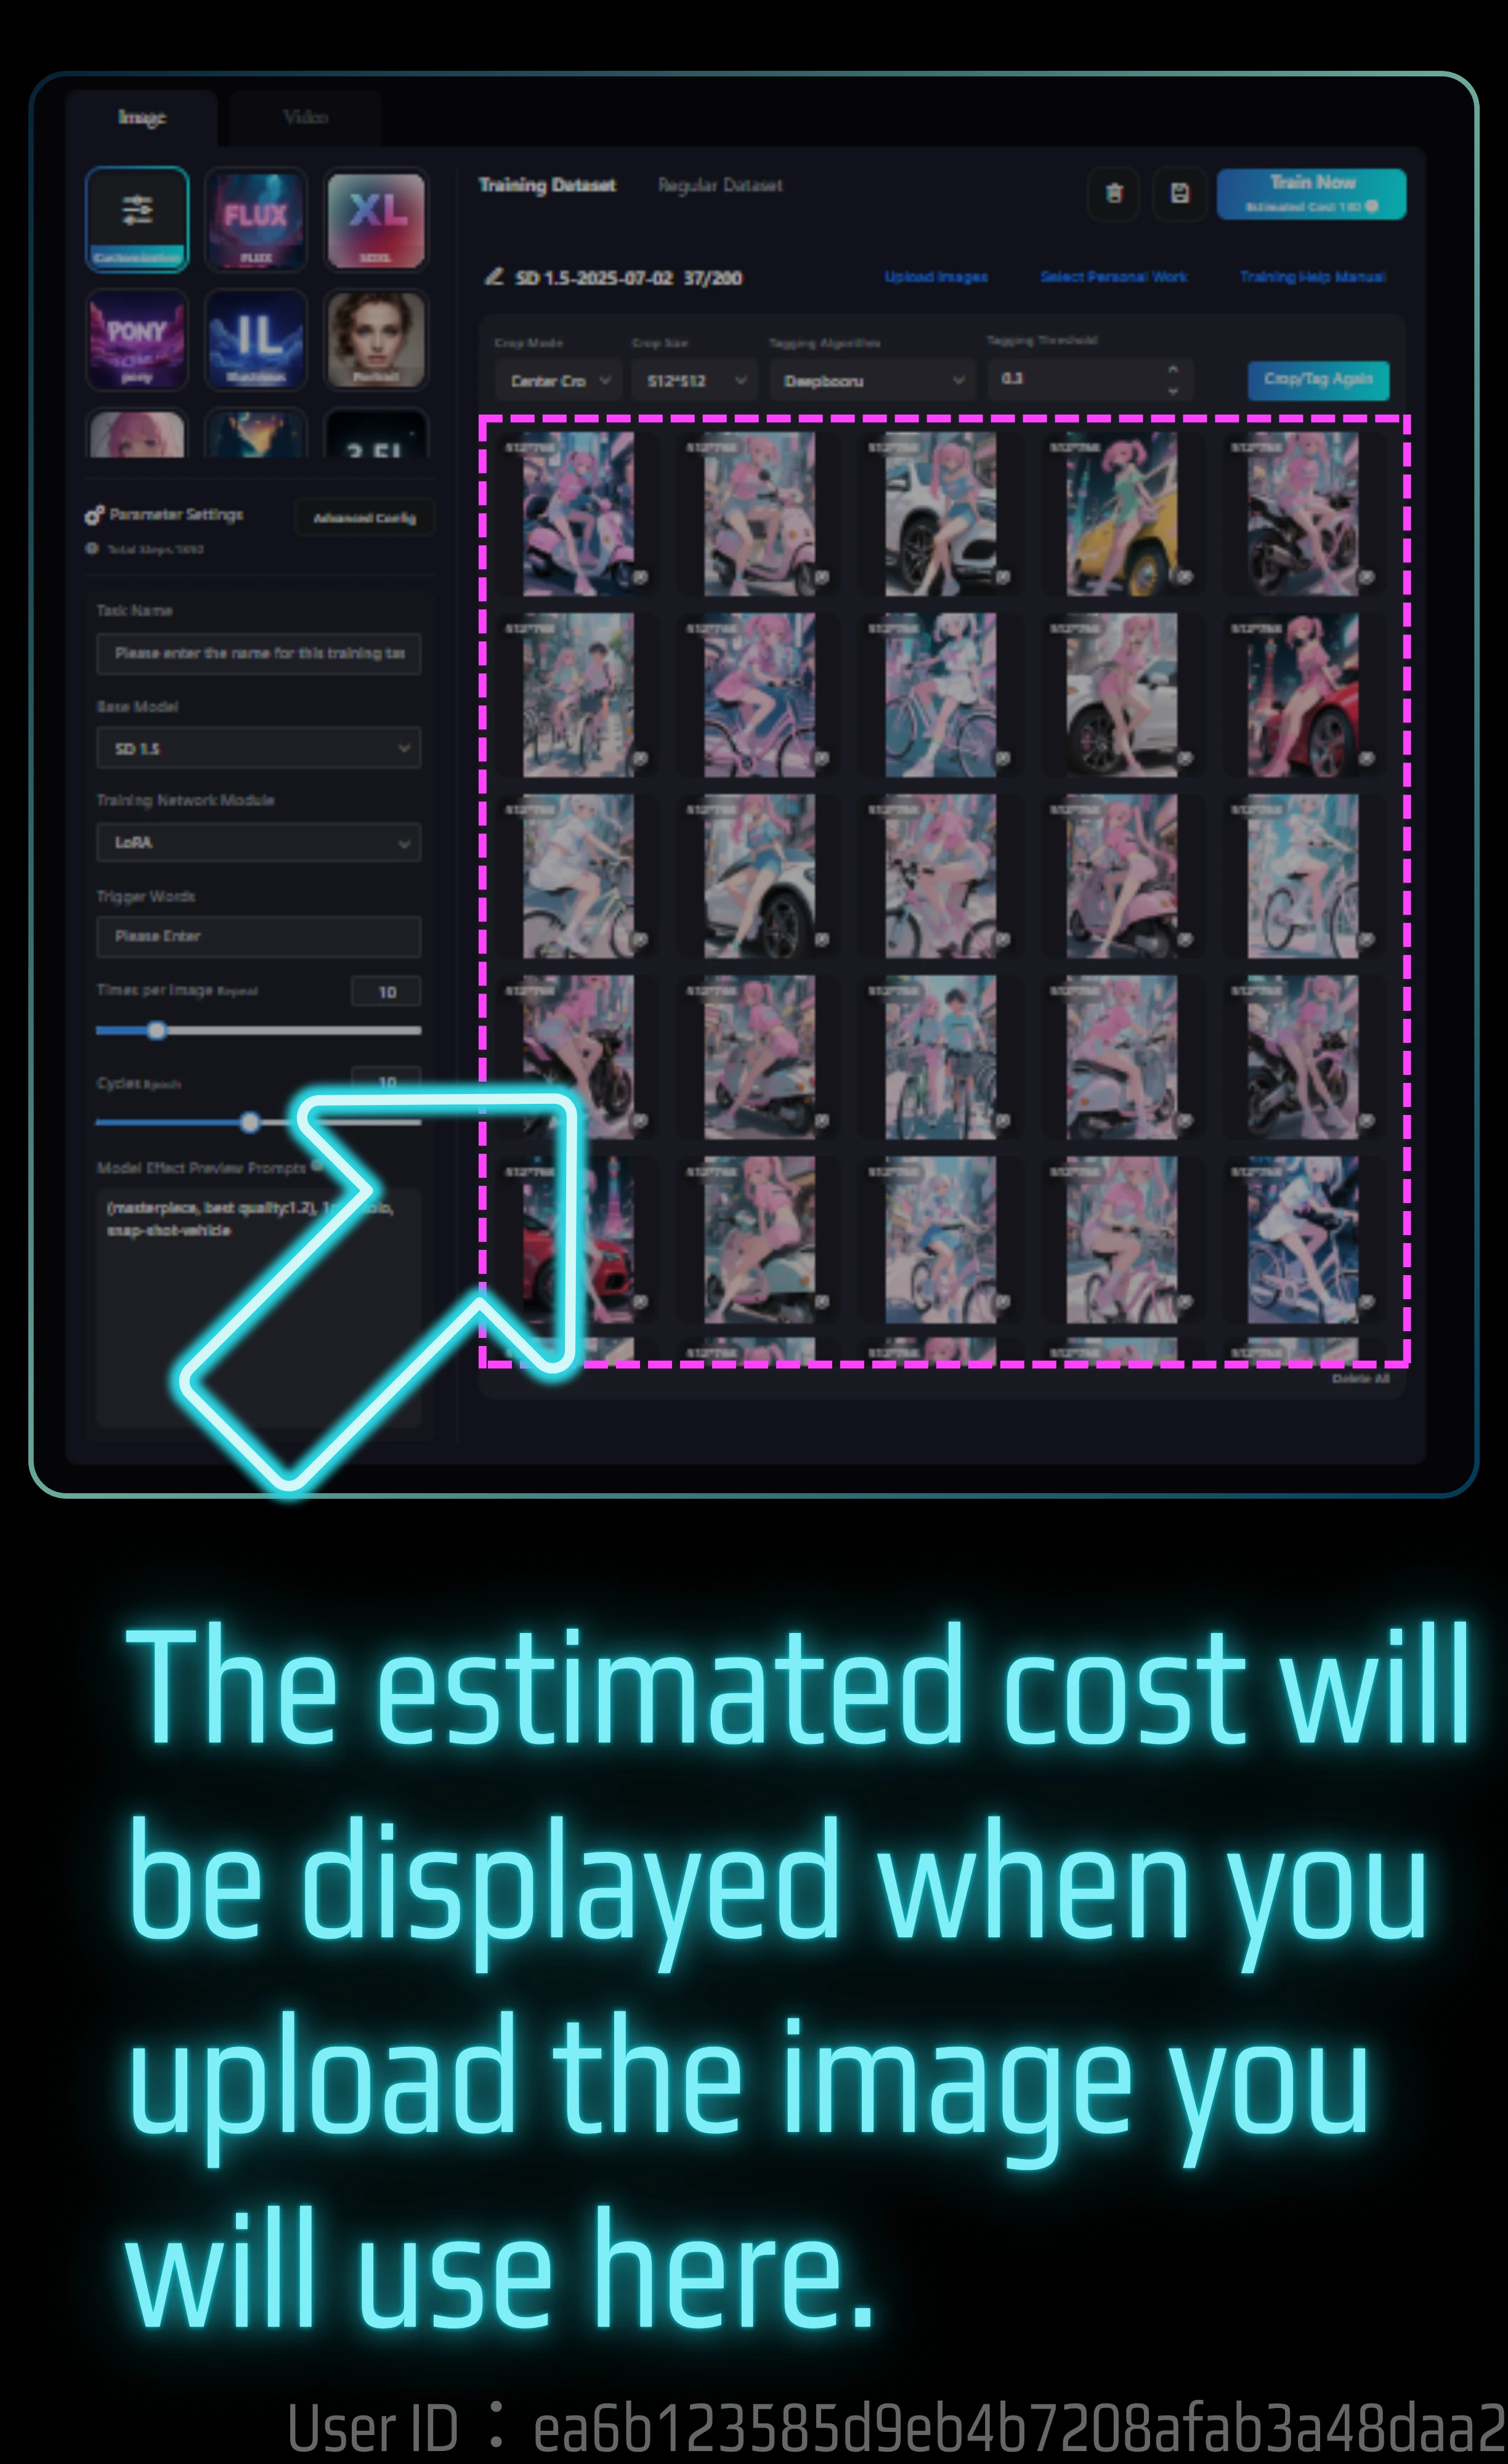
It costs 130 Stamina, so theoretically you can train 37 images. By the way, I ended up using 165 Stamina. On this page, I will explain the actual training process and the results of the model with images.
Rather than the process, I will first show you the generated images.
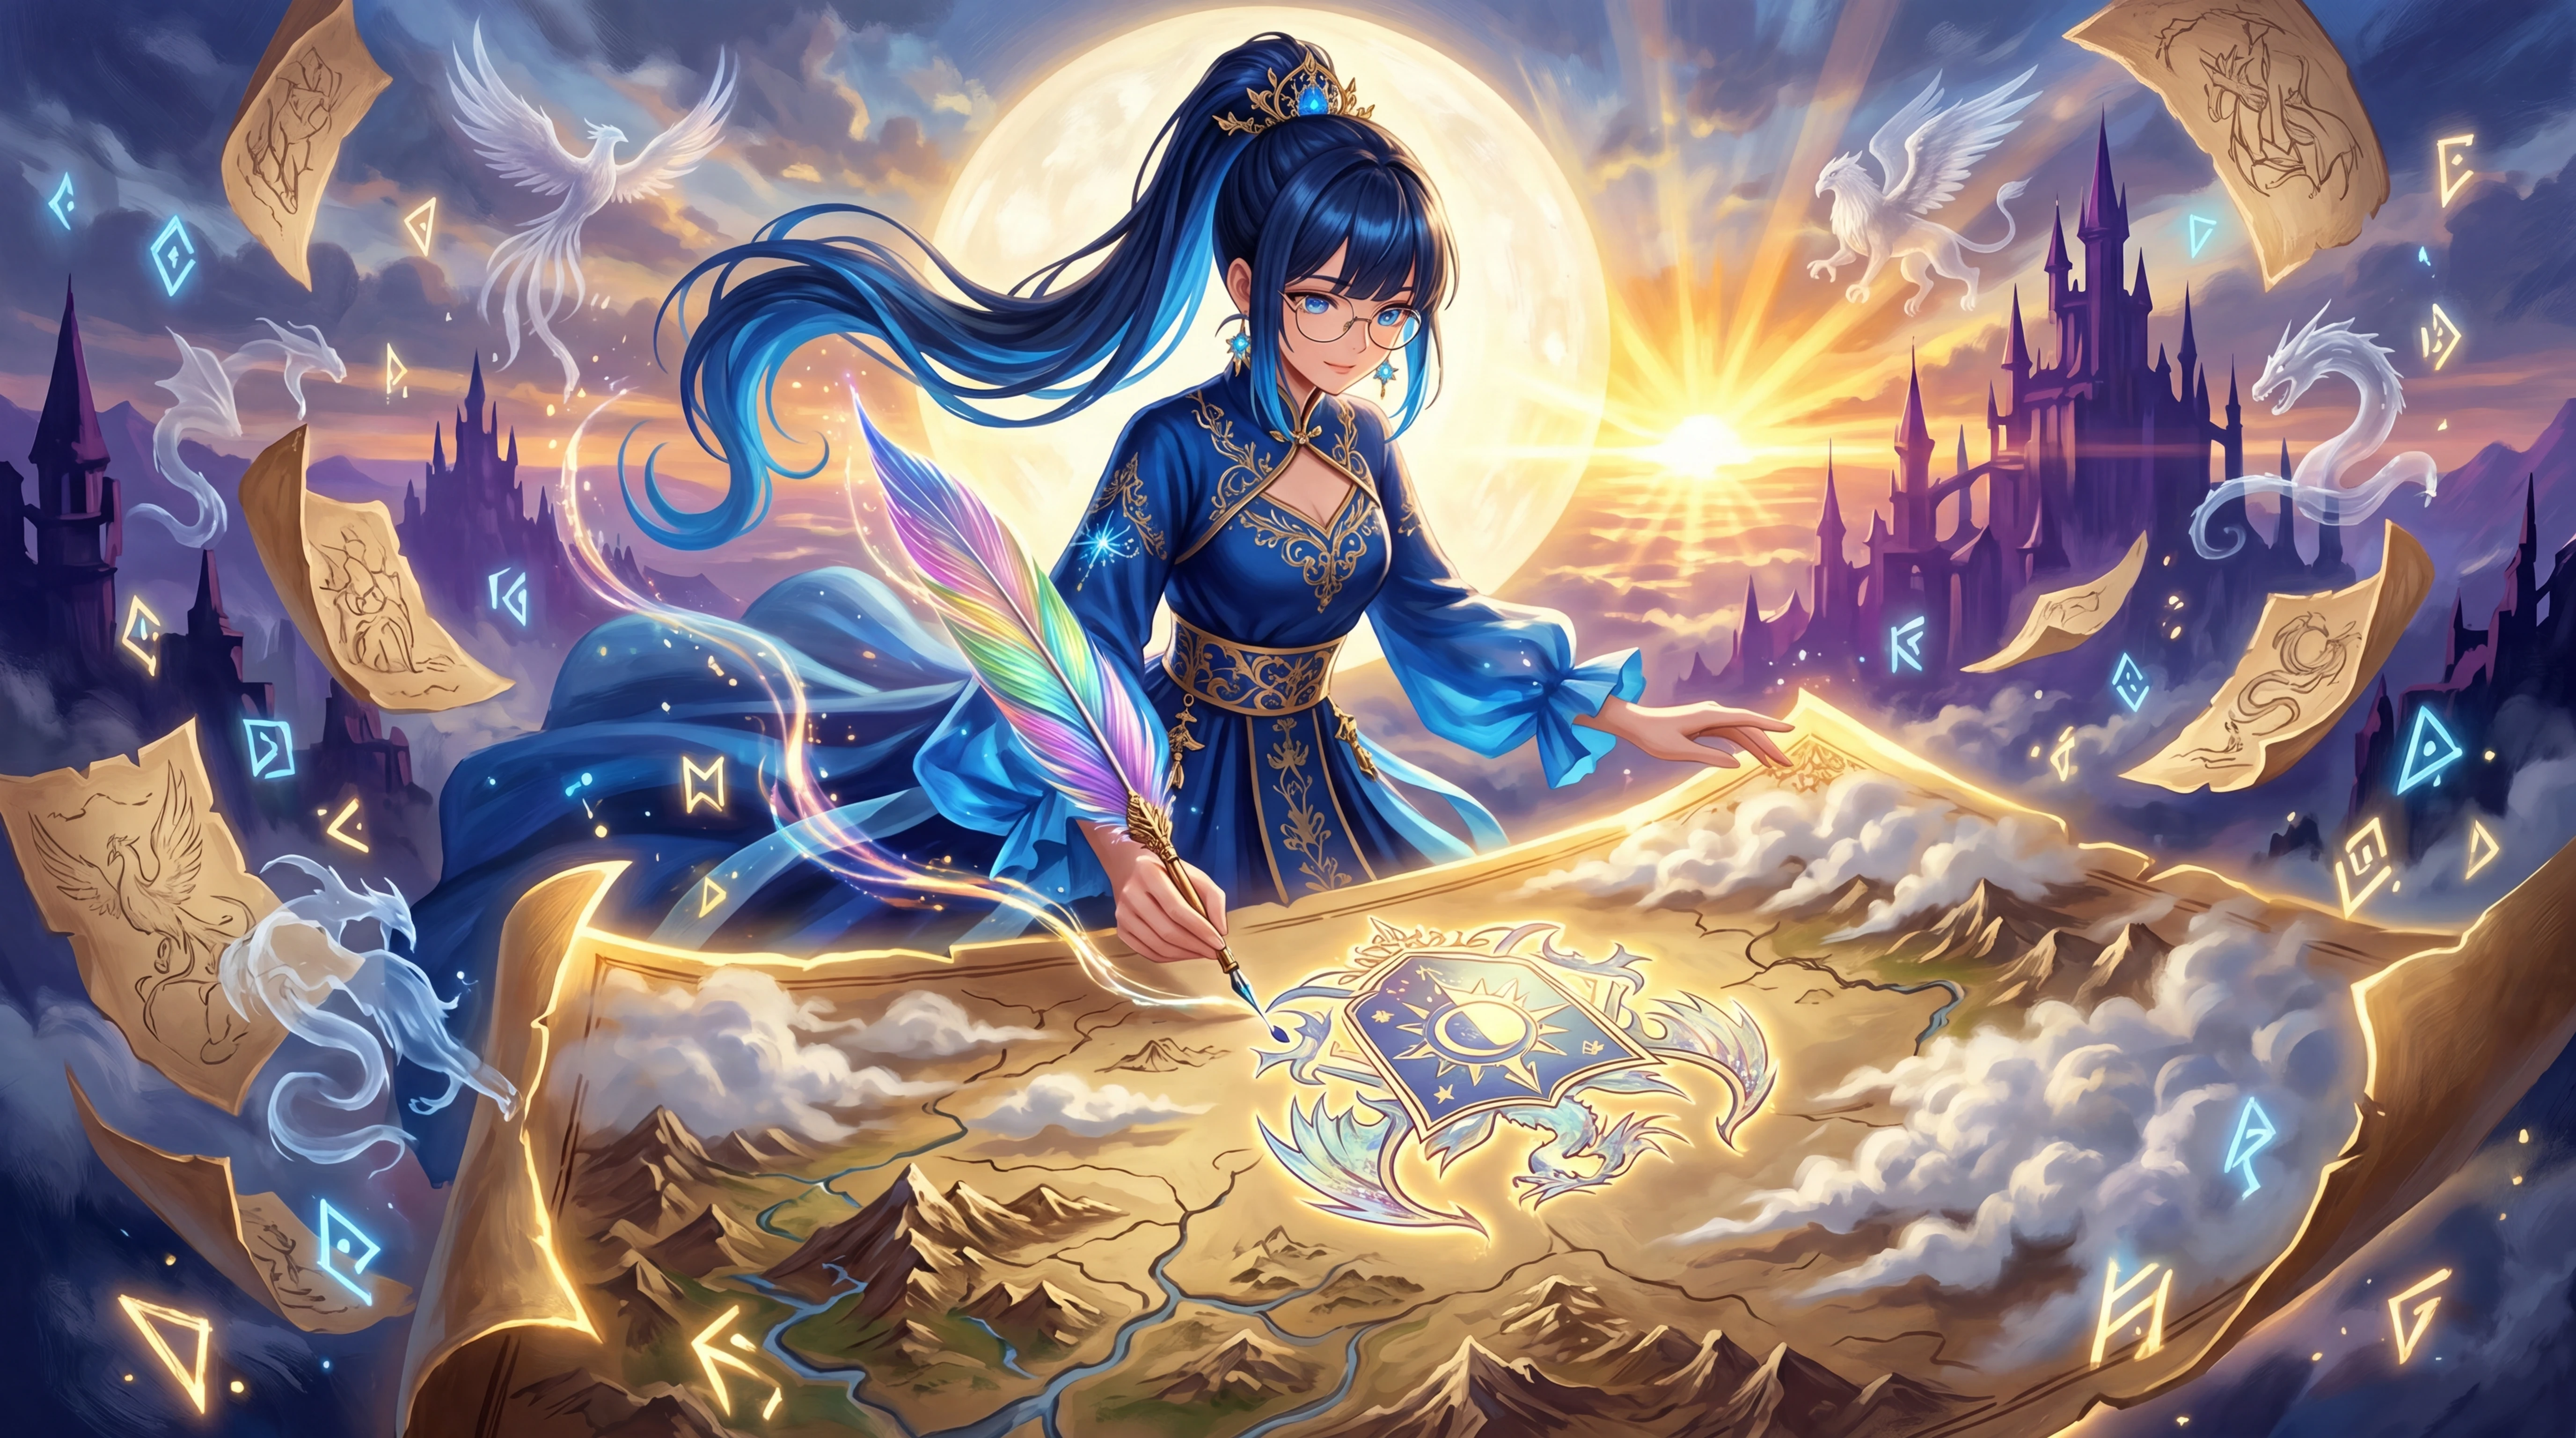
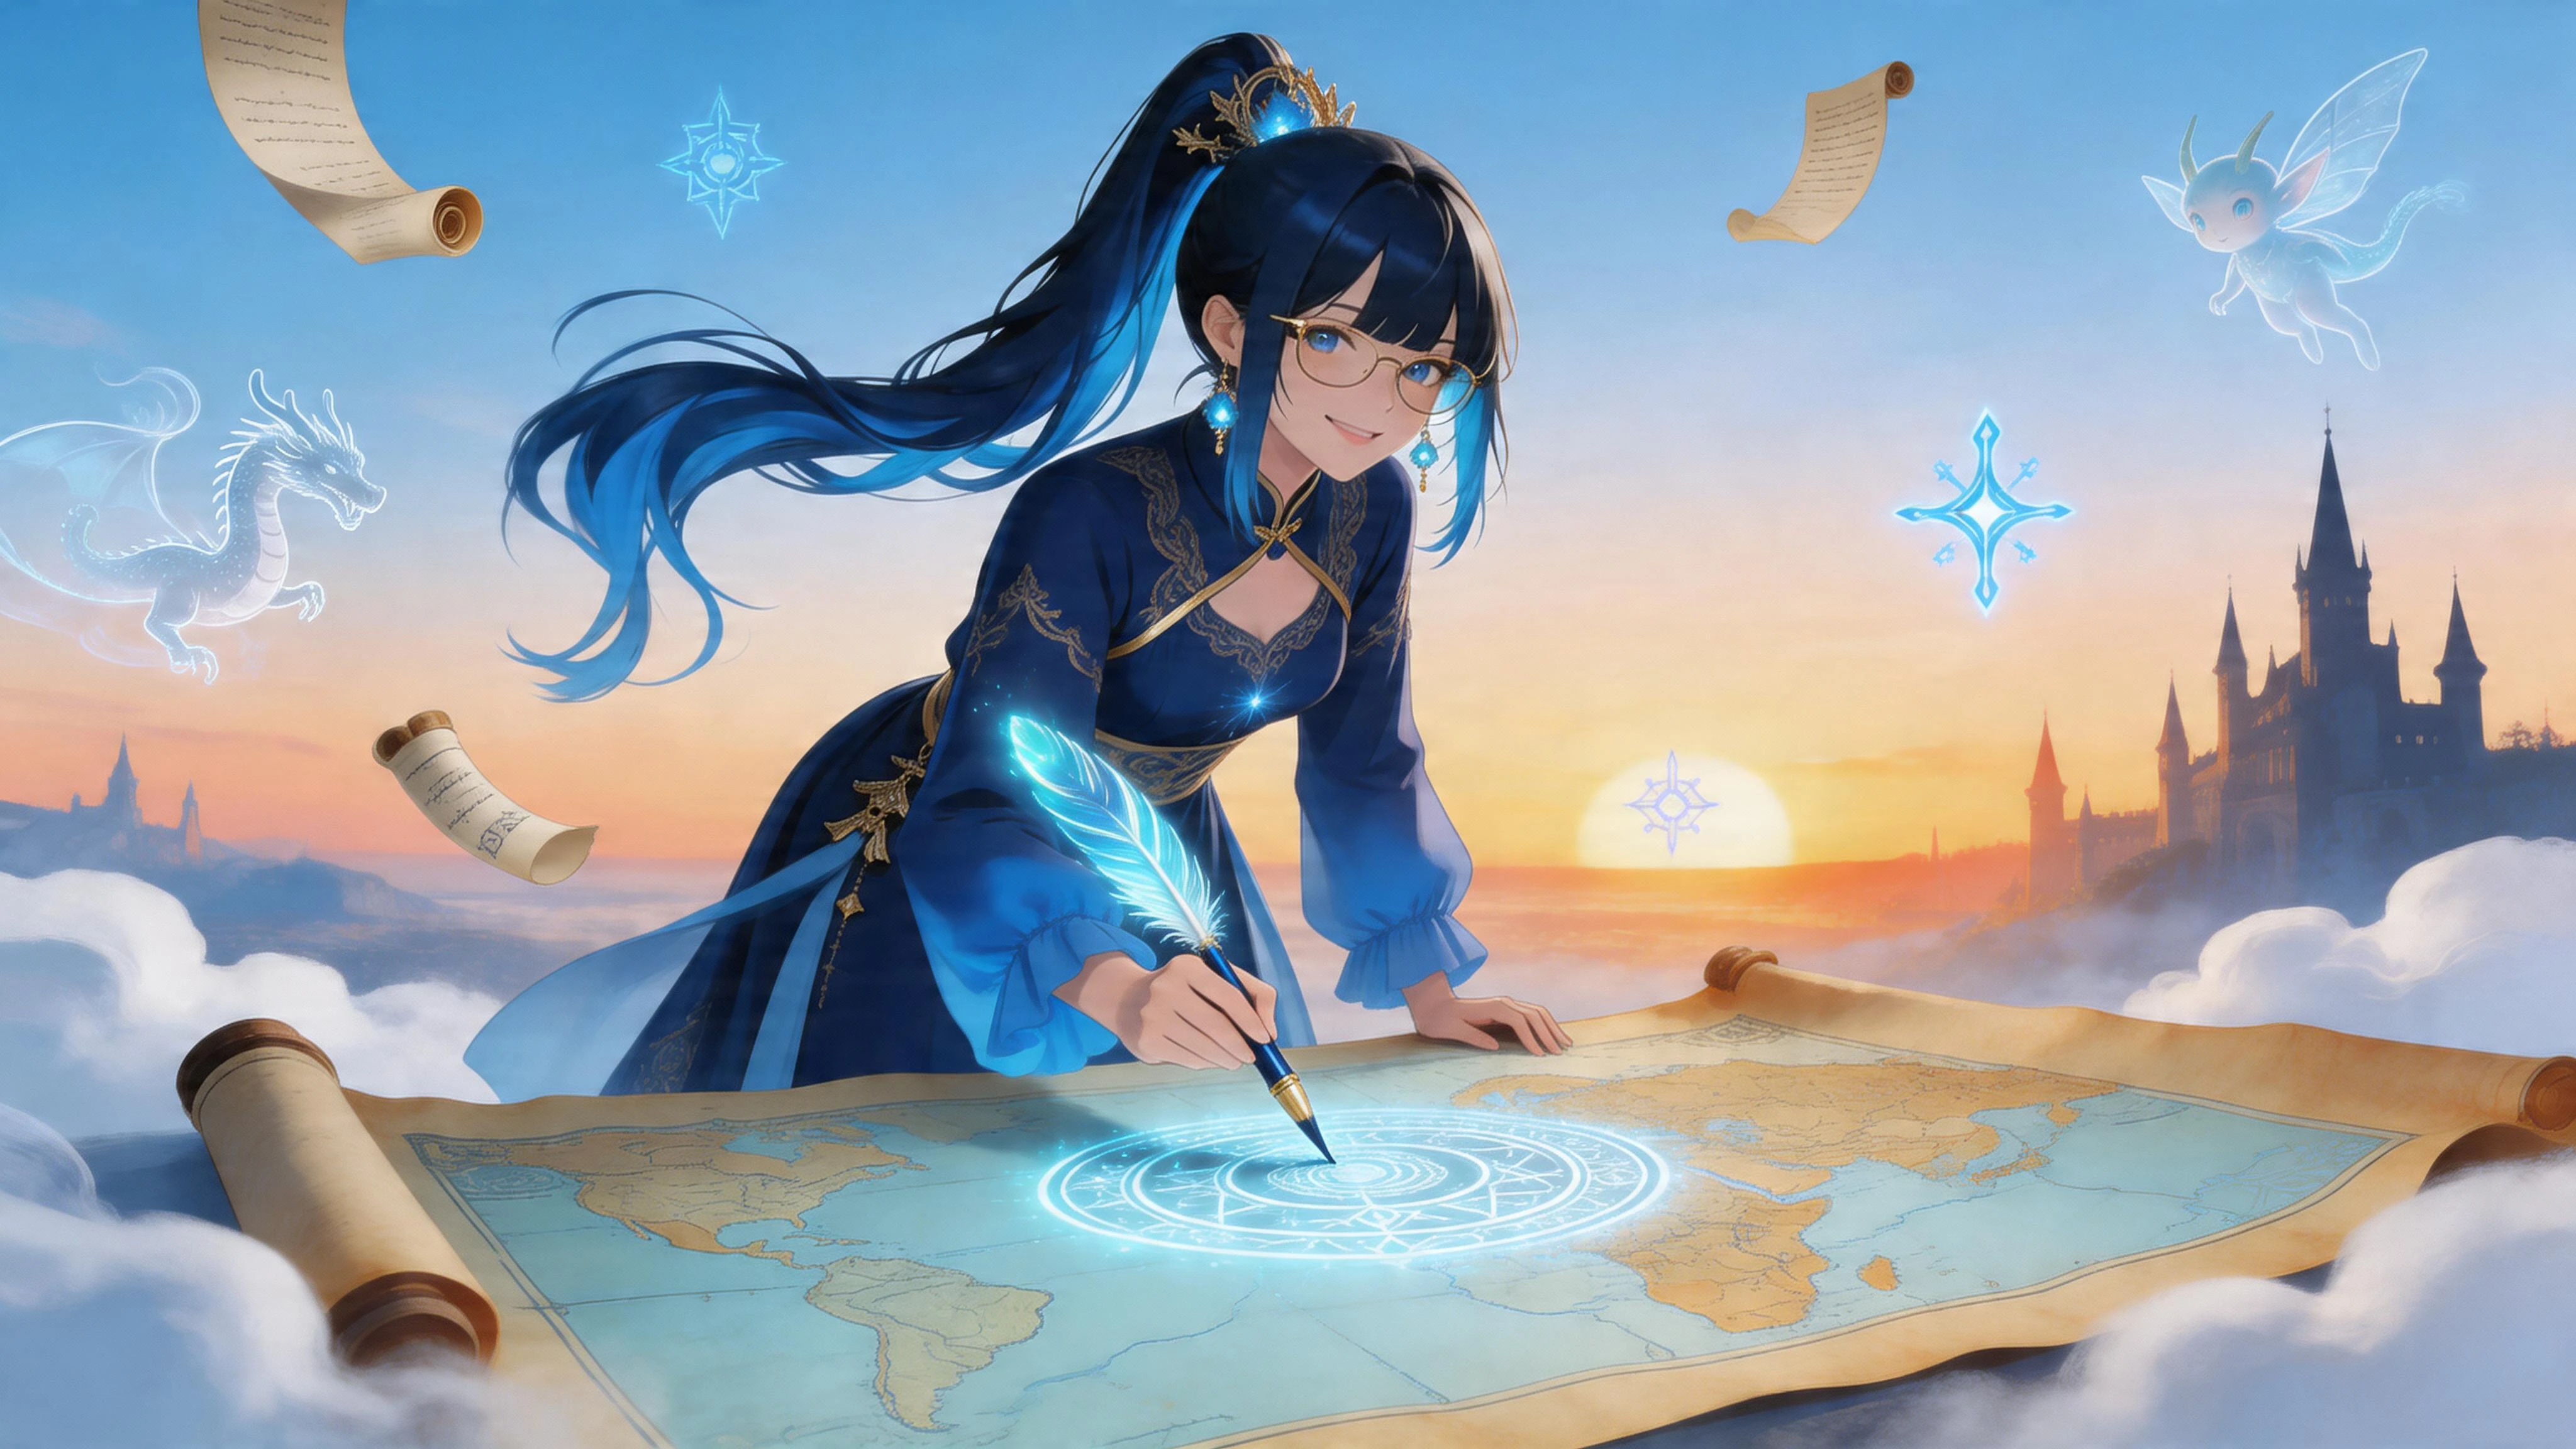
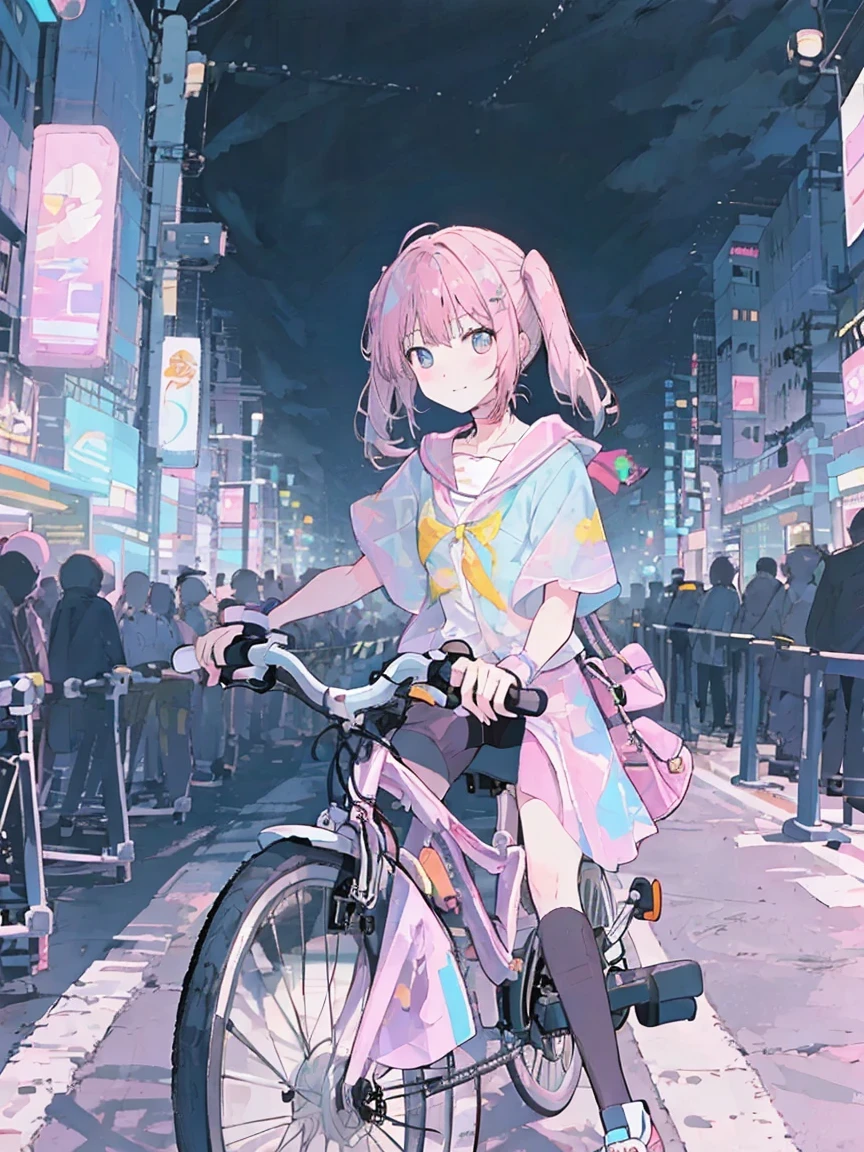
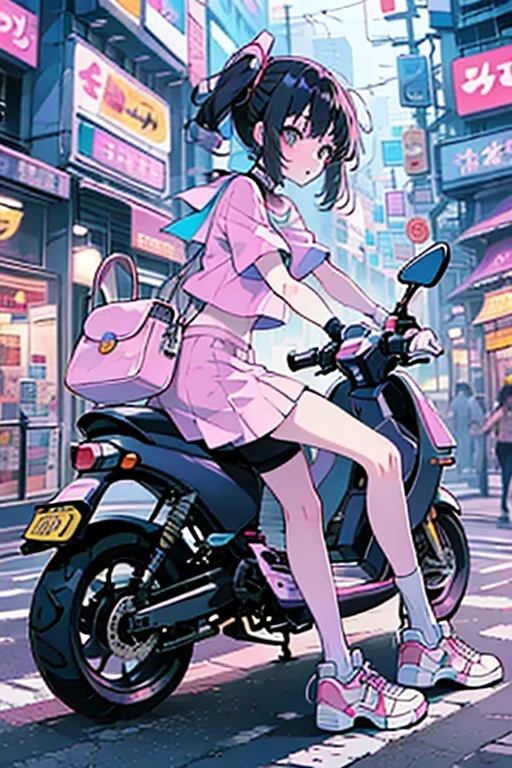
😄If you want to draw a person riding a bicycle, it's better to use seaartFilm
The original image used for learning was of a person riding a bike.
🖌️SeaArt Film Generate
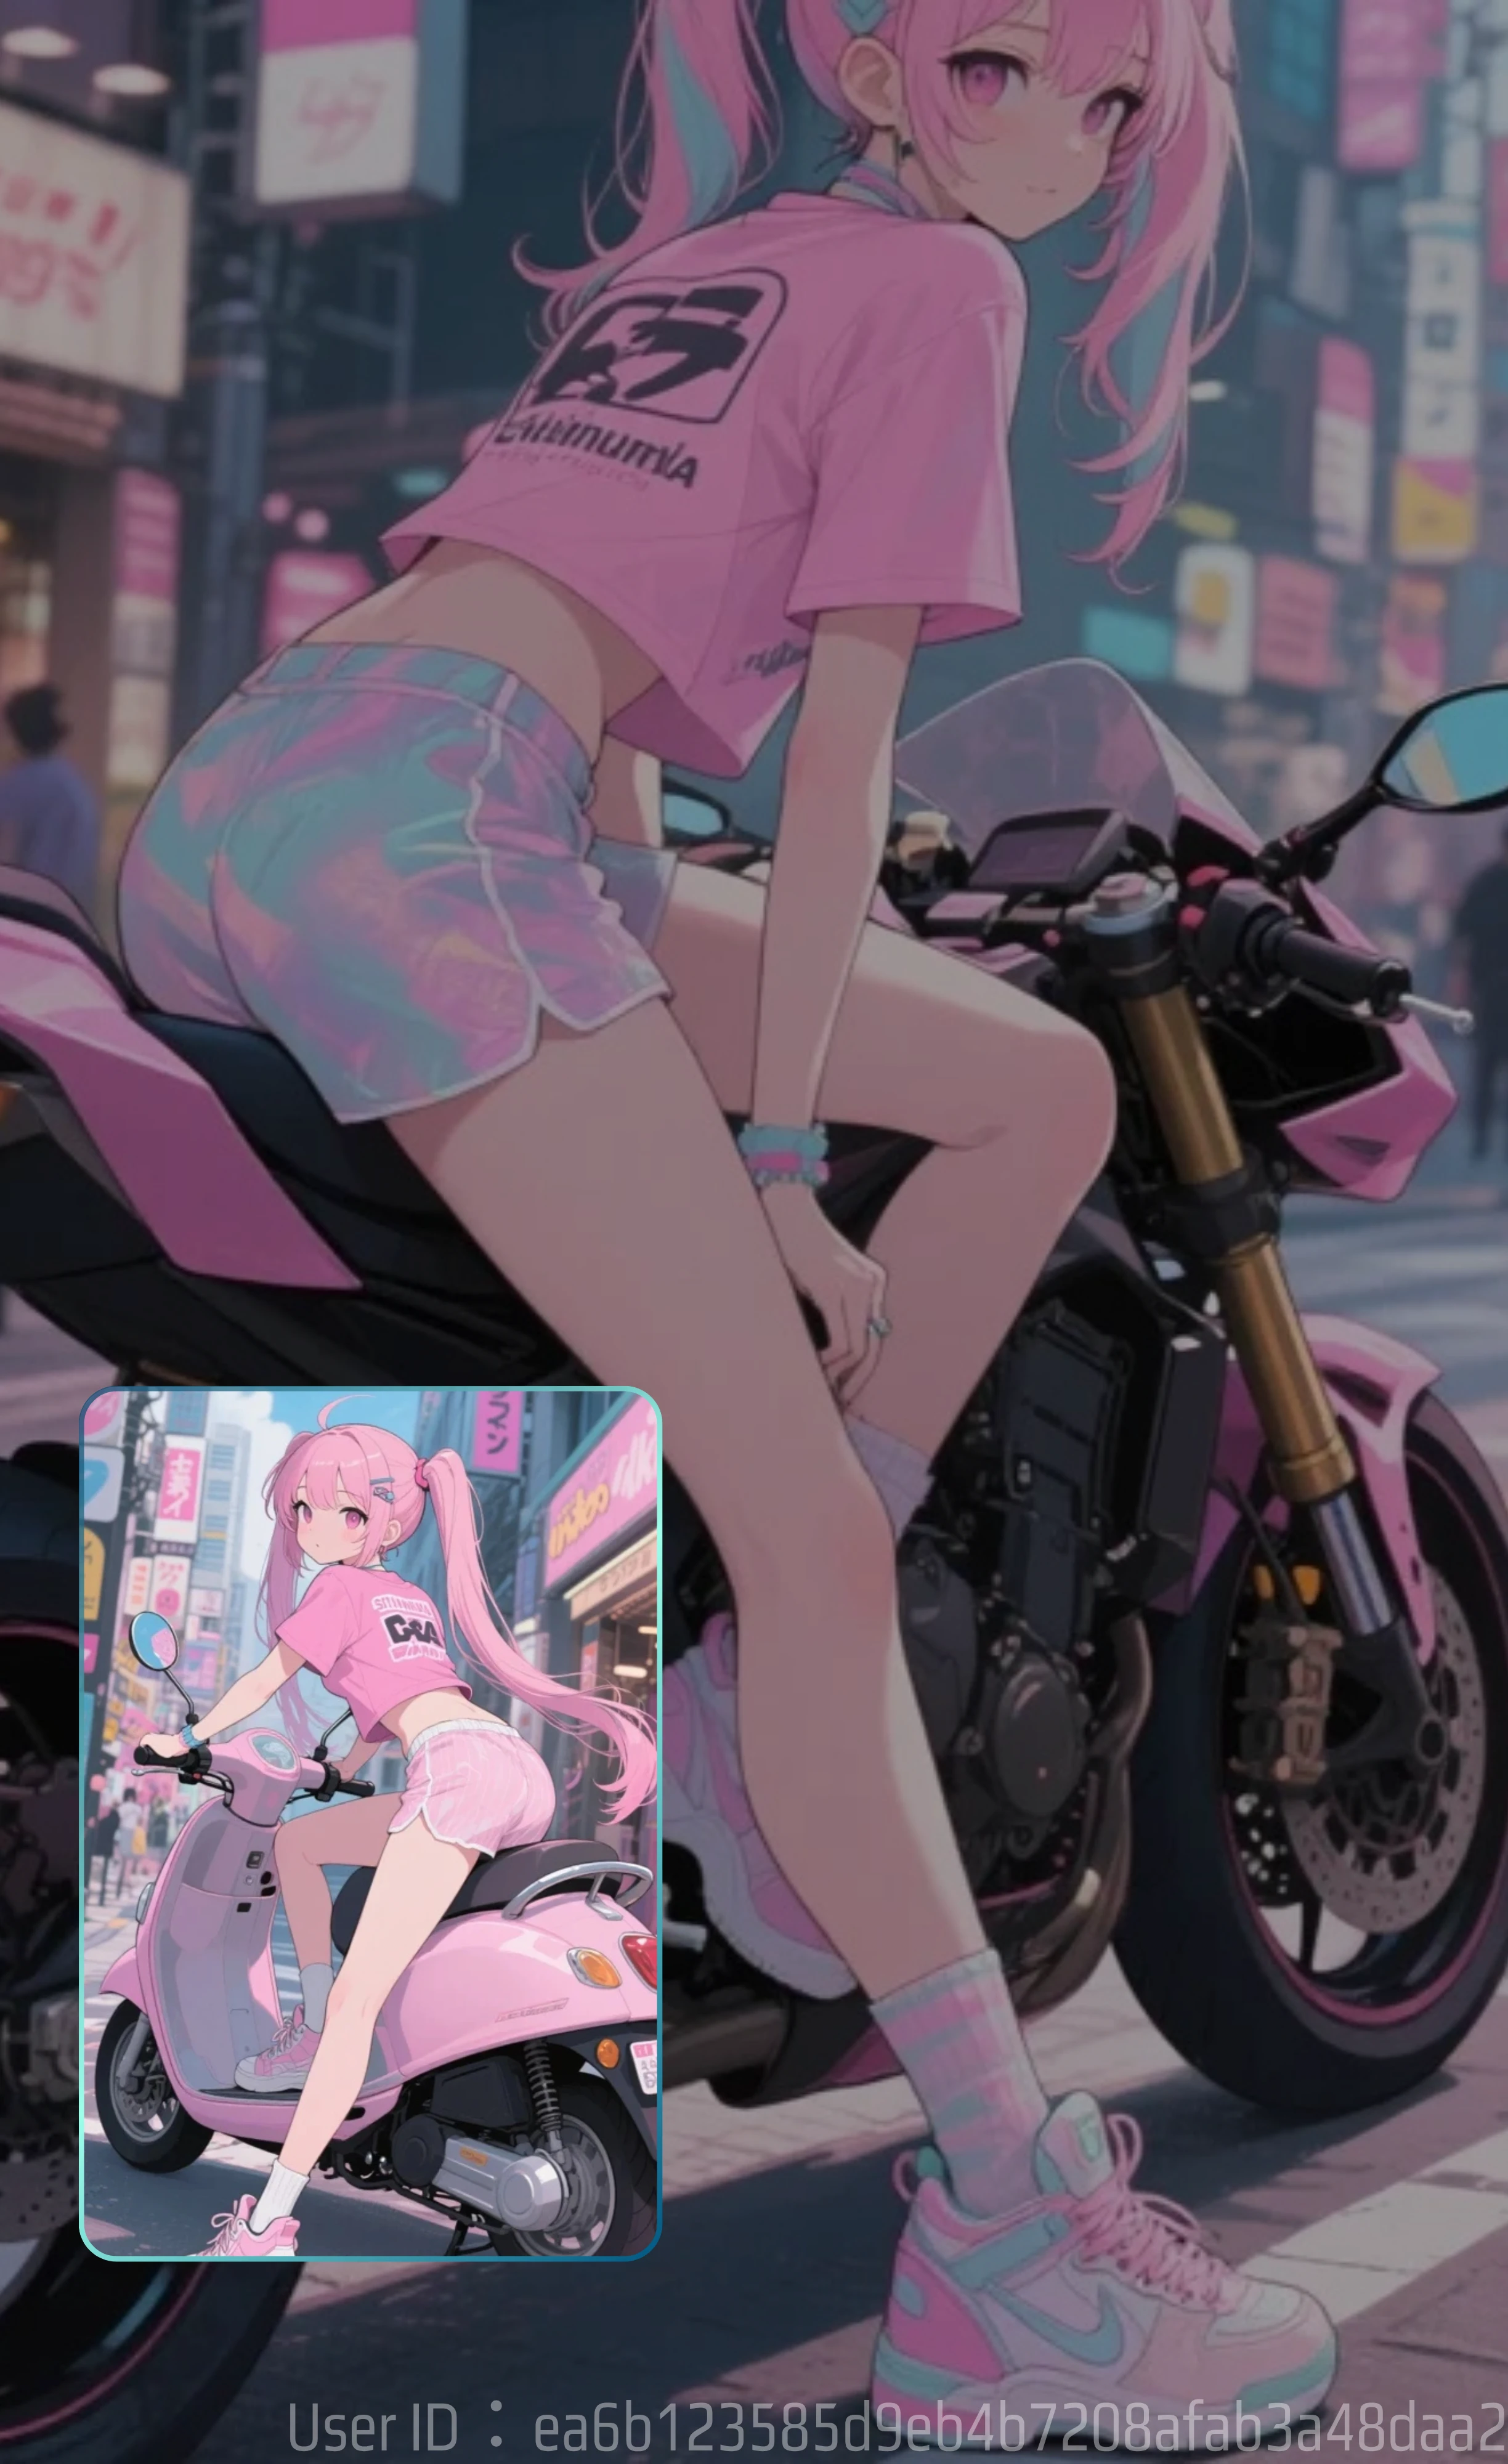
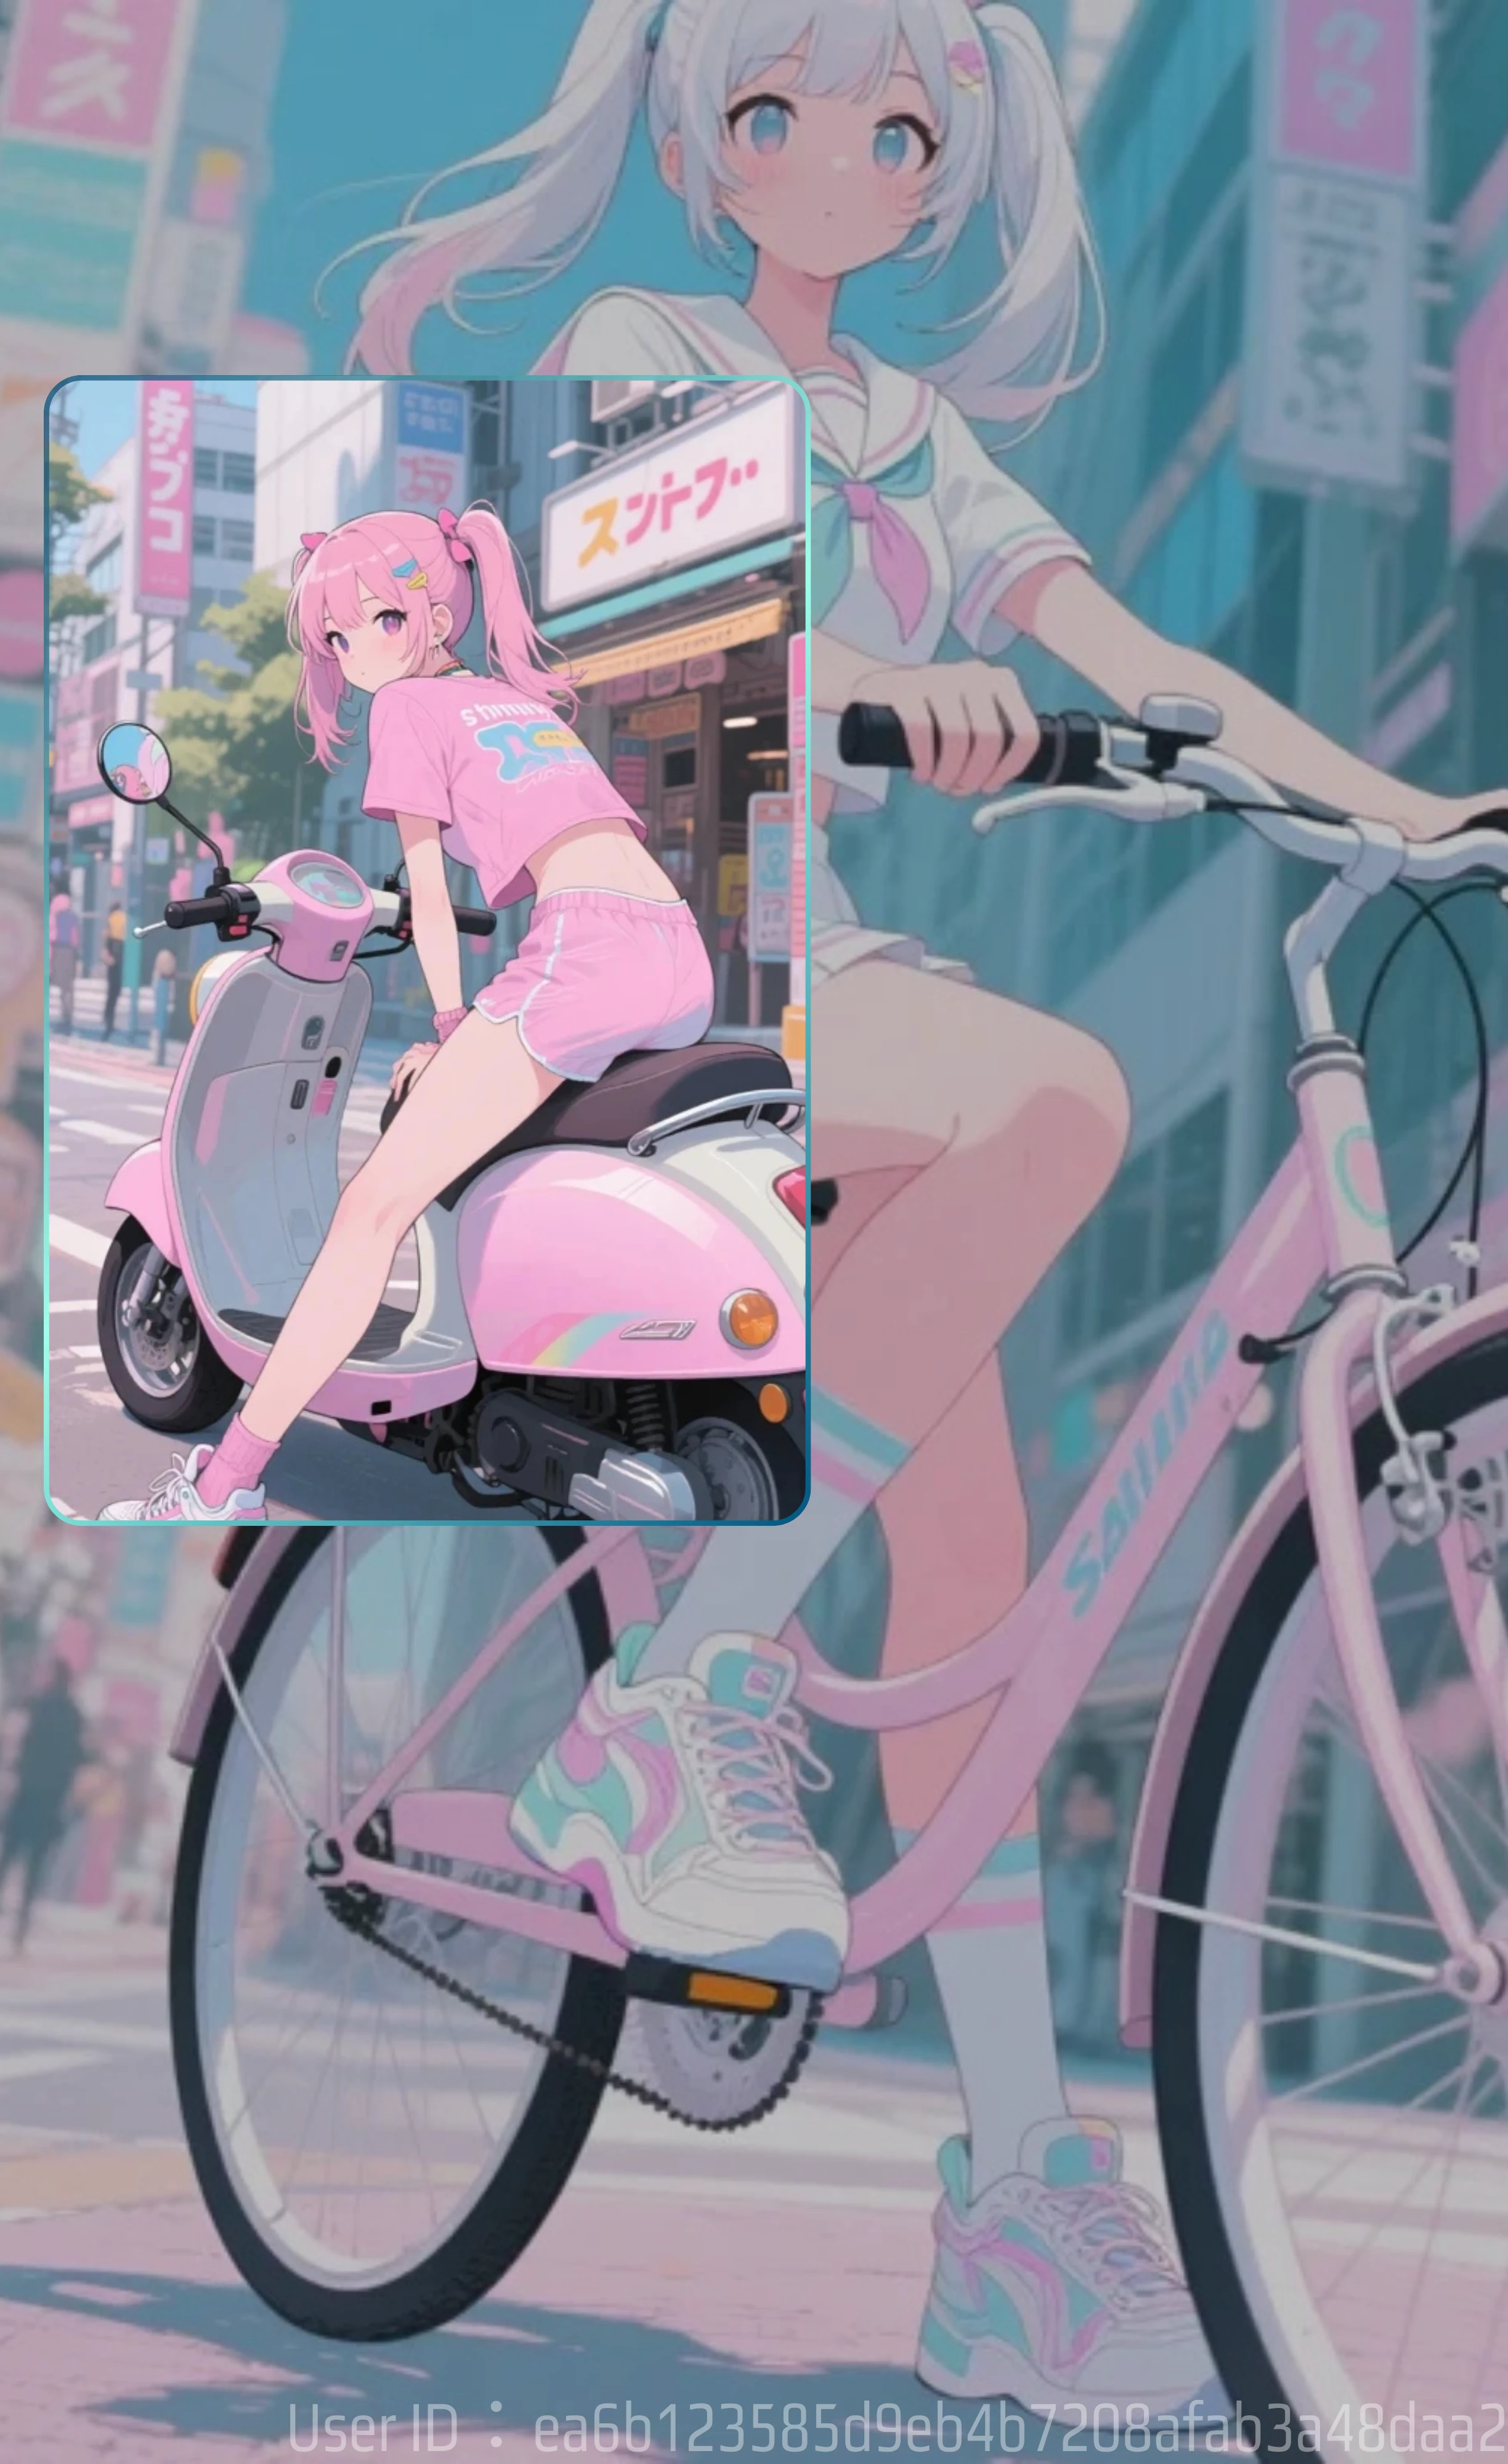
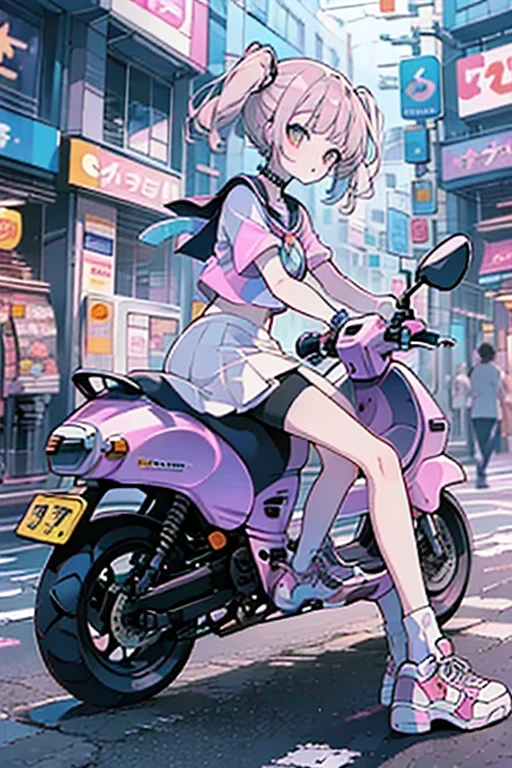
It didn't work well when I generated it with SD1.5. Please look at the next image.
As you can see from the image,
the vehicle body are well balanced.
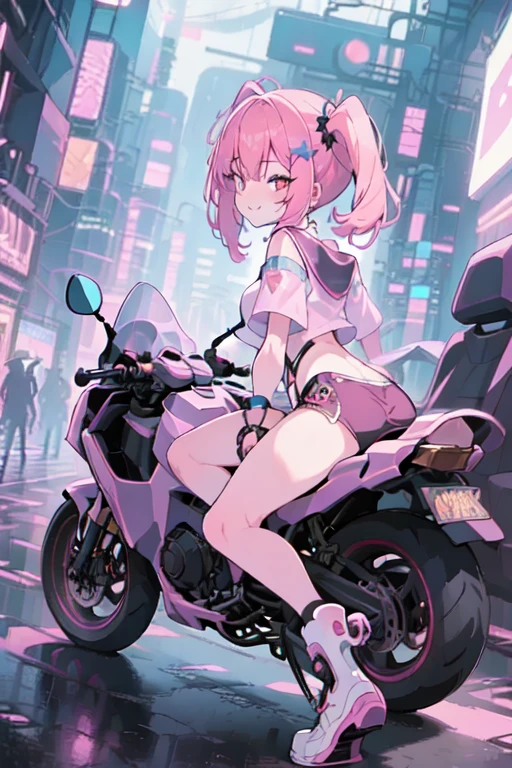
🖌️SD1.5 Generate
This was made with the generated model.
This is when the LoRA model of a bike is added. I tried various things, such as without the additional LORA, but the results were not very good. I will discuss these later.
I created a LoRA model in SD using images generated by SeaartFilm.
If you want to draw a person riding a bicycle, Film is really good.
I realized how easy it is to draw a person riding a bicycle.
And SD1.5 is cheap, but the legs become deformed when the person straddles a bicycle.
My impression after making it is that the level of completion is very low.
Considering the time it takes to generate and the cost of generating multiple images, film is more efficient.
Click here for LoRA model generation, a table of generation costs for one image, etc.
If you want to know the detailed costs, I have compiled a table on this page.

- Free 130 Stamina: A Comprehensive Guide to AI Image Generation Costs, sdxl sd⤴️
- Use LoRA training for a cost of 130Stamina or Credit⤴️
SeaArt Guide LoRA Training (Advance)⤴️
The guide to LoRA training itself is here. It also explains the recommended values for parameters.
I actually did LoRA training for 130 Stamina
Well, I expected 130, but it actually cost 165.
There is a chance that 130 Stamina alone is not enough, so you can adjust it by increasing SeaArt Stamina or Credits, or reducing the number of images a little. This did not happen with this training, but I have seen cases where Credits were calculated as negative if Stamina was insufficient.
The image when the sample checkpoint is created is always a strange image. It may be because of the prompt. I find prompts troublesome, so I only enter the trigger word.
Now, let's go back to the image training.
Go to the model training page
This is explained in a desktop environment.
The locations and page structures of the SeaArt model training page, training page, and trained and completed model are very complicated, so it may be difficult to find them.
You can find the model in Create.
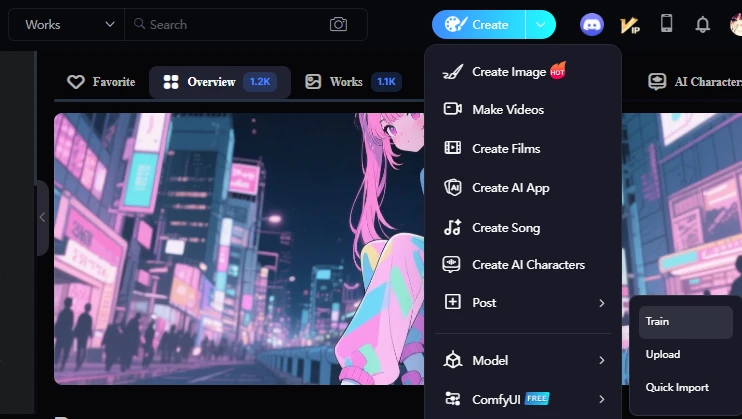
The model hierarchy has the following items, but open Train.
- Train
- Upload
- Quick Import
Note: The model in the tab is different. This is where the generated model is displayed. But what's confusing is, on the Models tab here, there's a button to upload a model.
LoRA Training Result Report
1. Document Basic Information
- Trained Base Model: Stable Diffusion 1.5 (SD1.5)
- LoRA Concept: Adheres to default settings
2. Training Overview
I have changed these parameters.
I used SD1.5. You can use it by selecting Customization.
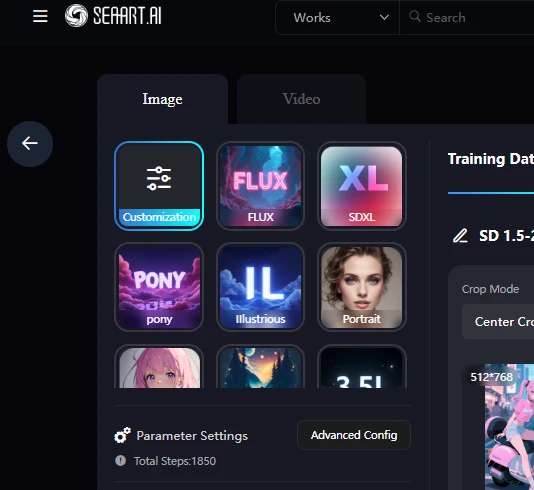
Next, Base Model SD 1.5
A side note: After the model is completed,
However, there is something that bothers me. When you use a LoRA model, the normally trained Base model is set and you are taken to the Create page.
So, the Base model is set to SD1.5, but when I generate it, a system error occurs.
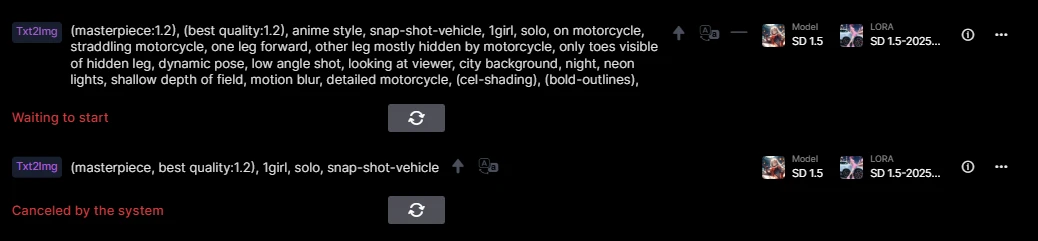
If I try to generate it again, I get an error.
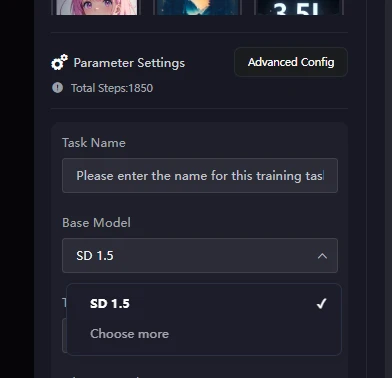
How to change the base model
Note: Base models and LoRA models are different. The one below the base model is the LoRA model. When creating a LoRA model, you also use the base model.
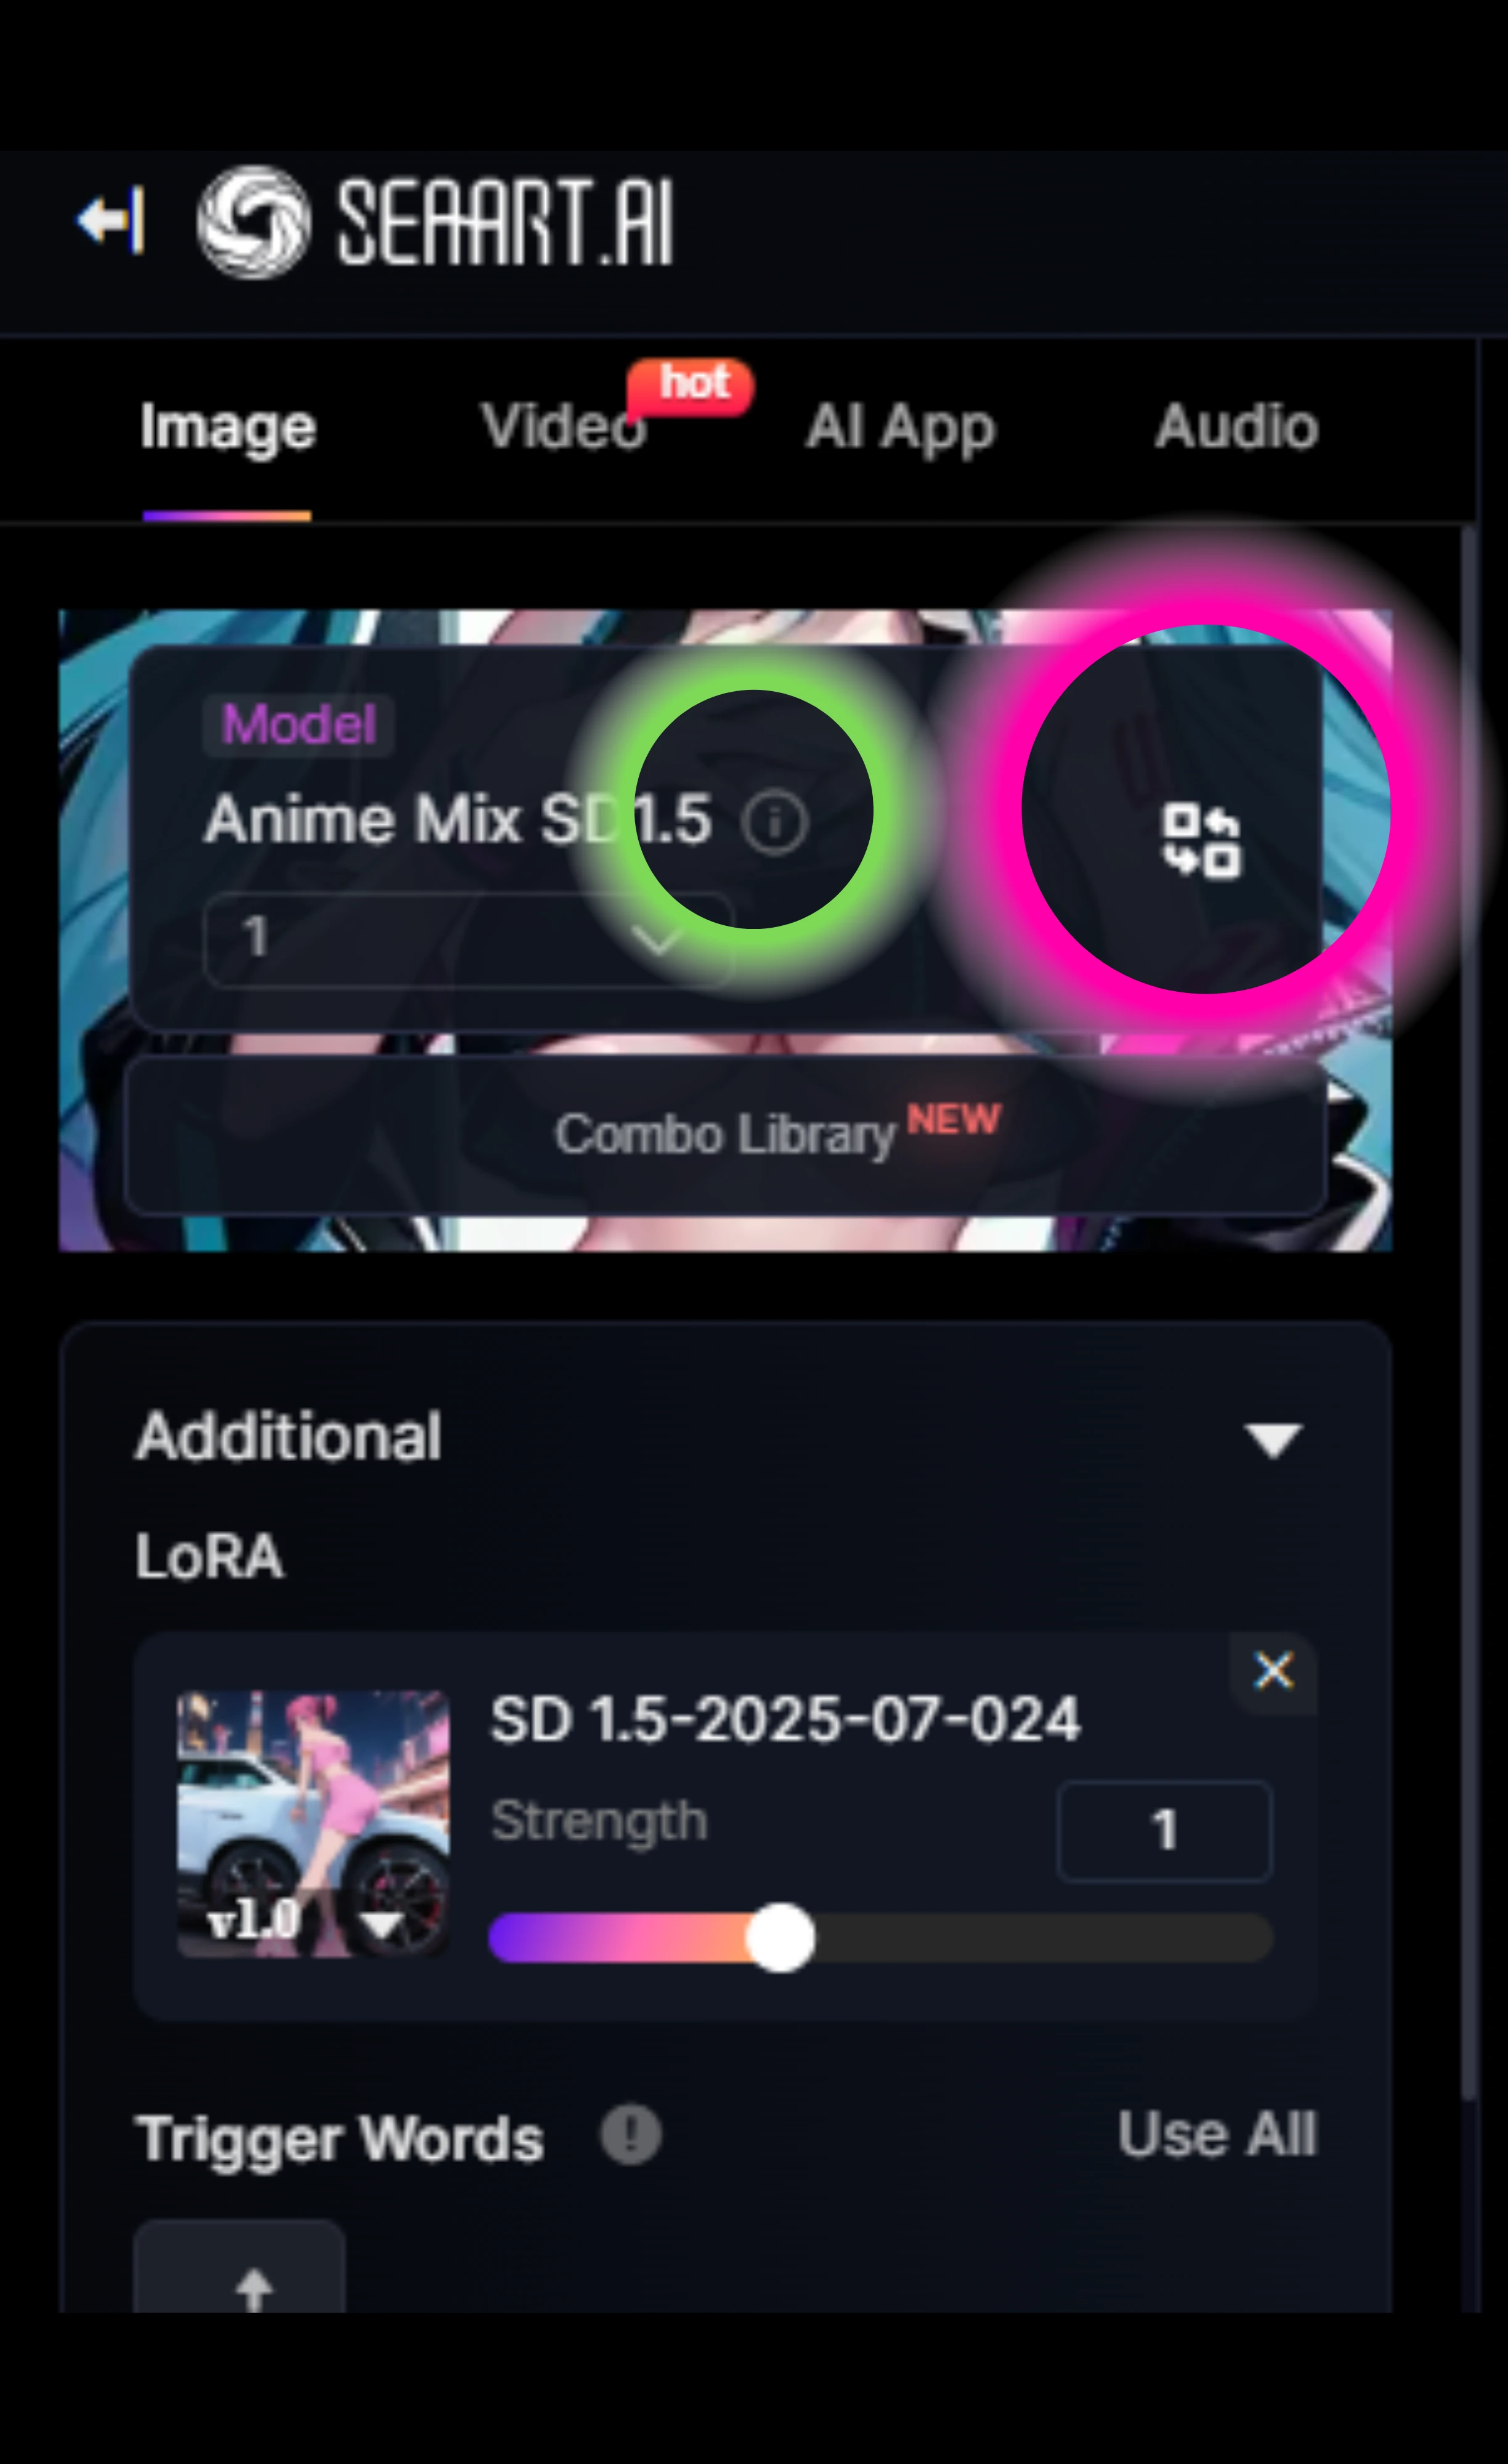
Press the light-green information button to go to the details page for this base model. You can change it by pressing the pink circle or anywhere on this base model.
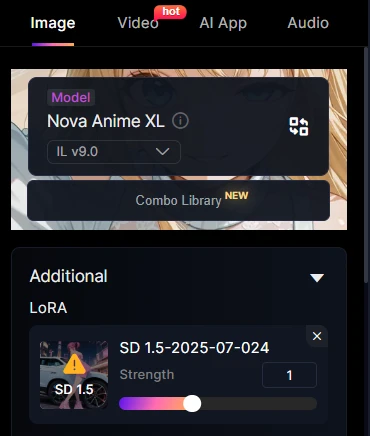
LoRA is already set with SD1.5. If you use an SDXL series or similar for the base model, you will get the following error.

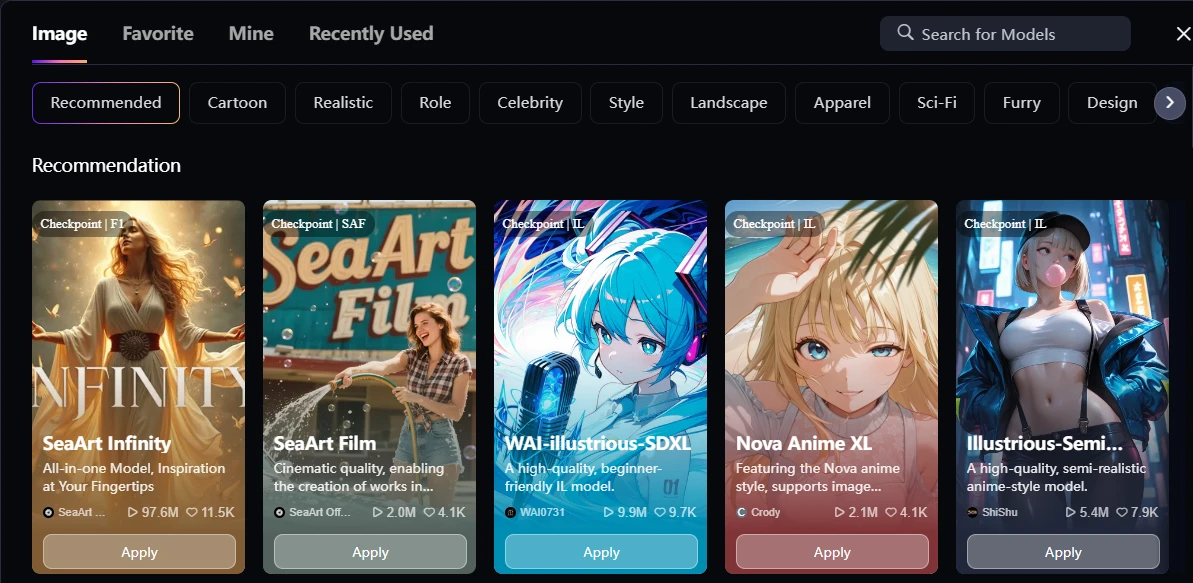
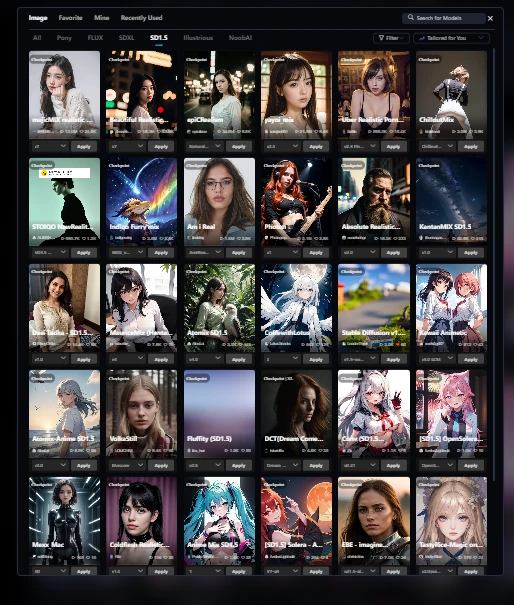
It's very confusing, but there is a button called Base Model hidden to the right of the top tab. Press this to search for the base model.
Then the SD1.5 button will appear, so press it to narrow your search.

By the way, if you press the Filter button even though you have pressed the SD1.5 button, something that allows you to narrow down all models will appear. Since you have already narrowed it down to SD1.5, there is no need to use this, so I think it is a design error.
If you press flux in the filter while pressing the SD1.5 tab button, flux will appear as shown in the following image.
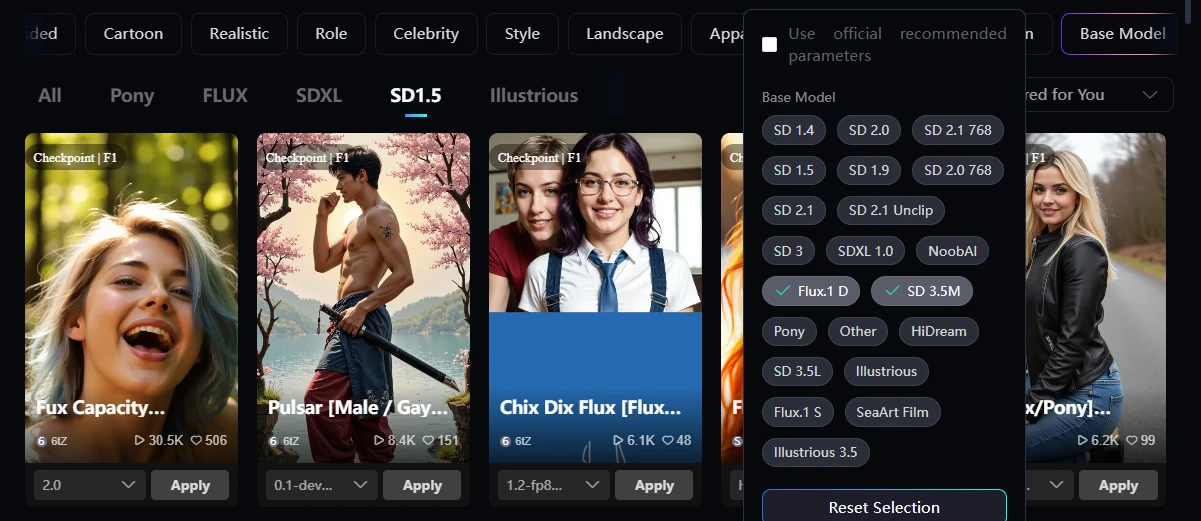
It's very hard to see, but to the right of the top tabs there is a button called Base Model. Press this to search for the base model.
Then an SD1.5 button will appear, so press this to narrow your search.
Hassaku ( model)
< href="https://www.seaart.ai/models/detail/d0he4hle878c73ep8igg" target="_blank">Anime Mix SD1.5
let me explain the training.
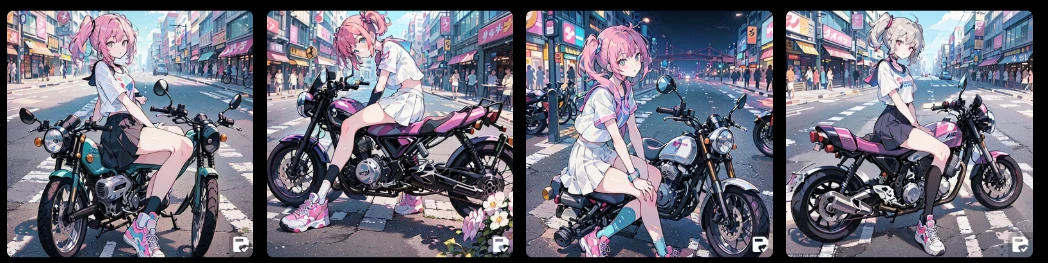
How to select images for training
These are images I made with Film.
I uploaded 37 images with consistent illustrations and image sizes.
If only one image was a square, there is a high possibility that strange learning would occur.
To prevent this, use the crop function to make the aspect ratio and size of the images uniform.
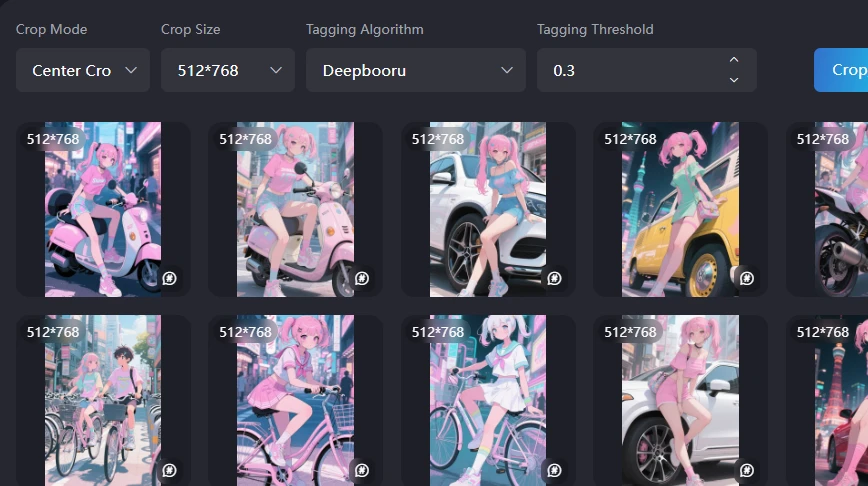
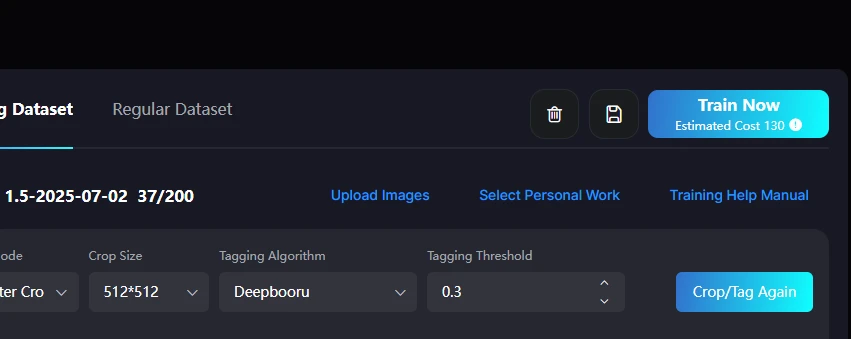
The recommended values are focus crop and deepbooru 0.6.
The recommended values for SD and SDXL are a 1024px square. Since these are original images and people, I chose 512px x 768px.
I made it at 9:16, so it was 828px x 1472px.
Since it is an image with a 2:3 ratio of SD1.5, I did not use it as it is, but cropped it with focus.
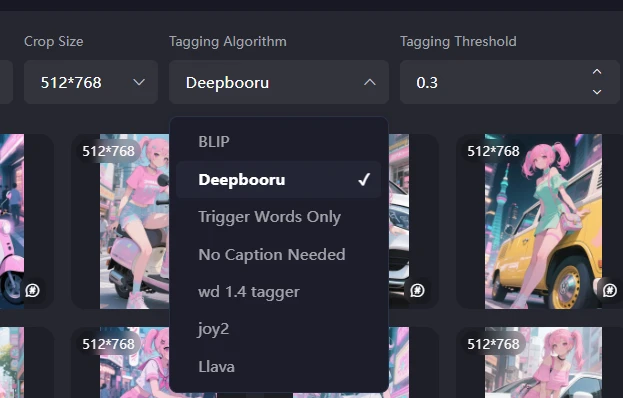
Tagging Algorithm
There is a tagging called BLIP, which is made with natural language. For animation and illustrations, it seems that prompts are better for tags. For real things such as photos, it is said that natural language is better. I'm not sure if that's SD1.5 or not.
Since this is an anime, I'll use deepbooru.
- Objective: Tested the actual behavior with 37 training images using SD1.5 as the base model, within the 130 Stamina credit limit provided to free accounts.
- Total Epochs/Steps: 10 epochs, final steps 1850, final Loss value 0.14.
I actually thought about changing the STEP and number of epochs, but I thought it would be difficult to match if I changed the parameters too much, so I left them mostly at the default.
2.1. Dataset Details
- Number of Images Used: 37 imagesNote: This is based on the number of images that can be trained within the 130 Stamina credit limit available to free users of SEAART's SD1.5.Caution: The actual cost consumed during training was 165 (confirmed after generation). Since this exceeded the 130 coins for free users, it might be necessary to have more than 130 coins when performing training.
- Crop Settings:Crop Mode: Crop by FocusCrop Size: 512x768PX (Adjusted to the vertical training size of Stable Diffusion)
3. Training Parameters
The parameters are mostly default, but since I've taken the opportunity to do so, I have roughly written down what happens if you change the parameters.
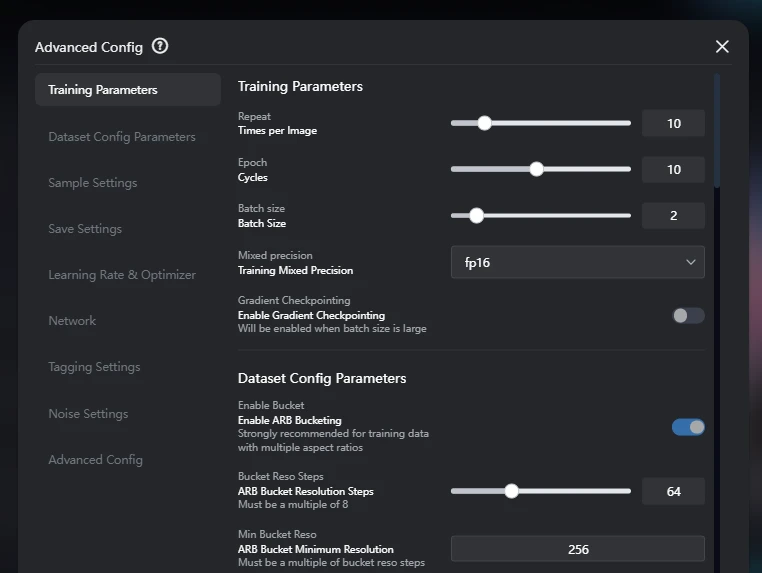
The parameters used for this training are as follows. Most settings have not been changed.
- Repeat (Times per Image): 10
- Epoch (Cycles): 10
- Batch size: 2
- Mixed precision: FP16
- Gradient Checkpointing: Off (Effective when batch size is large)
3.1. Dataset Settings Parameters
- Enable ARB Bucketing: On (Strongly recommended for training data with multiple aspect ratios)Effect: Used to efficiently process images with various aspect ratios in the training data. This minimizes distortion from stretching or cropping, optimizes VRAM usage, and improves training quality. It is effective even if all image sizes are already optimized.
- ARB Bucket Resolution Steps: 64 (Must be a multiple of 8)Effect: Defines the resolution increment when ARB Bucketing resizes images. A smaller value creates more types of resolution buckets, maintaining aspect ratios more precisely, but may consume more memory. Setting it to a multiple of 8 improves GPU processing efficiency.
- ARB Bucket Minimum Resolution: 256Effect: Sets the minimum side resolution for images processed by ARB Bucketing. Images smaller than this will be scaled up to this minimum value. This helps prevent training with excessively small images and stabilizes quality.
- ARB Bucket Maximum Resolution: 1024Effect: Sets the maximum side resolution for images processed by ARB Bucketing. Images larger than this will be scaled down to this maximum value. This enables training within VRAM limits and prevents out-of-memory errors from excessively large images.
- Color Aug (Color Data Augmentation): Off (Randomly changes image saturation during training)Effect: Since this setting is disabled, image saturation, brightness, and contrast will not be randomly fine-tuned during training. This means that the color variations in the dataset may be directly reflected in the training results.Note: I usually turn this off to prevent changes in the color tone of the images being trained.
- Flip Aug (Flip Data Augmentation): Off (Randomly flips images horizontally during training)Effect: Since this setting is disabled, images will not be horizontally flipped during training. This means that any bias in the orientation of images in the dataset may be directly reflected in the training results.Note: Turning this ON bias but doubles the cost. For example, if there are many images of a person facing right, the resulting model will tend to generate more right-facing poses. Using this feature creates flipped images that also face left, thus balancing the number of left and right poses. Even if you feel there are slightly more left-facing images, the model will tend to generate more left-facing images if this is off.
3.2. Sample Settings Parameters
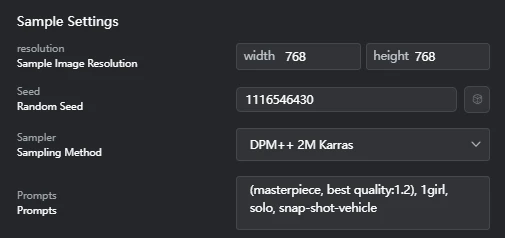
- Resolution (Sample Image Resolution): Width 768, Height 768 (Although the crop size during training was 512x768PX, samples were generated at 768x768PX square.)
- Seed (Random Seed): 1116546430
- Sampler (Sampling Method): DPM++ 2M Karras
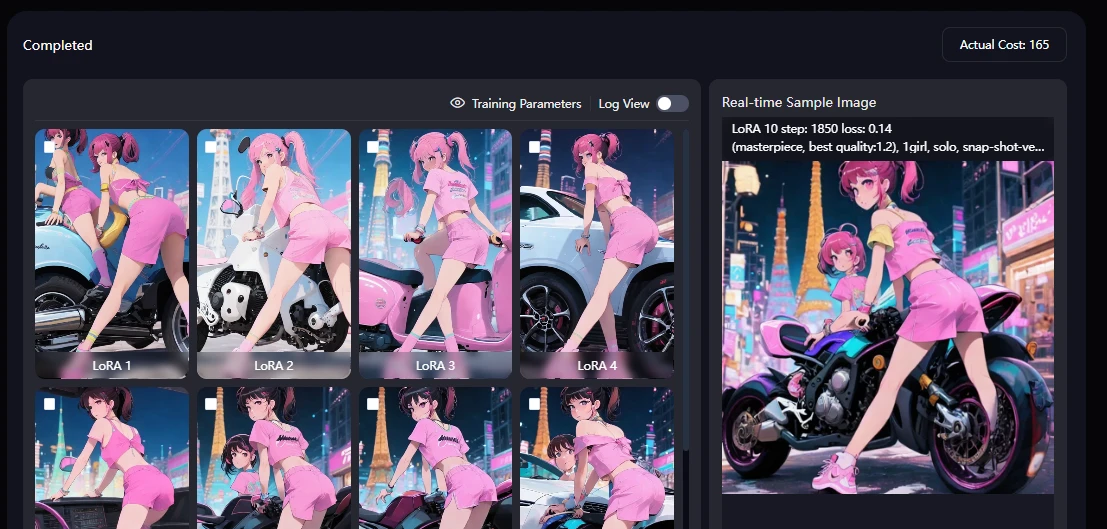
- Prompts: (masterpiece, best quality:1.2), 1girl, solo, snap-shot-vehicle
3.3. Save Settings Parameters


3.4. Learning Rate and Optimizer Settings Parameters
- Learning Rate: 0.0001Effect: This is a key hyperparameter that controls how fast the model learns during training. If this value is too high, training can become unstable; if it's too low, training may take too long or fail to reach an optimal solution. If separate learning rates are set for U-Net and Text Encoder, this overall learning rate value will be overridden.Note: Setting a low learning rate might result in little change per epoch (e.g., almost no change from epoch 1 to 5). Conversely, setting too high a learning rate might lead to overfitting around 3 epochs, after which it stabilizes. Setting the number of epochs to 10 or 20 in such cases might result in wasted cost.
- Unet lr (U-Net Learning Rate): 0.0001Effect: The learning rate for the U-Net portion, responsible for image denoising and detail generation. It significantly impacts the quality and style of the generated images.
- Text encoder lr (Text Encoder Learning Rate): 0.0001Effect: The learning rate for the Text Encoder portion, responsible for converting prompt (text) information into images. It affects how faithfully the generated images adhere to the prompt.
- Lr warmup (Learning Rate Warmup (%)): 0Effect: The percentage of the training duration during which the learning rate gradually increases from a low value. This helps reduce initial training instability and allows the model to start learning more stably. 0% means no warmup is applied.
- Lr scheduler (Learning Rate Scheduler): cosine_with_restartsEffect: A primary strategy that manages the decay of the learning rate. Different schedulers have minimal impact on the final result, but cosine_with_restarts causes the learning rate to decrease along a cosine curve and then restart back to its maximum value in cycles. This helps the model fully learn the dataset through multiple restarts and avoids interference from "local optima" during training.
- Lr scheduler num cycles (Learning Rate Scheduler Cycles): 1 (Restart Times)Effect: Specifies the number of times a learning rate scheduler like cosine_with_restarts repeats its learning rate cycle. A value of 1 means the learning rate decreases once along a cosine curve and then does not restart.Note: To fully leverage the benefits of cosine_with_restarts, it is recommended to set the number of restarts to a value greater than 1, such as 3 to 5. This increases the likelihood of the model escaping local optima and finding a better global optimum. With the current setting, the restart functionality is effectively disabled.
- Optimizer: AdamW8bitEffect: An algorithm used to update model weights and minimize Loss. AdamW8bit is a memory-efficient 8-bit version of the AdamW optimizer, particularly suitable for training large models in environments with limited VRAM.
- Train unet only: OffEffect: Controls whether only the U-Net portion is trained. If Off, both U-Net and Text Encoder are trained.
- Train text encoder only: OffEffect: Controls whether only the Text Encoder portion is trained. If Off, both U-Net and Text Encoder are trained.
- Min snr gamma (Minimum SNR Gamma): 0Effect: In Stable Diffusion model training, this parameter adjusts the learning weight based on the signal-to-noise ratio (SNR) of the noise level and signal level. 0 means no such adjustment is applied.
3.5. Network Settings Parameters
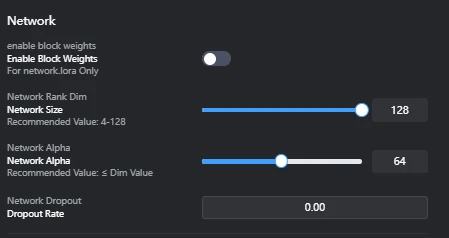
- Enable Block Weights: Off (network.lora only)Effect: Controls whether individual weights can be set for each LoRA block (e.g., different layers within U-Net or Text Encoder). Enabling this can increase LoRA's expressive power but may complicate training. It's typically used when you want to apply LoRA only to specific layers.
- Network Size: 128 (Recommended: 4-128)Effect: Also known as LoRA's "rank" or "dimension," it directly impacts the LoRA model's expressive power and file size. A larger value increases the model's expressive power, allowing it to learn more information from the original model, but also increases file size and the risk of overfitting. It should be adjusted within the recommended range based on the dataset's complexity and objective.Note: While Network Size directly relates to LoRA's expressive power, setting it too high can lead to overfitting and increased file size. If you want to make the generated images closely resemble the training images, increasing the Network Size (e.g., closer to the upper limit of the recommended range) can be an effective approach. This is because LoRA can learn more information in addition to the original model.SeaArt's Recommendation:Realistic style: 64/128Anime style: 8/16/32Setting the value too high can cause the AI to learn too deeply, capturing many irrelevant details, leading to a state similar to "overfitting."
- Network Alpha: 64 (Recommended: ≤ Dim Value)Effect: Controls the scaling of LoRA's learning rate. It is typically set to about half of the Network Size (Dim Value). A higher value increases LoRA's influence, while a lower value reduces it. It is used to appropriately adjust LoRA's effect while preventing overfitting.Note: Setting Network Alpha to the same value as Network Size significantly increases LoRA's influence, tending to heavily override the original model's style. While this can lead to very high fidelity to the training images, it greatly increases the risk of overfitting, loss of versatility, and generated images becoming too similar to the training images, lacking diversity. It also increases file size. Therefore, Network Alpha is usually set to about half of the Network Size. According to SeaArt, "Alpha usually does not exceed rank. Currently, alpha is usually set to half of the rank. Setting it to 1 maximizes its influence on weights."
- Network Dropout (Dropout Rate): 0.00Effect: A regularization technique that randomly deactivates neurons during training to prevent model overfitting. 0.00 means no dropout is applied. While a higher dropout rate can suppress overfitting, it may also slow down training or lead to underfitting (insufficient learning).
3.6. Tagging Settings Parameters
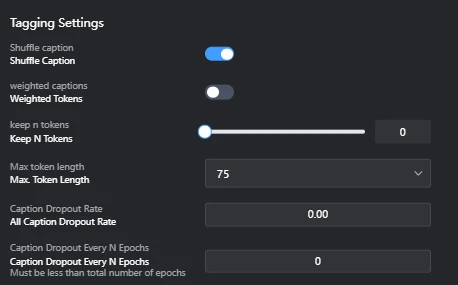
- Shuffle caption: OnEffect: Randomly shuffles the order of image captions (tags) at each training step. This prevents the model from overly relying on tag order during learning, promoting more versatile feature extraction.Drawbacks (Considerations):Loss of Order Dependency: If the order of tags within a caption carries specific meaning (e.g., positional relationships like "A on the left, B on the right"), shuffling may cause this information to be lost, making it harder for the model to learn the intended relationships. However, in general image generation captions, strict tag order rarely carries critical meaning.Minor Computational Overhead: The shuffling process itself incurs a small computational cost, but its impact on overall training time is usually negligible.
- Weighted Tokens: OffEffect: A feature that assigns weights to specific tokens (words or phrases) within a caption to convey their importance to the model. If Off, all tokens are treated with equal weight. Enabling this can allow for emphasizing specific elements during training, but it can complicate the setup.
- Keep N Tokens: 0Effect: Keeps a specified number of tokens from the beginning of the caption in the same order, without shuffling. 0 means all tokens are subject to shuffling.
- Max Token length: 75Effect: Sets the maximum token length for captions. Captions longer than this will be truncated. It is adjusted to fit the model's input size.Note (Token Count vs. Word Count):In English, 75 tokens typically correspond to about 50-75 words. Punctuation and symbols are also counted as tokens, so the token count tends to be higher than the word count.In Japanese, due to the complex word segmentation, 75 tokens tend to be fewer words than in English.Caution: The token count varies depending on the tokenizer used (e.g., Stable Diffusion's CLIP tokenizer, OpenAI's tokenizer). In the example tags you provided, OpenAI's tokenizer counted 49 tokens, but this may not necessarily match the token count actually used in Stable Diffusion training.
- Caption Dropout Rate: All Caption Dropout RateFunction: During training, this feature randomly drops out (deletes) entire captions with a certain probability. This encourages the model to learn to understand image content even without captions, potentially leading to a more robust and versatile LoRA model.Effect:Improved Versatility: Enhances the model's ability to learn from visual features of images without over-reliance on captions. This results in more stable outputs when applying LoRA, even with slightly different captions.Overfitting Suppression: Reduces the risk of overfitting to specific caption-image relationships, as captions are not always guaranteed to be present.Example: If your training data contains many images of dogs with the caption "dog," enabling this feature means that in some steps, the model will learn from dog images without the "dog" caption. This helps the model develop a deeper understanding of the "dog" concept purely from visual features.Consideration for Value: Typically, values from 0.00 (disabled) to about 0.50 are set. A higher value increases versatility but also carries the risk of losing too much essential information, hindering effective learning.
- Caption Dropout Every N Epochs: Caption Dropout Every N Epochs (Must be less than total number of epochs)Function: When Caption Dropout Rate is set, this controls how often (every N epochs) caption dropout is applied.Effect:Adjusting Dropout Frequency: This value allows you to adjust the frequency of caption dropout application. For example, 0 (disabled) means dropout is never applied, 1 means it's applied every epoch, and 2 means every 2 epochs.Training Stability: Can be used to strategically apply dropout based on training phases, such as utilizing full caption information in early stages and introducing dropout in later stages to stabilize learning.Consideration for Value: Typically, 0 (disabled) or 1 (every epoch) is commonly set. The value must be less than the total number of epochs.
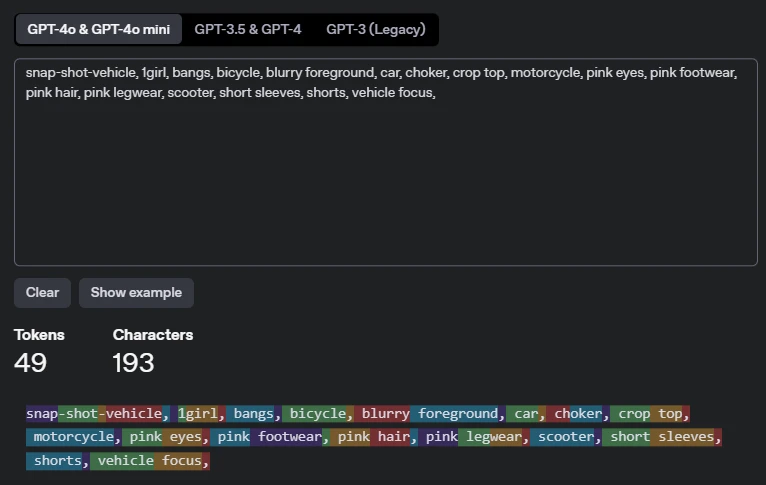
Token count
The count was done using OpenAI's token count.
If you crop and tag the image, it will be tagged like this.

Counted using OpenAI's token count.
These are the tags added to the images used in training.
Tokens 49, Character 193
3.7. Noise Settings Parameters
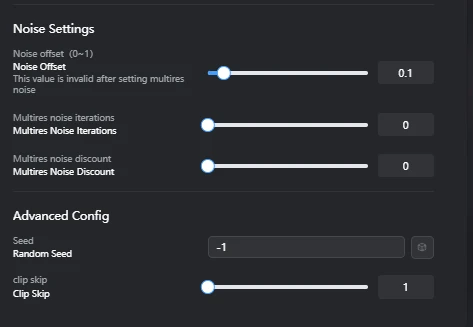
- Noise offset (0~1): 0.1Function: A feature that adds noise during the image generation process, affecting the brightness, contrast, and particularly the details in dark and bright areas of the images generated by the model.Effect:Detail Enhancement: Increasing this value tends to add more detail and texture to the dark and bright areas of the generated images. This particularly enriches the representation of shadows and highlights.Contrast Adjustment: Affects the overall contrast of the image, allowing for the creation of sharper or softer images.Benefits:Can compensate for lack of detail in images, creating more informative results.Especially effective when you want to improve the visibility of objects against dark or bright backgrounds.Drawbacks:Setting the value too high may generate unwanted noise or artifacts (unnatural patterns due to noise) in the image.This value is overridden if multires noise is enabled.
- Multires noise iterations: 0Function: A feature that adds noise to images at multiple different resolution levels, allowing the model to learn details across a wider range of scales.Effect:Multi-stage Detail Generation: Since noise is added to images at different scales, from low to high resolution, the model improves its ability to generate complex details, from coarse structures to fine textures.Improved Image Quality: Can lead to more natural and realistic results, especially when generating images with complex textures or patterns.Benefits:Enhances overall image quality and detail representation.A powerful tool for generating more realistic and complex images.Drawbacks:Increasing the number of iterations significantly lengthens training time.Setting an excessively high value may lead to over-detailing, making the image appear unnatural.This setting overrides the Noise offset value if enabled.
- Multires noise discount: 0Function: A parameter used to adjust the amount of noise added at each iteration when Multires noise iterations is enabled.Effect:Noise Amount Control: Allows for gradually reducing the amount of noise added at each resolution level. For example, a value of 0.1 means the noise amount decreases by 10% in the next iteration.Stabilizing Training: By suppressing the impact of noise at higher resolutions, it helps prevent the model from overfitting to fine details and stabilizes training.Benefits:Helps fine-tune noise application and find an optimal balance when using Multires noise iterations.Allows for benefiting from multi-stage detail generation while preventing image degradation from excessive noise.Drawbacks:This parameter is only relevant when Multires noise iterations is greater than 0. It has no effect if Multires noise iterations is 0.
3.8. Advanced Settings Parameters
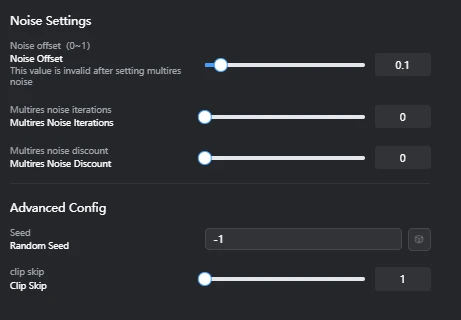
- Seed (Random Seed): -1Effect: The initial value that controls the randomness of image generation. -1 means a random seed is used for each generation. For reproducibility, it is better to set a fixed seed value for verification.
- Clip skip: 1Effect: Controls how many layers are skipped from the final layer of the Stable Diffusion model's text encoder. Increasing the value allows the model to interpret text prompts at a higher level of abstraction, potentially leading to more diverse results.Details and Considerations:Stable Diffusion models use the text encoder part of the CLIP (Contrastive Language-Image Pre-training) model to convert text prompts into images. This text encoder consists of multiple stacked layers, each learning different levels of abstraction from the prompt.Shallow Layers (closer to input): Strongly reflect concrete words and their direct meanings, and syntax.Deep Layers (closer to final layer): Based on the concrete information extracted by shallow layers, they understand and express more abstract concepts, overall atmosphere, style, and context. The final layer outputs the most refined, high-level abstract meaning representation derived from the prompt.Meaning of CLIP skip value:CLIP skip: 1 (Default Setting): Means skipping the final layer of the text encoder and primarily using information from the layer just before it. This tends to make the image generation more faithful to the direct meaning of each word in the prompt.CLIP skip: N (N > 1): Means skipping N layers from the final layer of the text encoder, using information from deeper (more abstract) layers. For example, an SD1.x model typically has 12 CLIP layers, so a CLIP skip of 2 would use information from the 10th layer.Example of Impact (for prompt: snap-shot-vehicle, 1girl, bangs, bicycle, blurry foreground, car, choker, crop top, motorcycle, pink eyes, pink footwear, pink hair, pink legwear, scooter, short sleeves, shorts, vehicle focus,):With CLIP skip: 1: The model tends to faithfully follow the direct meaning of each word in the prompt (e.g., 1girl, bicycle, pink hair) and how those elements specifically appear in the image.With CLIP skip: 2, 3, or higher (increasing the value):Weaker reflection of specific elements: Specific clothing items or accessories like choker, crop top, short sleeves, pink footwear, pink legwear, or specific color designations may be less strictly reflected in the image. For example, instead of "pink shoes," it might be interpreted as "pink-themed fashion," or shoes of a completely different color might appear.Emphasis on overall concept and atmosphere: The model tends to emphasize more abstract concepts or atmospheres from the entire prompt, such as "snapshot of a vehicle and a girl" or "pink-themed atmosphere."Increased diversity and unexpected results: Since the model is not strictly bound by individual words in the prompt, it may produce more creative, unexpected, and diverse results.Reduced controllability: The model's controllability over specific instructions in the prompt decreases, which may lead to unintended elements appearing or make it harder to generate images exactly as expected.Use Cases: Worth trying when you desire more diverse variations, creative results inspired by the prompt, or when you want to emphasize a particular art style or atmosphere.Differences by Model:CLIP skip settings are only effective for Stable Diffusion 1.x models and their derivatives that use the CLIP model.Stable Diffusion 2.0 models and their derivatives use OpenCLIP, which is different from CLIP, so CLIP skip settings have no effect on them.
3.9. Notes on Default Settings
Many parameters in this training used their default settings. While default settings are suitable for general use, adjustments may be necessary to achieve optimal results for specific objectives or datasets. Pay particular attention to the following points:
- Learning Rate / Unet lr / Text encoder lr: All are set to the same value. In LoRA training, setting different learning rates for U-Net and Text Encoder can lead to more efficient and higher-quality learning. For example, setting a lower learning rate for the Text Encoder can maintain fidelity to the prompt while allowing the U-Net to learn image styles and details more effectively.
- Lr warmup (%) / Min snr gamma: These are set to 0, meaning optimizations such as stabilizing the learning rate in the early stages of training or weighting learning based on noise levels are not applied. Adjusting these values can improve training stability, especially in the initial stages, and potentially enhance final image quality.
- Network Dropout Rate: Set to 0.00, meaning dropout is not applied to prevent overfitting. If the dataset is small or a large number of epochs are set, the risk of overfitting increases, so considering a dropout rate greater than 0 might be beneficial.
- Weighted Tokens: Set to Off, meaning the feature to convey the importance of specific words in captions to the model is not used. If you want to strongly train the model on specific elements in your dataset (e.g., character names, clothing), enabling this and applying appropriate weighting can help achieve more targeted results.
4. Training Result Analysis
4.1. Loss/Average Graph
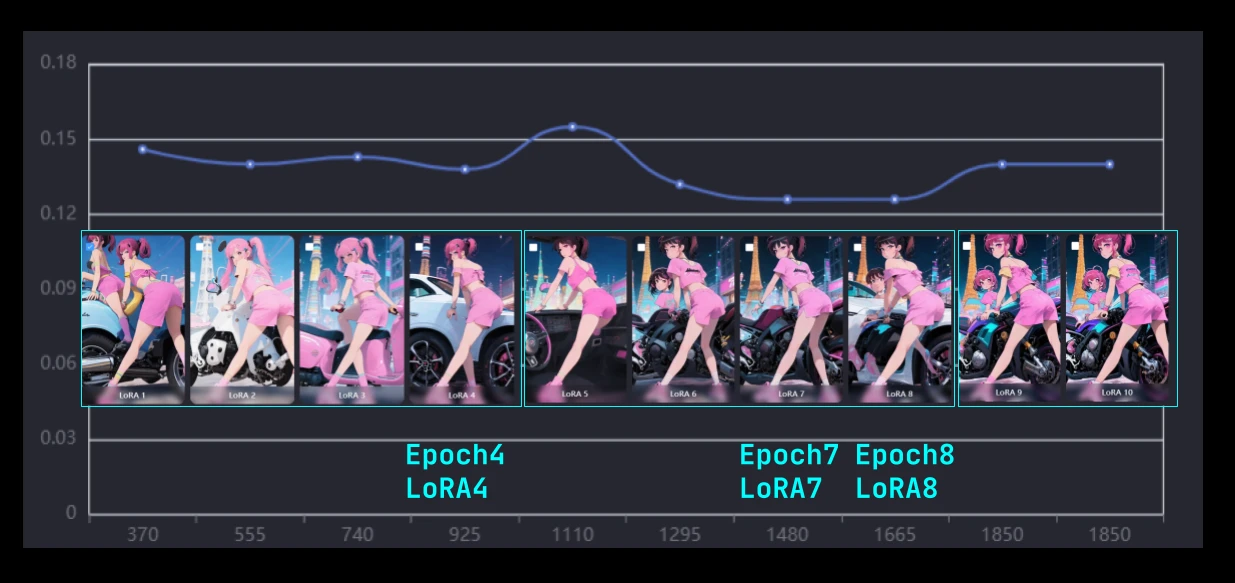
- Graph Description:This graph shows the transition of loss/average (average loss) during the training process.The horizontal axis represents the number of training steps, and the vertical axis represents the Loss value.
- Observed Trends:In the initial stages (approx. 370-925 steps), the Loss value remained relatively high (approx. 0.14-0.13).Around 1110 steps, the Loss briefly peaked above 0.15. This could indicate fluctuations in the early stages of training or a sign of overfitting.Subsequently, the Loss began to decline, reaching its lowest value of approximately 0.12 in the range of 1480-1665 steps.Finally, at approximately 1850 steps, the Loss appears to stabilize in the upper 0.13 range, although it has slightly increased from its lowest point.
4.2. Optimal Epoch/Checkpoint Selection
- Based on the loss/average graph, the range of approximately 1480-1665 steps is considered where the Loss is lowest and the model best fits the data.
- Specifically, the epoch around 1665 steps, just before the Loss starts to rise again, likely represents the optimal balance for avoiding overfitting.
- Recommendation: To confirm the final quality, it is crucial to compare images actually generated from multiple epochs within this optimal range.
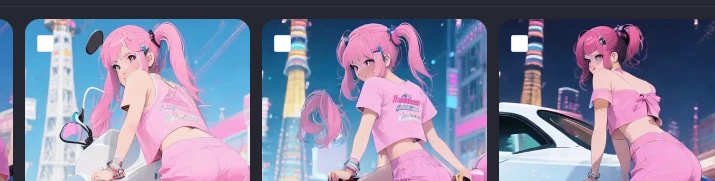
5. Generated Samples
- Description:These images are samples generated using the LoRA trained in this instance (recommended epoch: [e.g., 1665 steps]).[Describe how the LoRA functions or specific characteristics of the images. E.g., "Character features are faithfully reproduced" or "The specified style is effectively applied."]Note: Although the crop size during training was 512x768PX (vertical), the sample images were generated at 768x768PX square. The difference between the generation resolution and training resolution may affect the generated results.[Include the prompts and generation parameters used (e.g., Width, Height, CFG Scale, Steps) to enhance reproducibility.]
6. Conclusion and Future Outlook
- Conclusion: [Summarize briefly how successful this LoRA training was and whether the initial objectives were achieved.]
- Future Outlook: [Describe future improvements or things to try. E.g.:Retraining with different hyperparameters (learning rate, batch size, etc.).Improving versatility by adding more diverse datasets.Testing combinations with other LoRAs and Checkpoints.Additional training aimed at improving reproducibility of specific poses or expressions.]
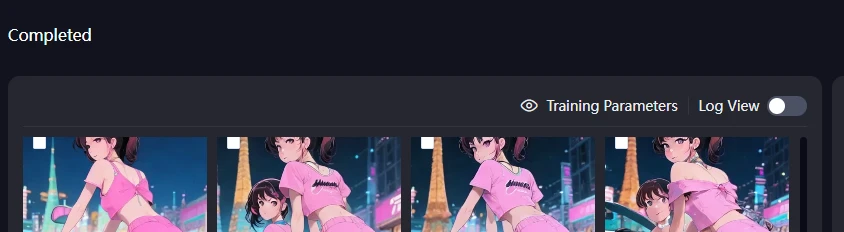
Sample images generated by training the image with LoRA
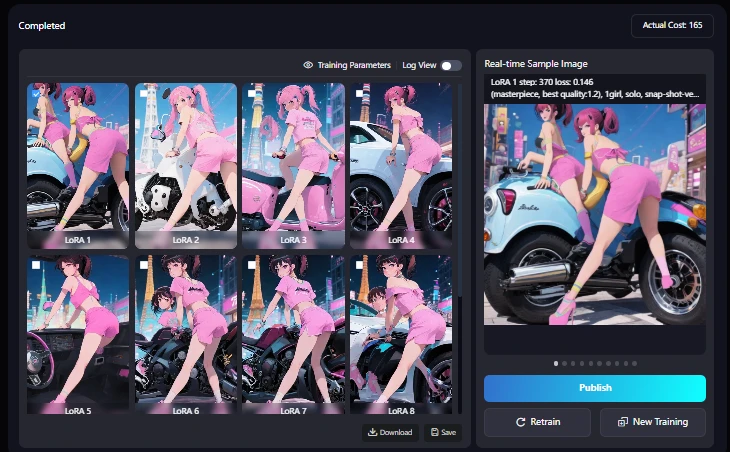
From what I can see, this is a failure.
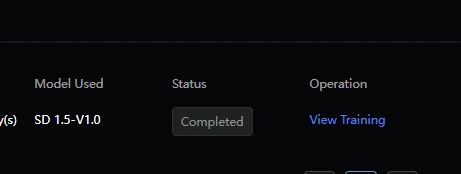
How to find where the model file is after training
When you open Create, Model, and Train, there is a task list. Click on it. By the way, Train is the content that was set before learning. There is a Model, which is a complete checkpoint or BaseModel. Next to it is LoRA, but it is not here yet. It is confusing because the list, Model, and LoRA are lined up in the same row.
This is also a confusing structure, but after training with Train, it will be indexed in the task list. There is a button called view training here, so you can see the training results from there. Select the model you want to use here and it will be indexed in LoRA.
Training Parameters ,Log view
This time, I set up to epoch10, so there are up to LoRA10.
This graph shows the loss/average (average loss) during your LoRA training for SD1.5.
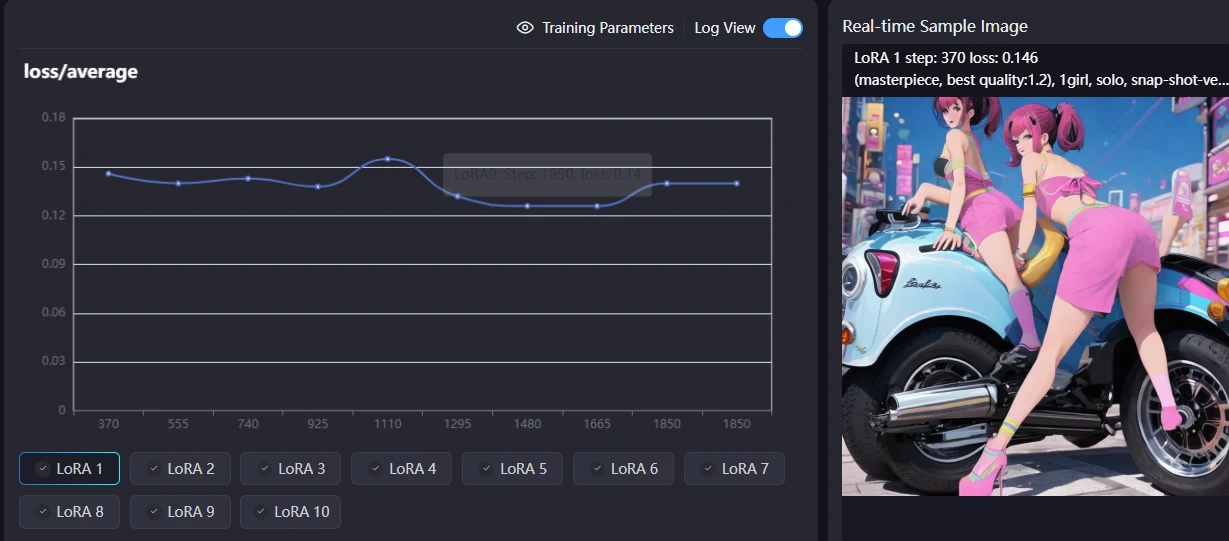
Horizontal Axis: Training steps (from 370 to 1850).
Vertical Axis: Loss value. A lower loss means the model is learning better and fitting the data more accurately.
What the graph shows:
Initial Learning: The loss started around 0.14, indicating the beginning of the training process.
When we asked the AI which one was best about the graph, we got the following response.
Based on this graph, it seems likely that the model saved around steps 1480 to 1665, where the loss is at its smallest, will perform best. To avoid overfitting, it is often best to select a model just before the loss starts to increase again (around step 1665 in this case).
Detail
A temporary peak above 0.15 was observed around 1110 steps, which may be a normal fluctuation or a temporary deviation during the early training period.
After that, the loss generally decreased and reached a minimum around 0.12 between 1480 and 1665 steps. This is the section where the model learned most effectively.
Final state: At 1850 steps, the loss stabilized around the upper limit of 0.13, slightly higher than the minimum. This suggests that the model may be starting to overfit slightly, or that the learning may have converged.
This would put it around LoRA7 or LoRA8.
Based on the above, I generated images using LoRA7 and 8.
By the way, I used LoRA4 at the end.
Details are in the next section.
Result of completing LoRA training for SD model
SD LoRAtraining Loss/average
In the previous section, the AI suggested that 7 or 8 would be optimal.
Therefore, I generated images using 7 and 8.
However, since there was a peak at 5, it must have been overtrained, so I generated images using LoRA4.
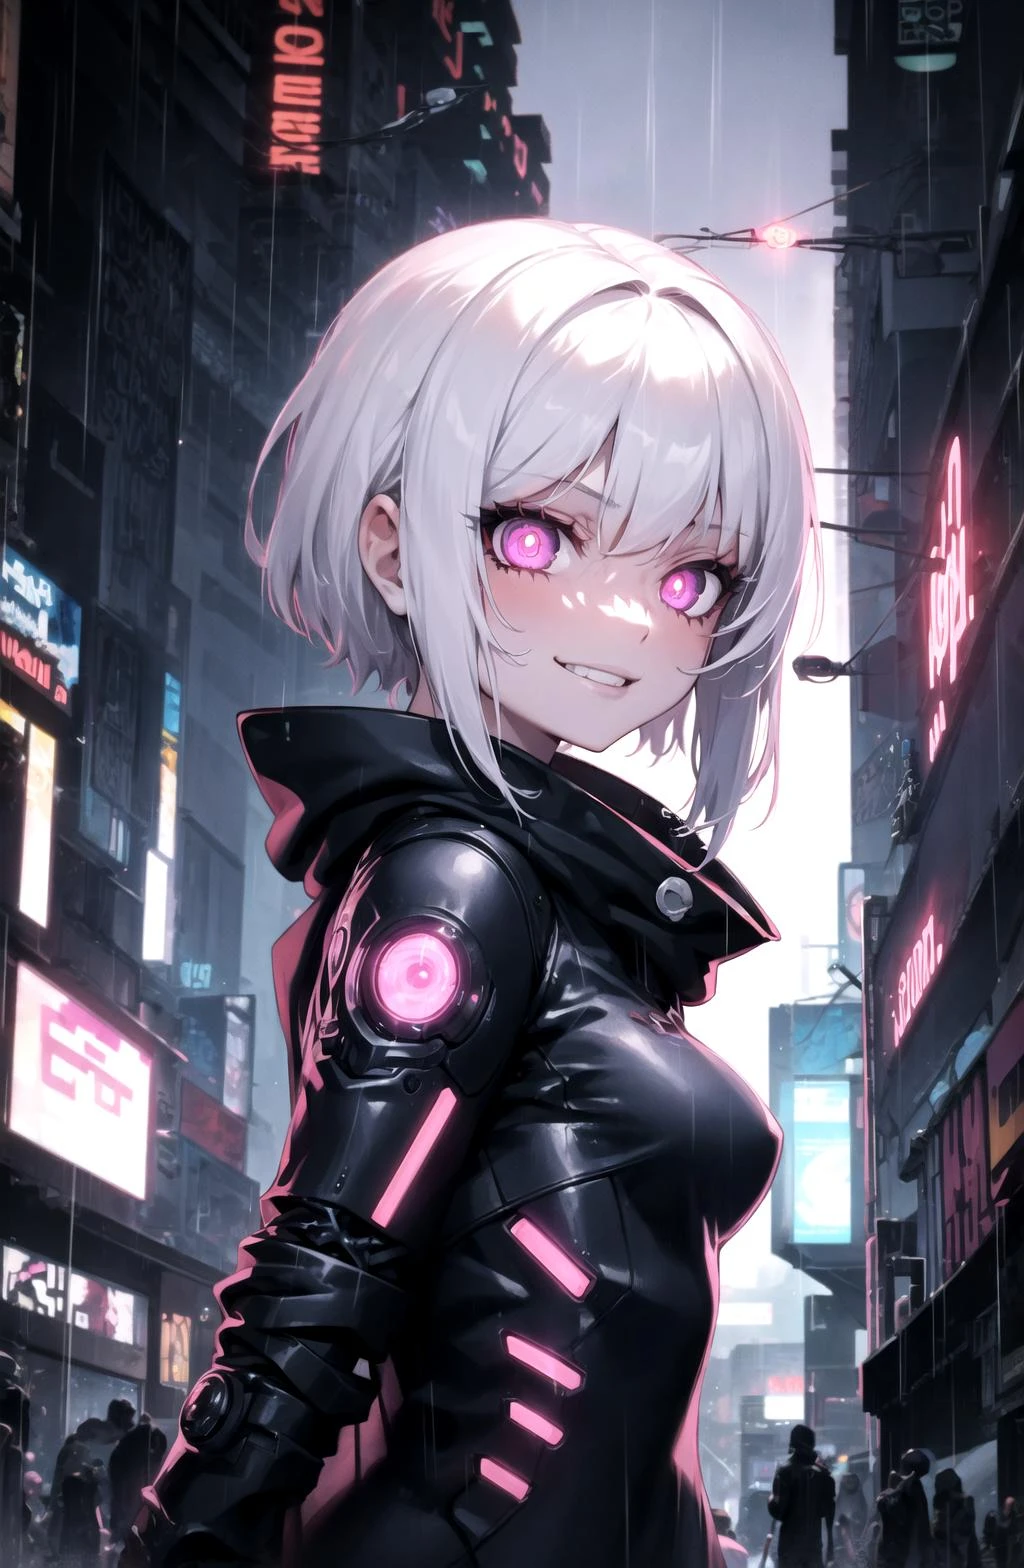
Generation results for Epoch 7 (LoRA7)
It's blurry, but the figure of riding a bicycle is somehow generated. You probably need to make it many times to get a good result.
This bike is actually weird.
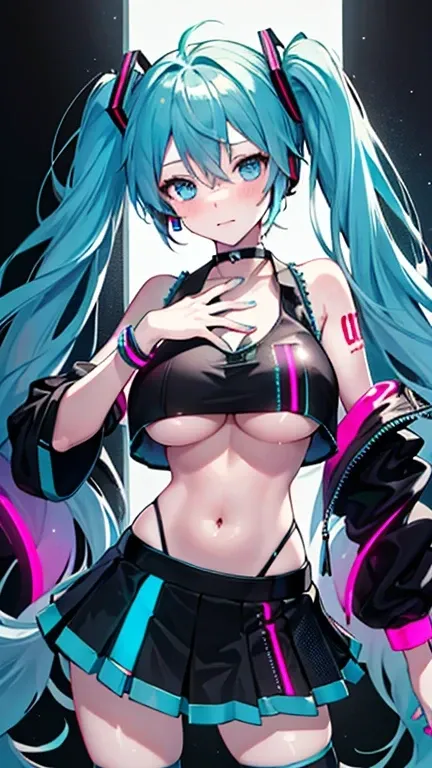
Generation results for Epoch 8 (LoRA8)
baseModel:Hassaku ( model)
Generating images of beautiful girls riding bikes using stable diffusion.
When I create a prompt to ride a bike with SD1.5, I think it fails to generate the legs.
When I generate with Film or Flux, I don't really think about what to do with negative prompts. If I think too much about how to add negative prompts or positive prompts, I can't get out of it.
I write prompts carelessly because if I change the order, it becomes a completely different character, and even if I change the ratio, the composition I was looking for changes.
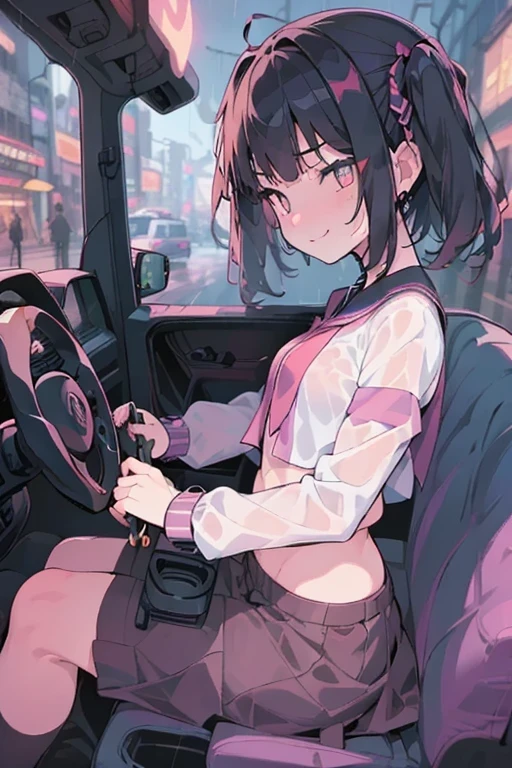
Image of overfitting of SD1.5, LoRA model E8. Anime illustration of a woman driving a car
baseModel:Hassaku ( model)
Next, generate "Anime Mix SD1.5" under the same conditions.
BaseModel Anime Mix SD1.5
The image is rough.
The image is rough. But the legs and bike are drawn.