I. Understanding SeaArt Flow
1. What is Flow?
Simply put, Flow is a "visual creative factory." Previously, creating videos might have required switching between image generation software, video tools, and editing software—a very cumbersome process. In Flow, you just need to connect blocks representing "scriptwriting," "drawing," "video making," and "dubbing" (we call these Nodes) like building blocks, and let AI automatically handle the work for you.
2. Core Advantages
- What You See Is What You Get: The interface is like a drawing board; drag and connect lines to see the logic at a glance.
- One-Stop Production: Handle everything from copywriting and storyboarding to animation and final audio editing in a single interface.
- One-Click Reuse: Saw an amazing effect created by a pro? You can copy their workflow with one click and swap in your own materials.
- Publish as AI APP: Turn your workflow into an easy-to-use app for others and earn rewards effortlessly.
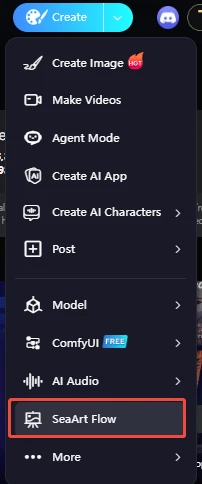
II. Basic Operations: Get Started in 3 Steps
1. Know Your Nodes (Your Building Blocks)
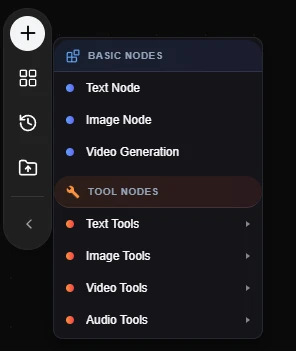
A. Basic Nodes — Building the Skeleton These are the three essential veterans for constructing any workflow:
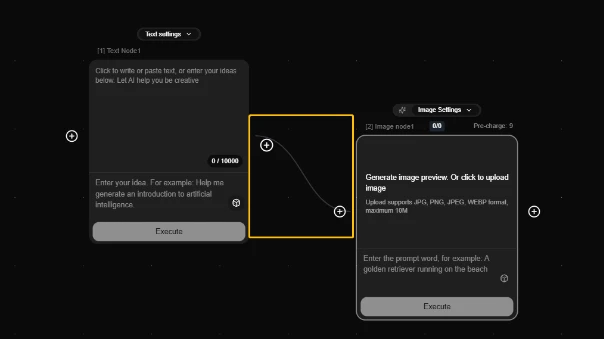
- 🔵 Text Node: The "brain" of the workflow. Used to input prompts, scripts, or instructions to control the image.
- 🔵 Image Node: Responsible for the "visuals." Used to upload reference images or receive AI-generated images.
- 🔵 Video Generation: The core engine. It transforms static images and prompts into dynamic videos.
B. Tool Nodes — The Powerful Multitaskers These offer more specialized functions to help process various materials:
- 🟠 Text Tools:
- Text Translation: A built-in "translator" that automatically converts Chinese prompts into English for better AI understanding.
- 🟠 Image Tools:
- Face Swap Node: One-click face swapping to perfectly blend Face A onto Body B.
- 🟠 Video Tools:
- Video Synthesis: The final assembly workshop that combines your video visuals and audio for export.
- Video Lip Sync: Synchronizes the lip movements of characters in the video to the audio track.
- Subtitle Generation: Automatically recognizes speech to generate subtitles.
- Short Drama Creation: A dedicated node for generating short dramas.
- 🟠 Audio Tools:
- Audio Upload: Upload your own music or voice recordings.
- Voice Node: AI dubbing; type text to convert it into speech.
- Txt2Music Node: Text-to-music; describe a mood, and AI writes a song for you.
2. Master "Presets" — The Beginner's Shortcut
If building from scratch feels too hard, Presets are your savior! Click the "four squares" icon in the left sidebar to access ready-made templates.
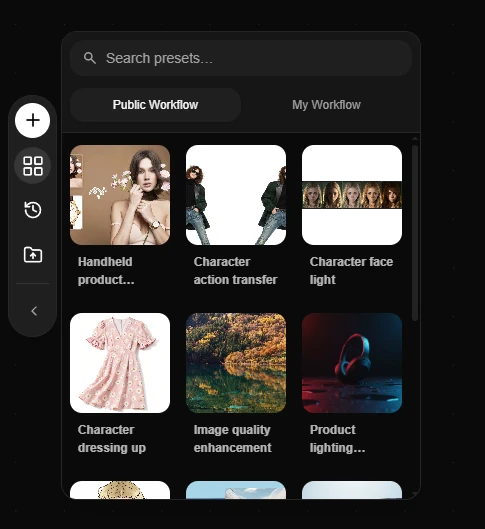
- Public Workflow: A collection of mature workflows from official sources and community pros, covering popular trends such as:
- Handheld product...: Upload a product image to automatically generate a handheld effect.
- Character action transfer: Make your character mimic movements from a video.
- Character dressing up: One-click outfit changing for characters.
- Image quality enhancement: Upscale blurry small images into high-definition.
- Character face light: Re-adjust the lighting on a character's face.
- My Workflow: Stores workflows you have saved or modified for easy access anytime.
How to use? Simply click the card you want, and the entire workflow will automatically load onto the canvas. Just replace the images or text inside, click run, and you're done!

3. ⭐ Core Practice: How to Make the Blocks "Run"?
Dragging nodes onto the canvas is just the first step. To make them work, you must complete the following three operations:
Step 1: Inject Soul (Configure Parameters) Nodes aren't empty; you must tell them exactly what to do:
- Text Node: Click the input box and type your prompt (e.g., "a cat flying in space").
- Audio Node: Click the center area of the card to upload your MP3/WAV music file.
- Video Generation Node: Pay attention to the input source. It supports both Text-to-Video and Image-to-Video; ensure you check the correct option.
Step 2: Establish Connections (Wiring Logic) This is the core of Flow! Data must flow.
- Core Rule: "Right Out, Left In."
- Operation: Click the small dot on the right side of a node (Output), drag a line, and connect it to the small dot on the left side of the next node (Input).
- Examples:
Connect the [Text Node]'s right dot to the [Video Generation]'s Prompt input point. (Tells AI to generate video based on this sentence.)
Connect the [Audio Upload]'s right dot to the [Video Synthesis]'s Audio input point. (Sends music to the synthesizer.)
Step 3: Final Convergence (Synthesis Node) All materials must eventually converge at the Video Synthesis node.
- Slot Explanation: This node usually has three inputs: Video (Required), Audio (Optional), Subtitle (Optional).
- Critical Action: Only when you connect the preceding video and audio streams here and click Execute can you download the final video file.
4. Prompt Writing Tips
To get the best work out of AI, your instructions must be precise. In Flow, prompts should follow the logic of "Goal + Steps + Format":
- Describe the Visual: E.g., "A cat sleeping."
- Describe the Motion: E.g., "The cat's belly rises and falls with breathing, whiskers twitching slightly."
- Describe the Sound: E.g., "Soft purring sound, quiet environment." 💡 Tip: If you don't know how to write one, use a "Text Node" to act as a "Prompt Master," letting AI expand your simple ideas into professional scene descriptions.
5. Connect, Run, and Check
- Connect: Each node has a + sign on both sides. Drag a line to link them, telling AI: "Pass the finished item from this step to the next for further processing."
- Run: After connecting, click the "Execute" button on the interface.
- Check: Watch the progress bar on the nodes. A green node means that step is complete; you can preview intermediate results in the node's preview area.
III. Hands-on Case Studies (Detailed Procedures)
Talk is cheap; let's practice with two of the most fun use cases.
Case 1: [One-Click MV] Creating a "Christmas Theme Song" Music Video
Scenario: You have a great Christmas song and want to match it with beautiful Christmas visuals to create an exclusive MV. Core Concept: Audio Input + Image Generation + Audio/Video Synthesis = Final Video
Procedure:
1.Drag in Nodes: Find and drag the following 4 nodes from the left menu onto the canvas: a. Audio Upload: In Audio Tools. b. Text Node: In Basic Nodes. c. Video Generation: In Basic Nodes. d. Video Synthesis: In Video Tools.
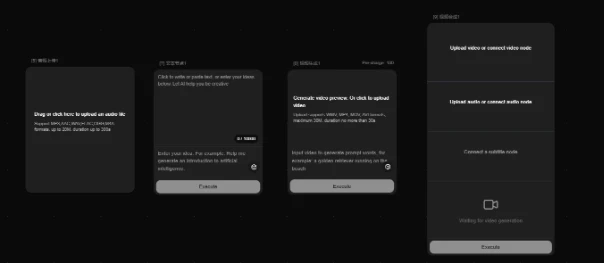
2.Configure Parameters:
- Audio Node: Upload your "Christmas Theme Song."
- Text Node: Input the prompt: Cinematic shot, Christmas tree with glowing lights, heavy snow, cozy fireplace, 8k resolution.
- Video Node: Set duration to 5s, ratio to 9:16.
3.Connect and Assemble:
- Text Node (Right) -> Video Generation (Left-Prompt)
- Video Generation (Right) -> Video Synthesis (Left-Video)
- Audio Upload (Right) -> Video Synthesis (Left-Audio)
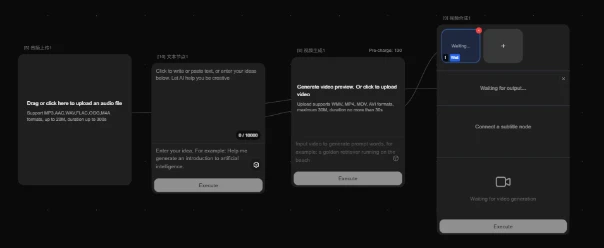
4.Generate:
- Click Execute in the top right corner. AI will automatically generate the visuals and synthesize them with the music. Wait a moment to download your MV.
- AI's Workflow: It reads your text -> generates a beautiful Christmas video -> "pastes" your music onto it -> exports a colorful MV with sound.
5.[Advanced Play] How to make a longer video?
Think 5 seconds is too short? You can drag in multiple Video Generation nodes, input different prompts for each (e.g., one for a Christmas tree, one for Santa, one for a gift close-up), and connect them sequentially into Video Synthesis to create a story-rich long MV!
Case 2: [ASMR Creative Video] Creating "Crispy Biscuit Keyboard" Visual-Audio Effects
Scenario: Create a satisfying ASMR video where a keyboard made of biscuits crumbles when typed on, complete with crispy sounds. No need to find materials; rely entirely on AI generation.
Procedure:
1.Drag in Nodes: Drag the following 5 nodes from the left menu: a. 1 Text Node: As the starting input, just type the core material (e.g., "Biscuit"). b. 2 Text Tools - Text Append: (Nodes #9 and #94 in screenshots are actually text nodes with AI expansion capabilities). Their role is to expand simple "Biscuit" into professional visual and dynamic descriptions. c. 1 Image Node: To generate the base image of the "Biscuit Keyboard." d. 1 Video Generation: The core engine that generates both visuals and sound simultaneously.
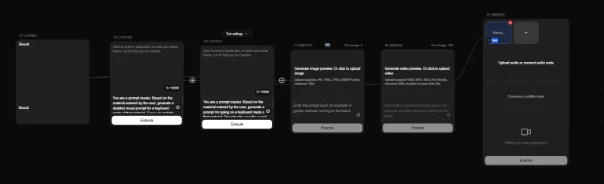
2.Set "Expansion" Instructions (Injecting Soul): a. Text Node 1 (Start): Input keyword Biscuit. b. Text Node 2 (Expand Visuals): Configure prompt as "You are a prompt master... generate visual prompts for corresponding material...". i. Expected Output: Realistic style, close-up. Hands hovering over keyboard. Keyboard body and keys highlight material texture (golden crispy surface texture...) c. Text Node 3 (Expand Motion & Sound): Configure prompt as "You are a prompt master... generate typing prompts for corresponding material keyboard...". i. Expected Output: Close-up shot: Hands typing on a keyboard made of crispy biscuits. Each keystroke makes a **clear "crack" shattering sound**, with golden biscuit crumbs flying. d. Key Point: Using AI expansion automatically turns simple words into professional instructions with sound descriptions.
3.Connect and Assemble (Fully Automated Pipeline): a. Step 1: Input Source i. Connect [Text Node 1] output to the inputs of [Text Node 2] and [Text Node 3]. b. Step 2: Generate Base Image i. Connect [Text Node 2 (Visuals)] output to [Image Node]. Click execute to generate a biscuit keyboard image. c. Step 3: Generate Video + Sound i. Connect [Image Node] (Base Image) to [Video Generation] Image input. ii. Connect [Text Node 3 (Motion & Sound)] output to [Video Generation] Prompt input.
4.One-Click Execute: a. Click Execute. b. Result: The AI understands the sound description in the prompt ("makes a crack sound") and directly generates a biscuit crumbling video with built-in sound effects.
IV. Recommended Excellent Apps on Site
Once you've mastered the basics, check out these ready-made apps encapsulated by pros (found on the Homepage):

💡 Pro Tip: The fun of Flow lies in experimentation. Don't be afraid to connect wrong lines; boldly combining different nodes might lead to unexpected new ways to play! Happy creating!