How do you post an article in the first place?
For those of you who are wondering, I have written an article in English on how to post an article... (^▽^)b
[About the purpose (use) and necessity of posting articles] Article posts can be used to share how to use SeaArt, introduce your own works and models, ...etc.
Article posts are sometimes the theme of various events, so I would like to introduce them here (^▽^)b
① Displaying the article submission screen
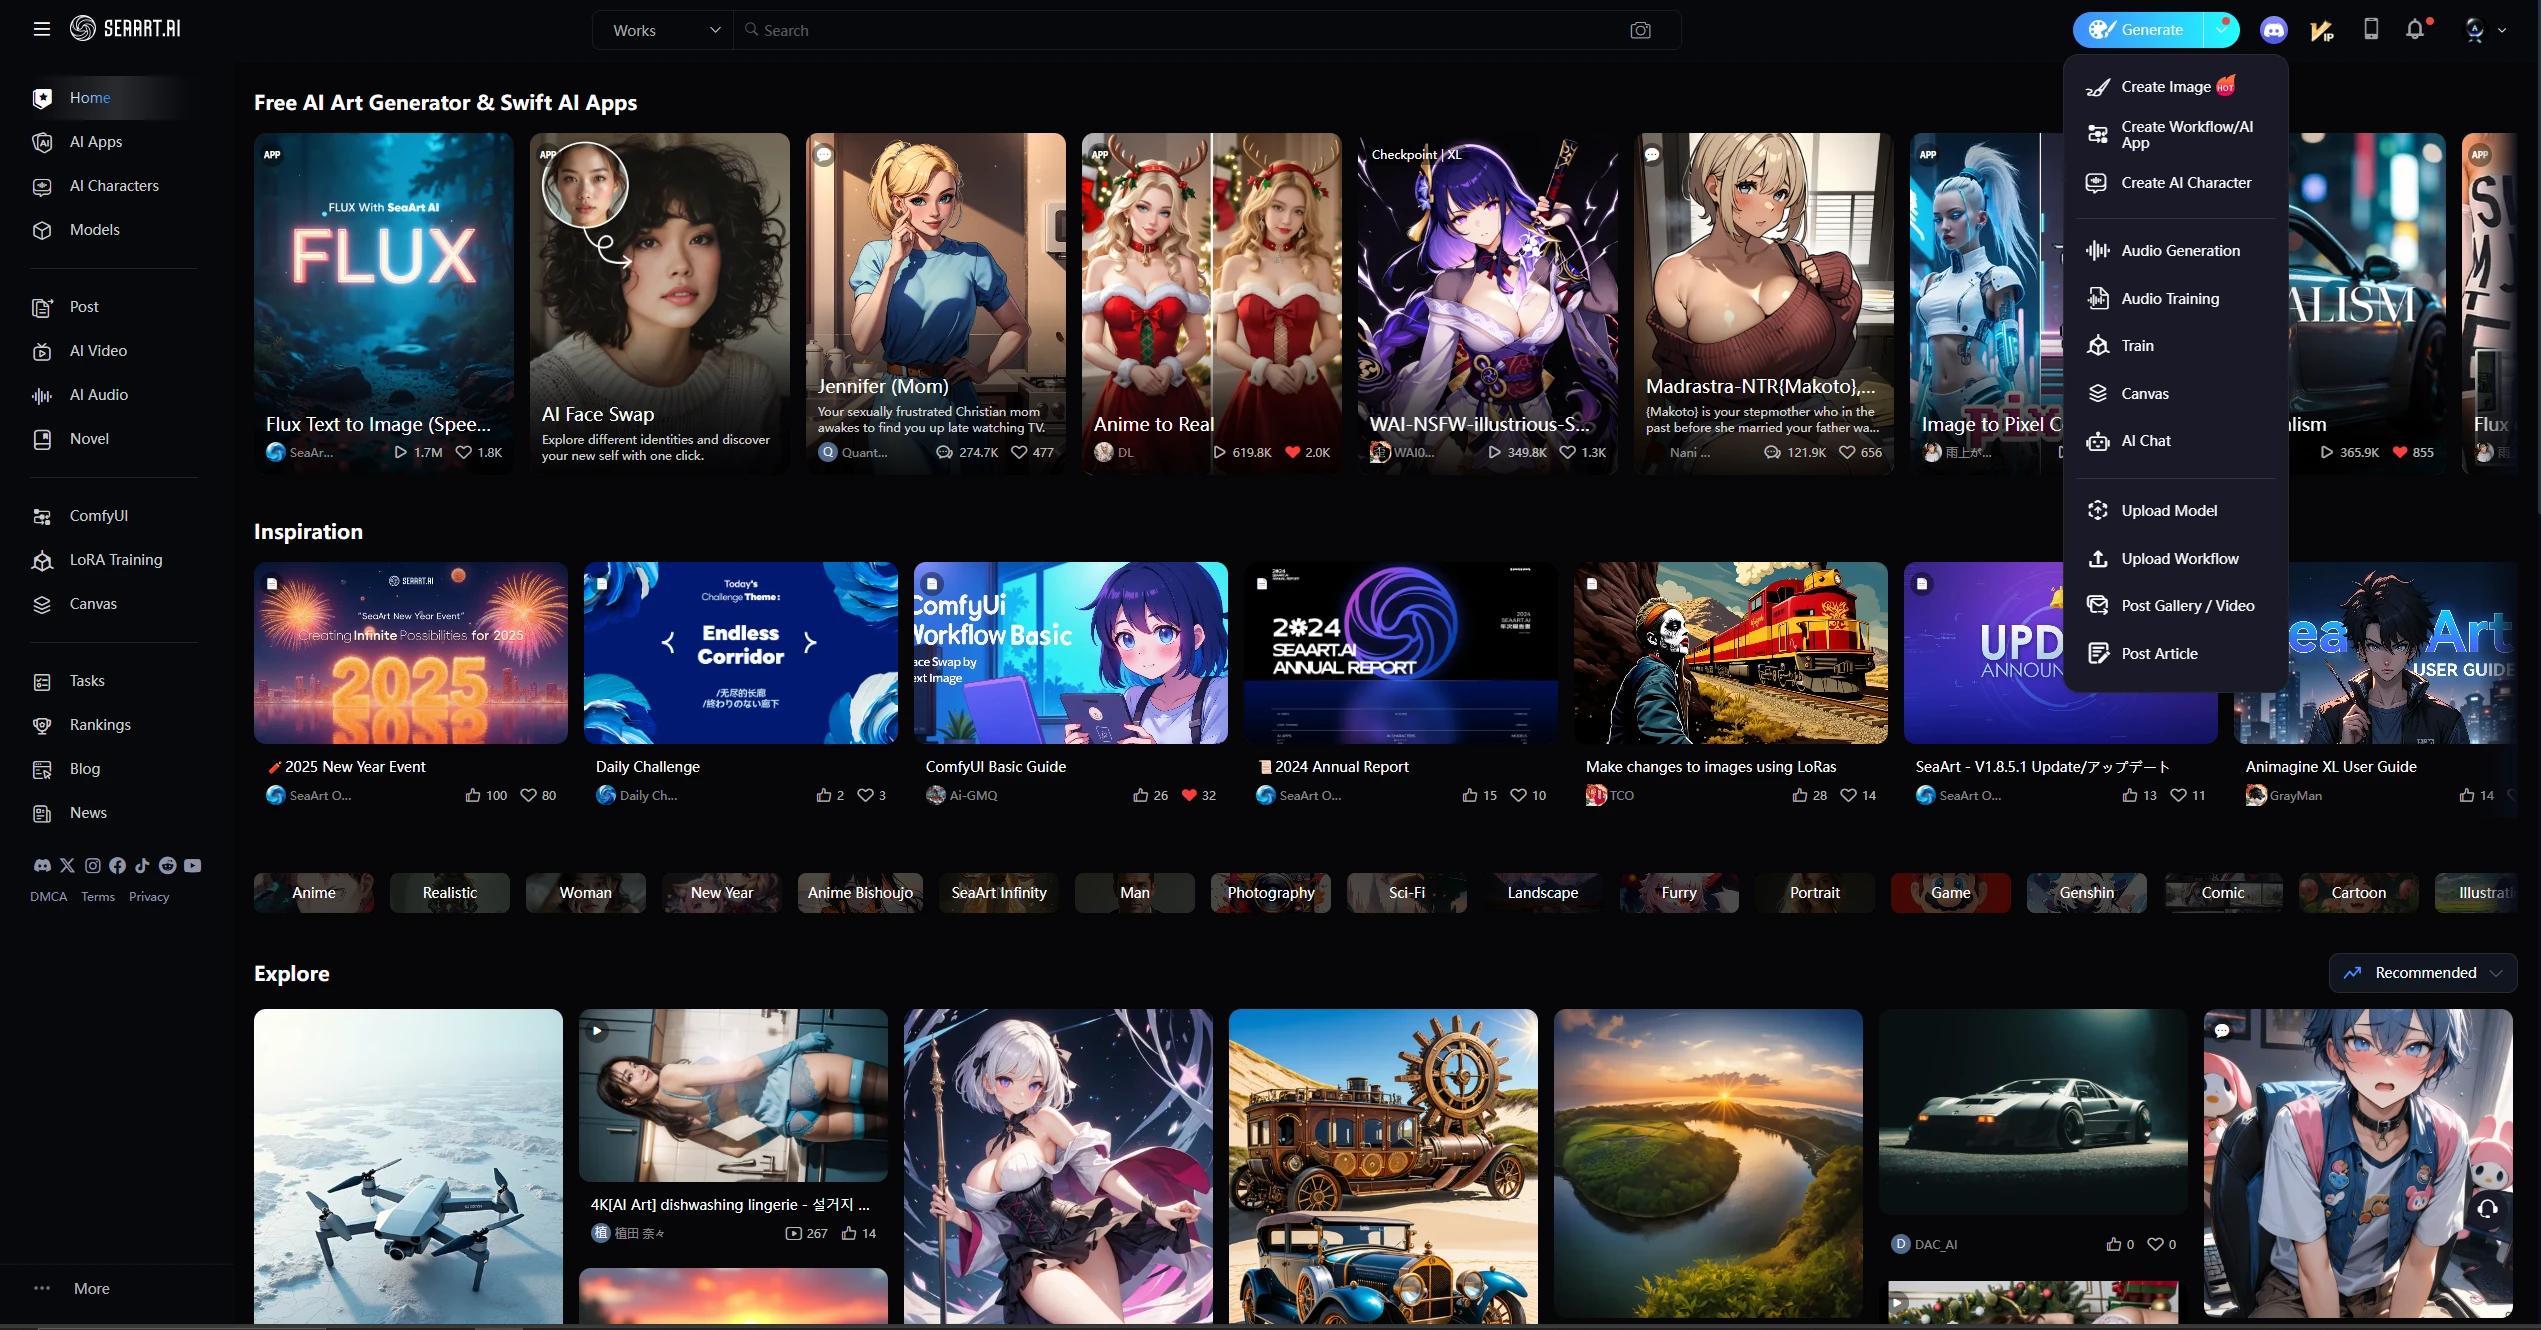
If you are using the English page, place the mouse pointer over the [Generate] button on the right side of the search box.
This will expand the categories below,
so click [Post article] to go to the article submission page.
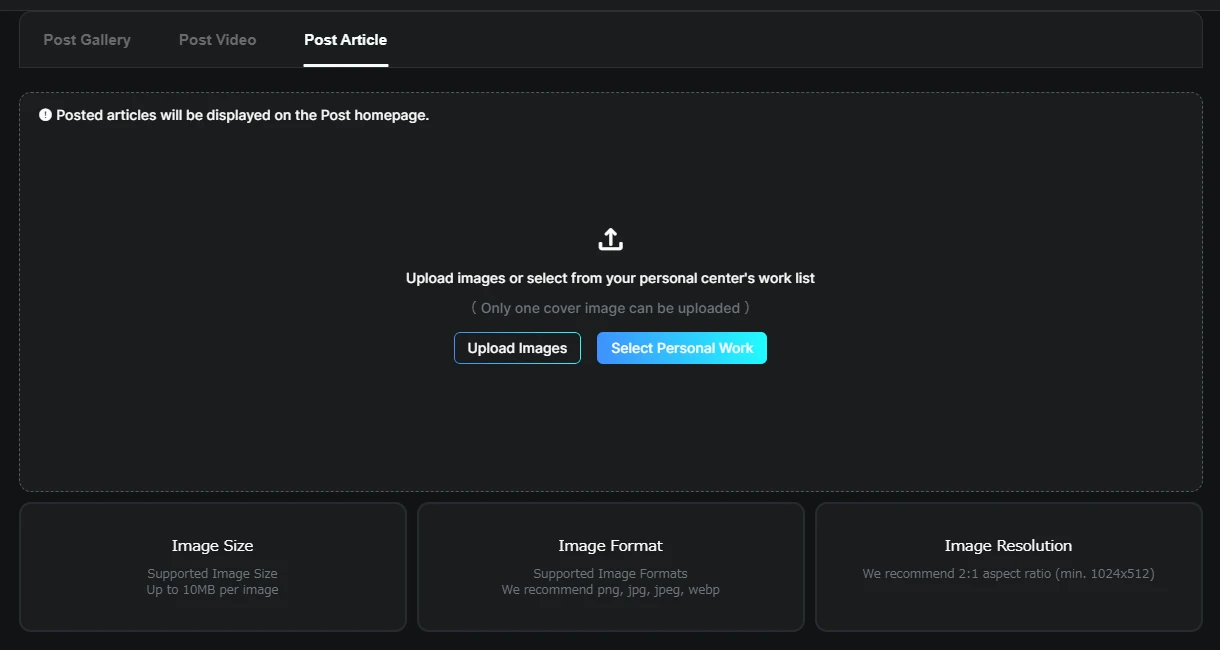
② Select article cover (banner and thumbnail display)
Next, a page like this will appear, where you can upload the work you want to display as the cover image.
The image resolution is stated in the bottom right,
and images with an aspect ratio of 1:2 and a resolution of 512x1024 or higher are recommended.
You can also perform the same operations from ③ onwards by selecting the [Post Article] tab above from the image posting screen.
③ Entering content (Function explanation regarding fonts, etc.)
In the example below, we have uploaded an image with an aspect ratio of 1:1.
Once the image upload is complete, you will be taken to a screen where you can enter [Title], [Relevant Tags], and [Content].
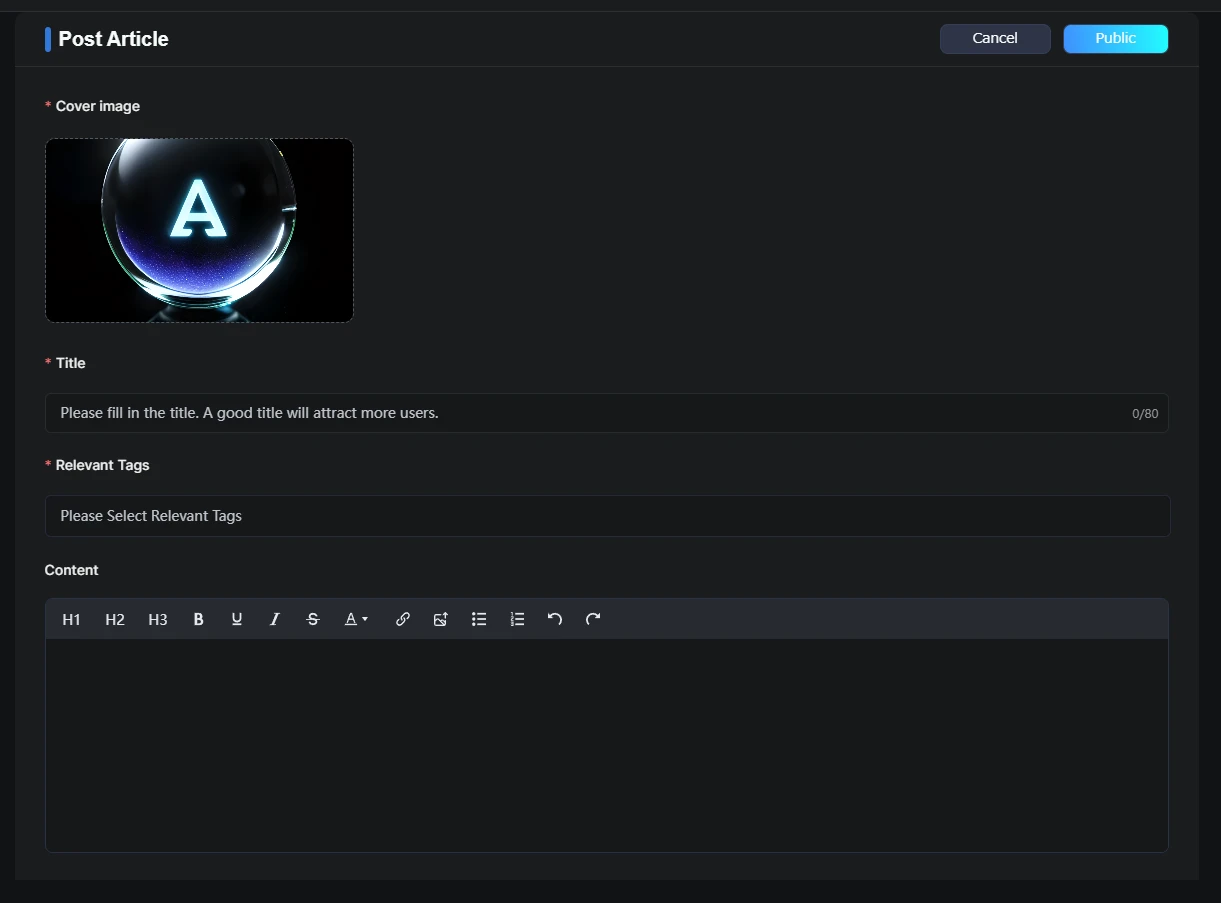
[Title] and [Relevant Tags] can be entered in the same way as for normal image posts.
In the [Content] field, you can simply enter text, but by selecting the icons at the top of the [Content] field, you can obtain the following effects, from left to right.
f you use H1, H2, or H3, a table of contents will automatically be created in the top right field, and you will be able to link to the headings from there.
H1: Large heading (text size will be increased by three levels)
↑ The effect will be applied to the entire line.
H2: Medium heading (text size will be increased by two levels)
↑ The effect will be applied to the entire line.
H3: Small heading (text size will be increased by one level) ↑ The effect will be applied to the entire line.- B : Make bold Only the selected text is applicable.
- Underline : Adds an underline. Only the selected text is applicable.
- Italic : Makes the text into a car body. Only the selected text is applicable.
- through : Adds a strikethrough Only the selected text is applicable (Sample →
Sample). - Font color : You can specify the text color. Only the selected text is applicable. (Sample / Sample / Sample)
- Insert link : You can specify the text to be displayed and link it to the link address.
- upload image : This is how the sample image was inserted.
- unordered list : The display method used here, [・] is automatically displayed when you press return.
- ordered list : The same display method used here, but instead of [・], numbers are automatically added in order when you press return.
- undo : That's the familiar symbol.
- redo : This is the resurrection spell after back.
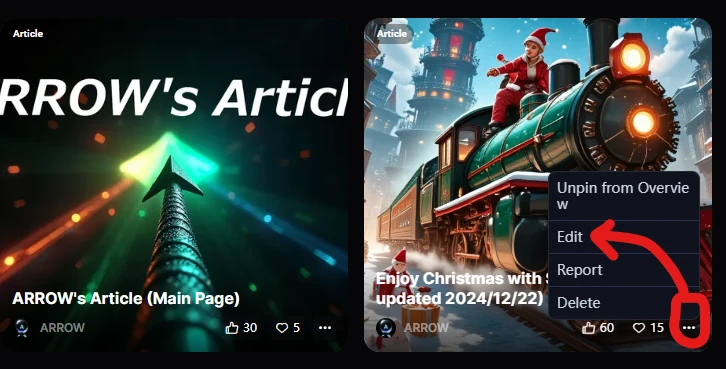
④ Editing after posting
You can edit your post even after it has been posted by clicking the thumbnail [...] on the post on your personal page and selecting [Edit].
Did you understand the above?
Thank you for reading to the end m( _ _ )m.
It's surprising how few manuals exist for basic content, so I hope this will be helpful to you all♪