
INTRODUCTION
Adding visual elements to your AI character ✨🤖 makes interactions more engaging and immersive . This guide will help you set up an animated profile picture for your AI character on SeaArt. Since SeaArt only supports WebP for animated profile pictures, we’ll walk you through converting 🔄MP4 or GIF files to WebP. Additionally, we’ll cover how to add a welcome image—whether still or animated—using Markdown formatting 📝.
SETTING AN ANIMATED PROFILE PICTURE
Step 1: WebP – The Key to Animated Profiles on SeaArt
If you've ever tried uploading a GIF to SeaArt and hit a roadblock 😥, you're not alone! SeaArt only supports WebP for animated profile pictures. But don’t worry 😎—converting your favorite MP4 or GIF animations into WebP is easier than you think! 🤗 Let’s dive in and get your AI character moving.
Step 2: Use SeaArt’s AI Generators
SeaArt provides video generation models like Seaart Ultra (both t2v and i2v) that you can use to create animations for your AI character. You can generate a video and then convert it into a WebP format for use as your display picture.
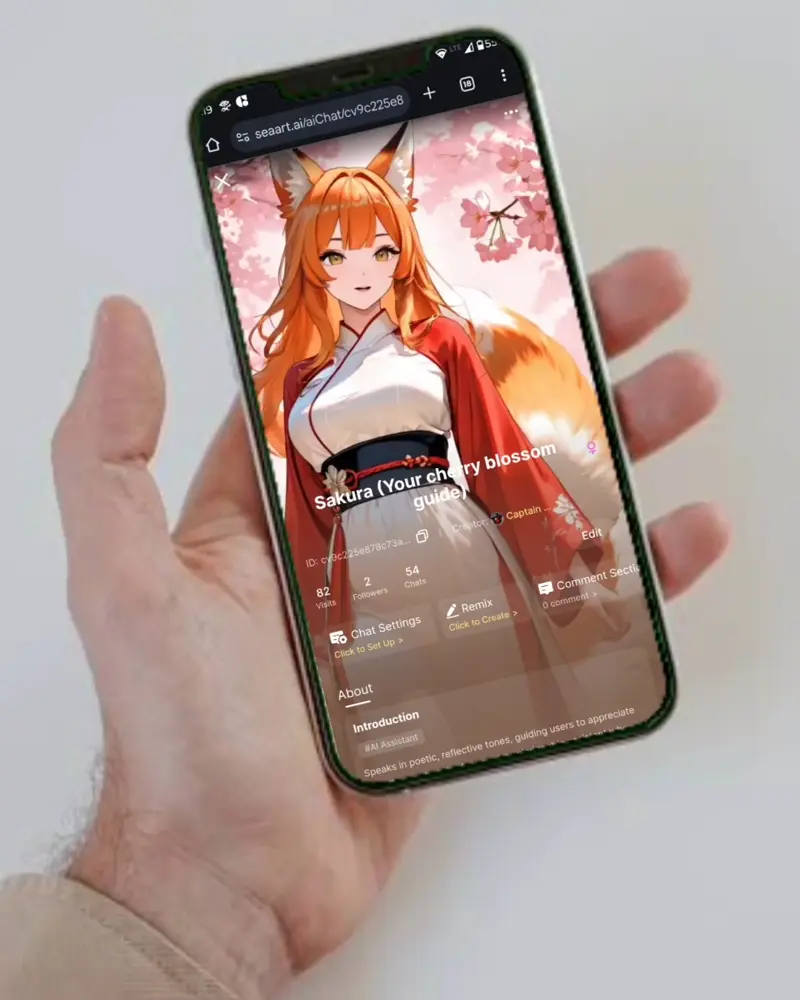
Example
Sakura (your cherry blossom guid)
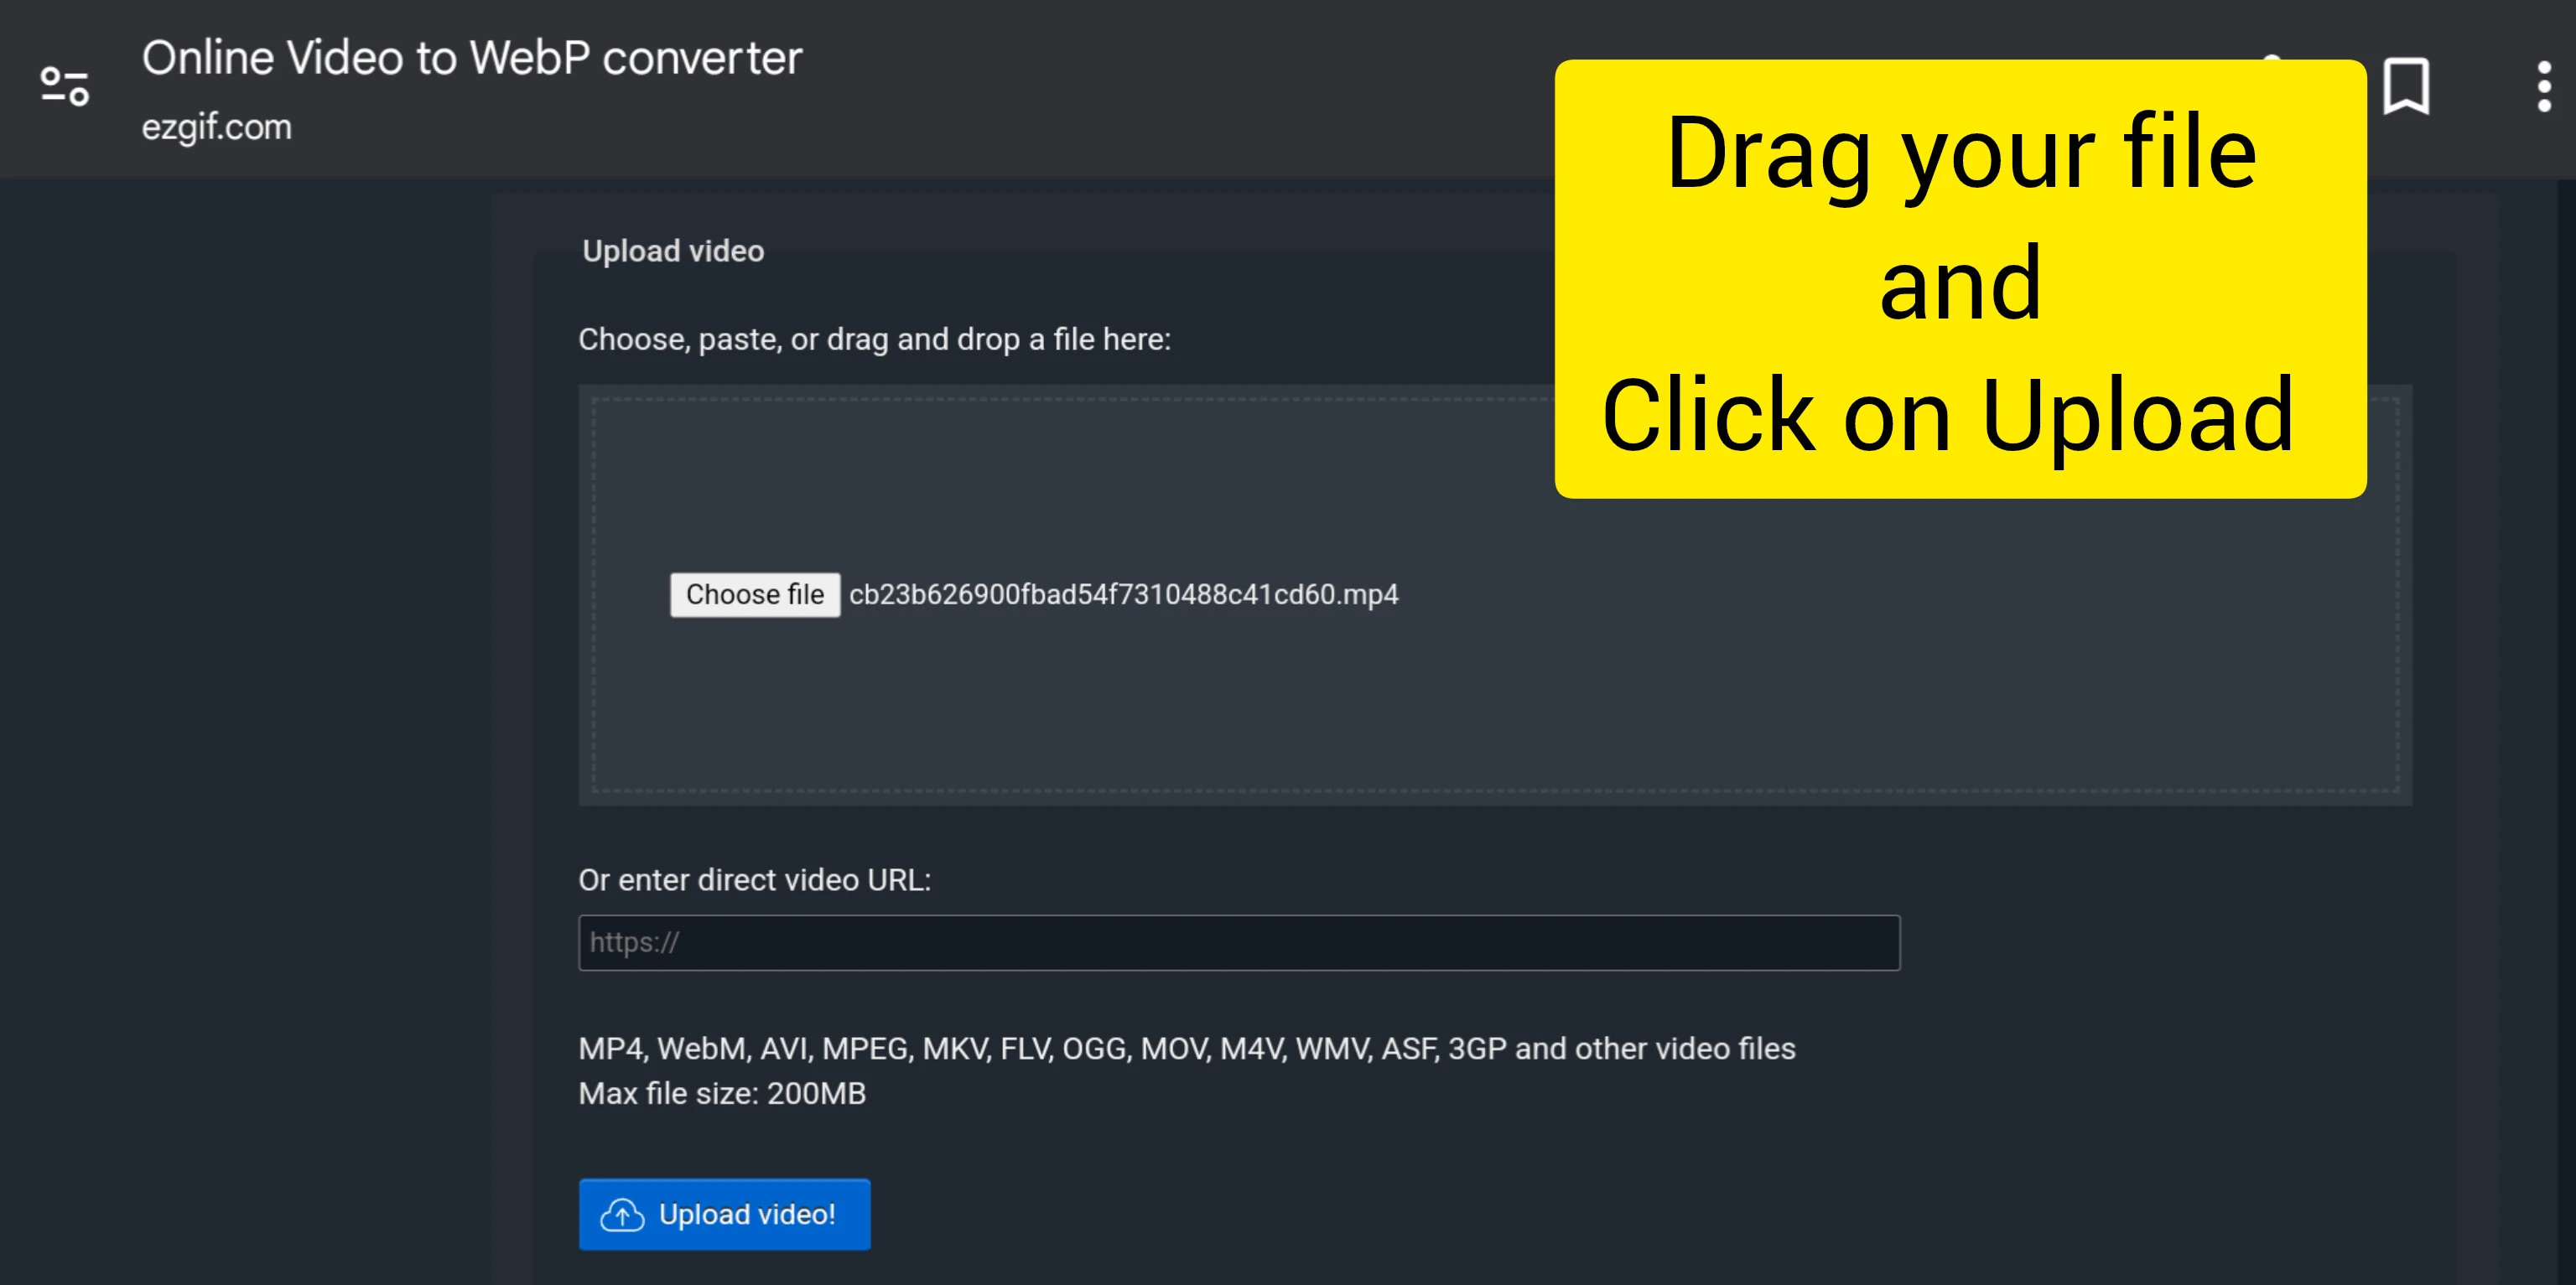
Step 3: Convert MP4 or GIF to WebP
Since SeaArt does not support GIF, you need to convert MP4 or GIF files to WebP. Here’s how:
For MP4 to WebP: Go to https://ezgif.com/video-to-webp
For GIF to WebP: Go to https://ezgif.com/gif-to-webp
Upload your file, adjust settings like frame rate, quality, and looping options.
Click "Convert" and download the WebP file.
(Screenshots attached below)

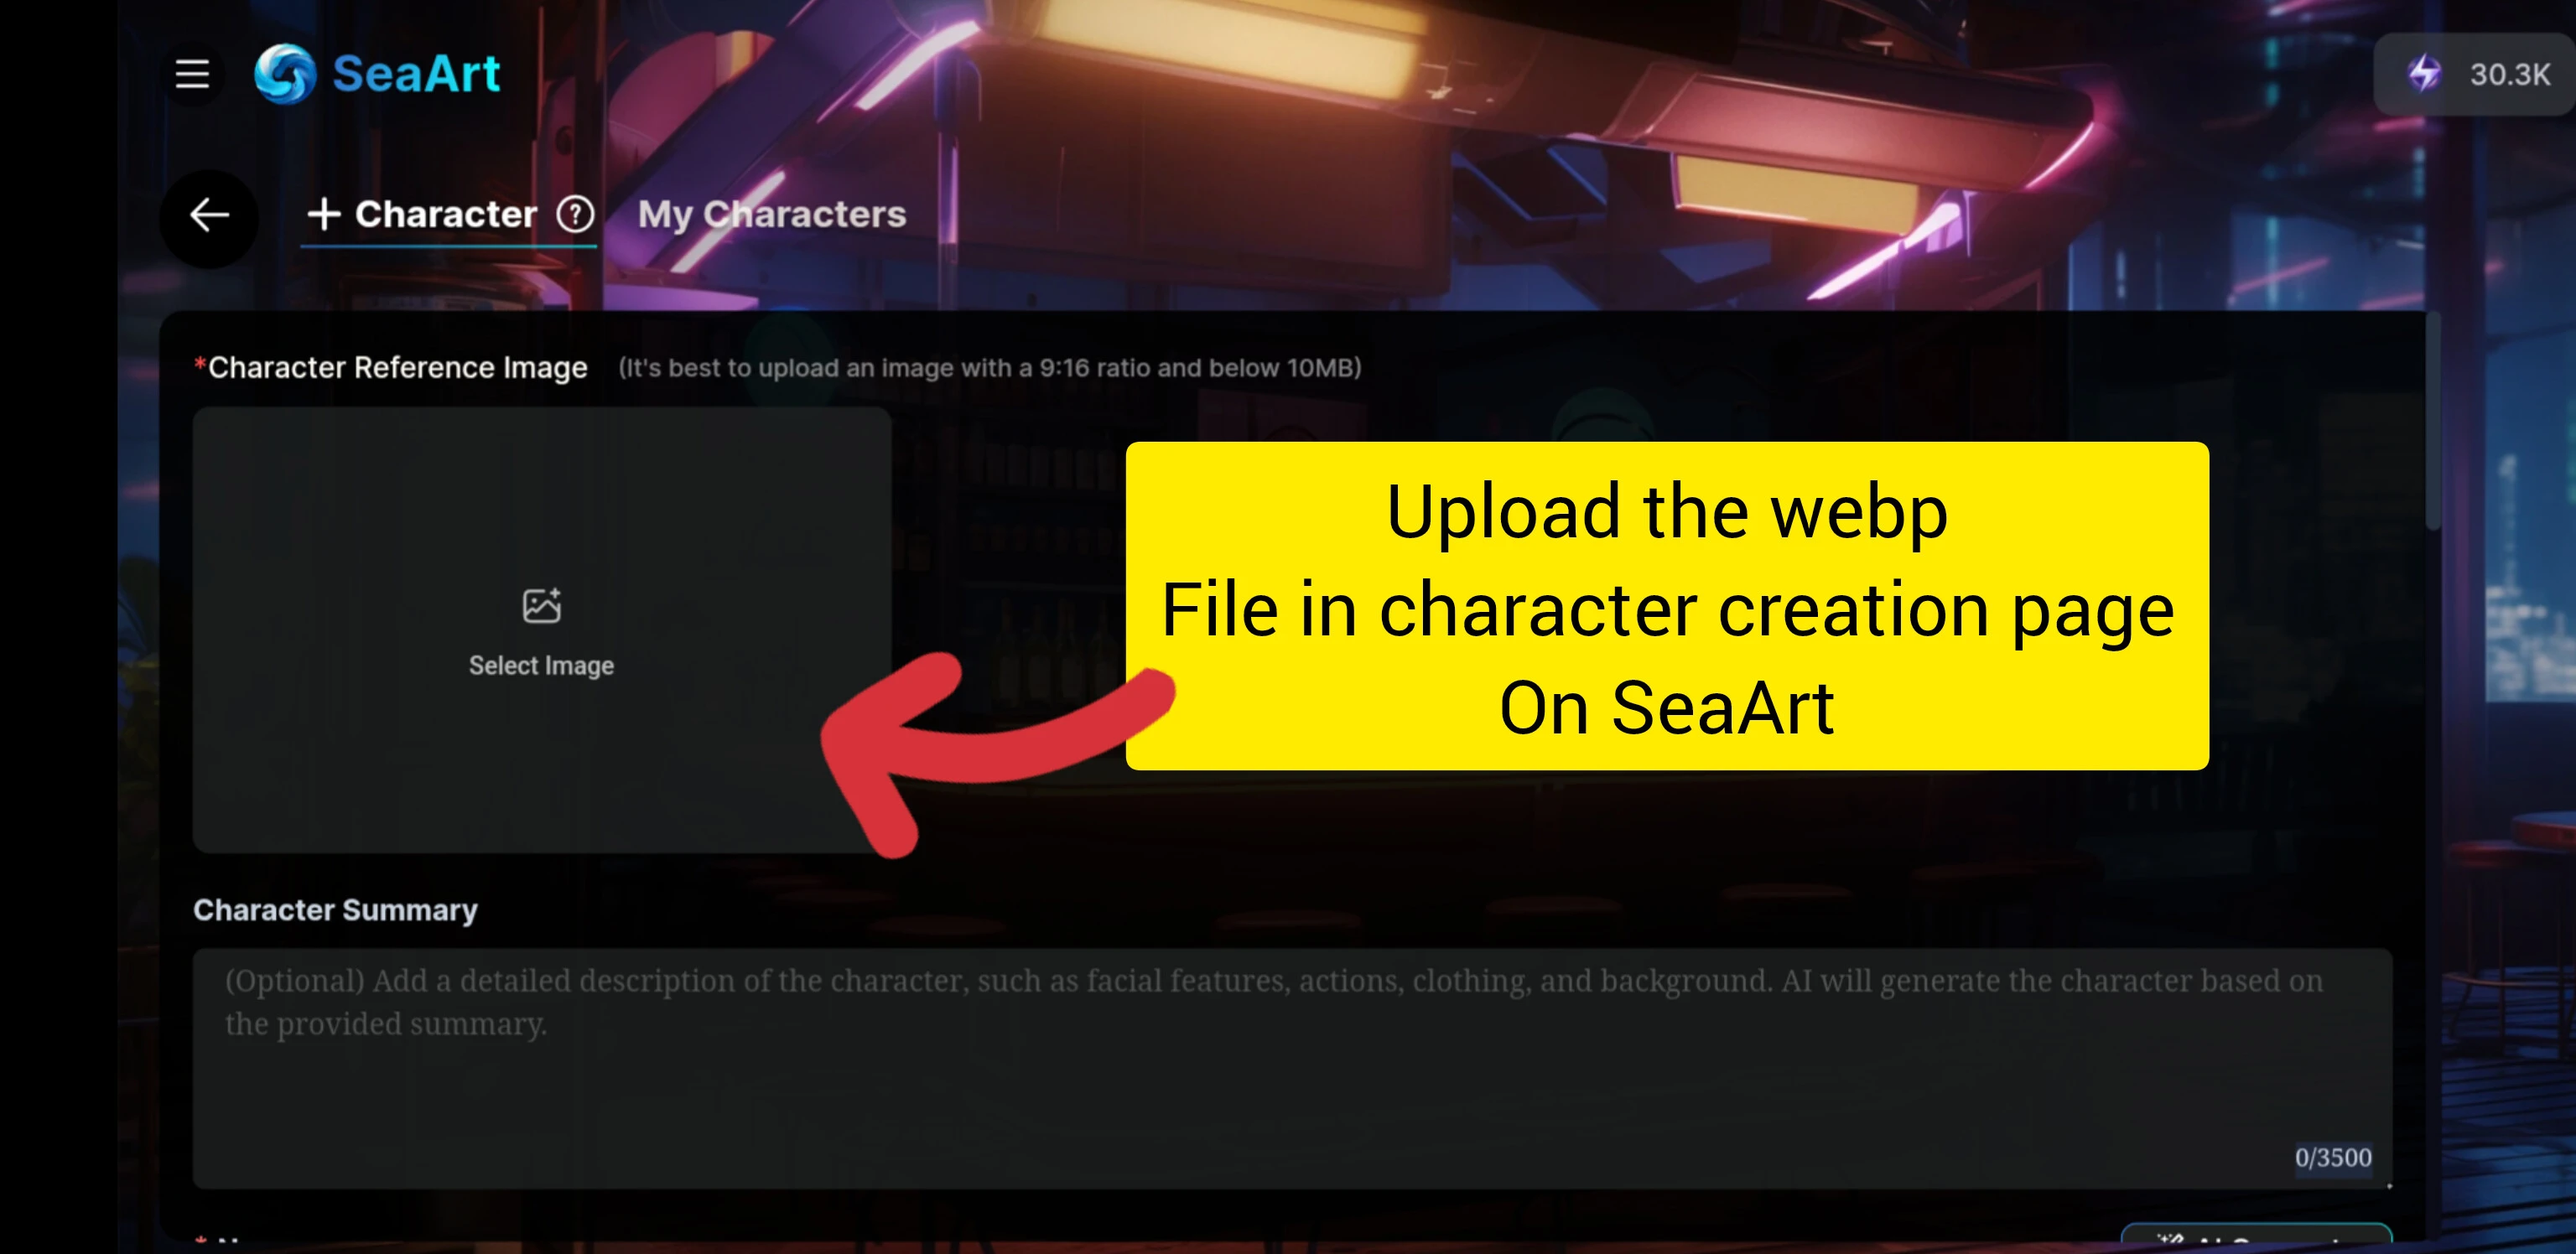
Step 4: Upload the Animated Image to SeaArt
1. Navigate to your Character Creation page.
2. Click on Upload Profile Picture.
3. Select the WebP file you converted.
4. Ensure the animation is playing correctly before saving.
Step 5: Test and Adjust
Once uploaded, test how the animated display picture looks in different conditions:
Check animation smoothness.
Ensure it loads quickly.
Verify compatibility across devices.