
Have you ever created an impressive ComfyUI workflow but didn't know how to share it with more people? Do you want your creative work to gain wider attention and recognition? Or are you looking for a professional platform to showcase your AI drawing skills? SeaArt.ai, as a leading AI art creation platform, provides the perfect stage for sharing ComfyUI workflows. In this digital creation era, sharing is not only a way to showcase talent, but also a bridge to exchange and learn with creators worldwide. By publishing your ComfyUI workflow on SeaArt.ai, you can:
- ✨ Expand your influence - Reach hundreds of millions of users globally
- 🤝 Build community - Connect with like-minded creators
- 📈 Get feedback - Collect valuable user opinions to improve your work
- 💡 Inspire creativity - Discover new creative directions through sharing
- 🏆 Build reputation - Establish professional standing in the AI art community
What will you learn from this tutorial?
Whether you're new to ComfyUI or an experienced user, this complete guide will help you:
- 🎯 Master publishing techniques - Every key step from workflow preparation to successful publication
- 📝 Learn content optimization - How to write attractive titles and descriptions to increase exposure
- 🔧 Avoid common pitfalls - Understand precautions and best practices in the publishing process
- 📊 Management and maintenance - How to continuously optimize and manage your workflow after publishing
Are you ready? Let's begin this creative sharing journey!
Preparation - What you need to know before starting
📋 Who is this tutorial for?
Before we begin the actual operation, let's confirm if this tutorial is suitable for you:
✅ Suitable for the following users:
- Creators with some ComfyUI experience
- Users who want to share their workflow creations
- Creators who want to establish influence in the AI art community
- Developers looking for workflow sharing platforms
❌ If you are in the following situations, it's recommended to learn the basics first:
- Never used ComfyUI before
- Not clear what a workflow file is
- Never used any AI drawing tools
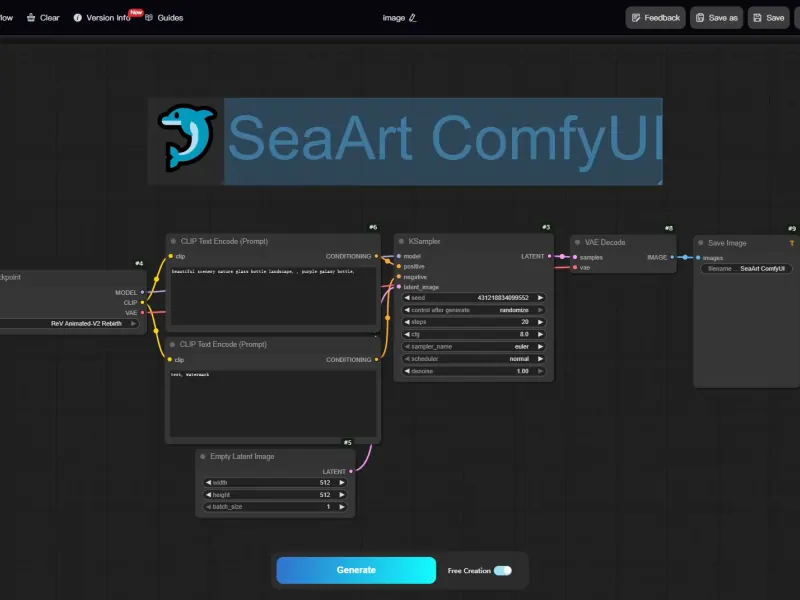
Step One: Prepare the workflow for publishing
Workflow preparation checklist
Before publishing your workflow, please follow these steps in order:
- Ensure workflow completeness: Check that all node connections are correct, with no missing models or plugins
- Complete run test: Run the entire workflow once to ensure it can generate images normally
- Maintain running state: After successful execution, do not modify any parameters or nodes
⚠️ Important reminder
The workflow must be in a state where it has been run successfully once without modifying parameters or nodes to be published smoothly!
✅ Correct approach: Successful run → Direct publishing
❌ Incorrect approach: Successful run → Modify parameters or add/delete nodes → Publish (will cause publishing failure)
Step Two: Start the publishing process
Click the publish button
Find the "Publish" button in the upper right corner of the workflow interface
Click the publish button
The system will automatically save the current workflow, please wait patiently for the save to complete
💡 Tip: Do not refresh the page or perform other operations during the saving process.
Step Three: Choose the publishing type
Publishing options interface

After clicking the publish button, the system will pop up a "How would you like to publish?" selection interface, offering two publishing methods:
Left side - Workflow
- Publish as a workflow, share with more people and gain inspiration
- Users can see the complete workflow structure and nodes
- Suitable for teaching and technical exchange
Right side - AI App
- Publish as an AI application, hiding workflow information
- Users only need to input parameters to use directly
- Suitable for commercial applications and simplified user experience
Choose to publish workflow
Click the " If you want to learn more, you can click "View Tutorial" below to see the tutorial 📝 Note: The AI App publishing option will be explained in detail in the AI App publishing tutorial. This tutorial focuses on workflow publishing. Workflow information form After selecting "Publish Workflow", the system will open the workflow information page where you need to complete the following information: Suggested to include: Click "Upload Images" to upload a cover image Recommended ratio: 3:> Supported formats: JPG, PNG, JPEG, WebP File size: Less than 5MB Cover image suggestions: Click the dropdown menu to select relevant tags Choose the classification that best matches your workflow type Helps users discover and search for your workflow Required option: ✅ Check "I have read and agree to the Terms of Use" Publication scope selection: ✅ Check "Publish workflow to community": Visible and usable by all users ⬜ Do not check "Publish workflow to community": Only for personal use in your profile Click the blue "Publish" button to submit your publication request. 💡 Filling tip: The more detailed the information, the easier it is for users to understand and use your workflow, increasing downloads and usage rates. After successfully publishing your workflow, you can maintain and update it at any time. Find the "Edit" button in the upper left corner of the workflow page After clicking"Enter ComfyUI", you will enter the ComfyUI editing interface You can modify nodes, parameters, or workflow structure Important reminder: Click "Go to Publish Page" to enter the publishing page You can modify the following content: Workflow title Workflow introduction Cover image Category tags Publication scope Click "Publish" to save changes after completing modifications After each update, the system will retain the latest version Users will always see your most recently updated version Updating the workflow will not affect existing favorites and ratings On the workflow details page, you can view: Publication time Usage status Rating information Node information Regular updates: Update based on user feedback and new technologies Optimize performance: Reduce unnecessary nodes, improve running efficiency Improve documentation: Update instructions based on user questions Respond to feedback: Pay attention to user feedback in the comment section, respond to issues promptly 💡 Tip: Continuous maintenance and updates of workflows are key to improving user experience and gaining more attention. Regular updates not only fix issues but also continuously optimize your workflow based on the latest technologies and user needs.Step Four: Fill in the basic information of the workflow
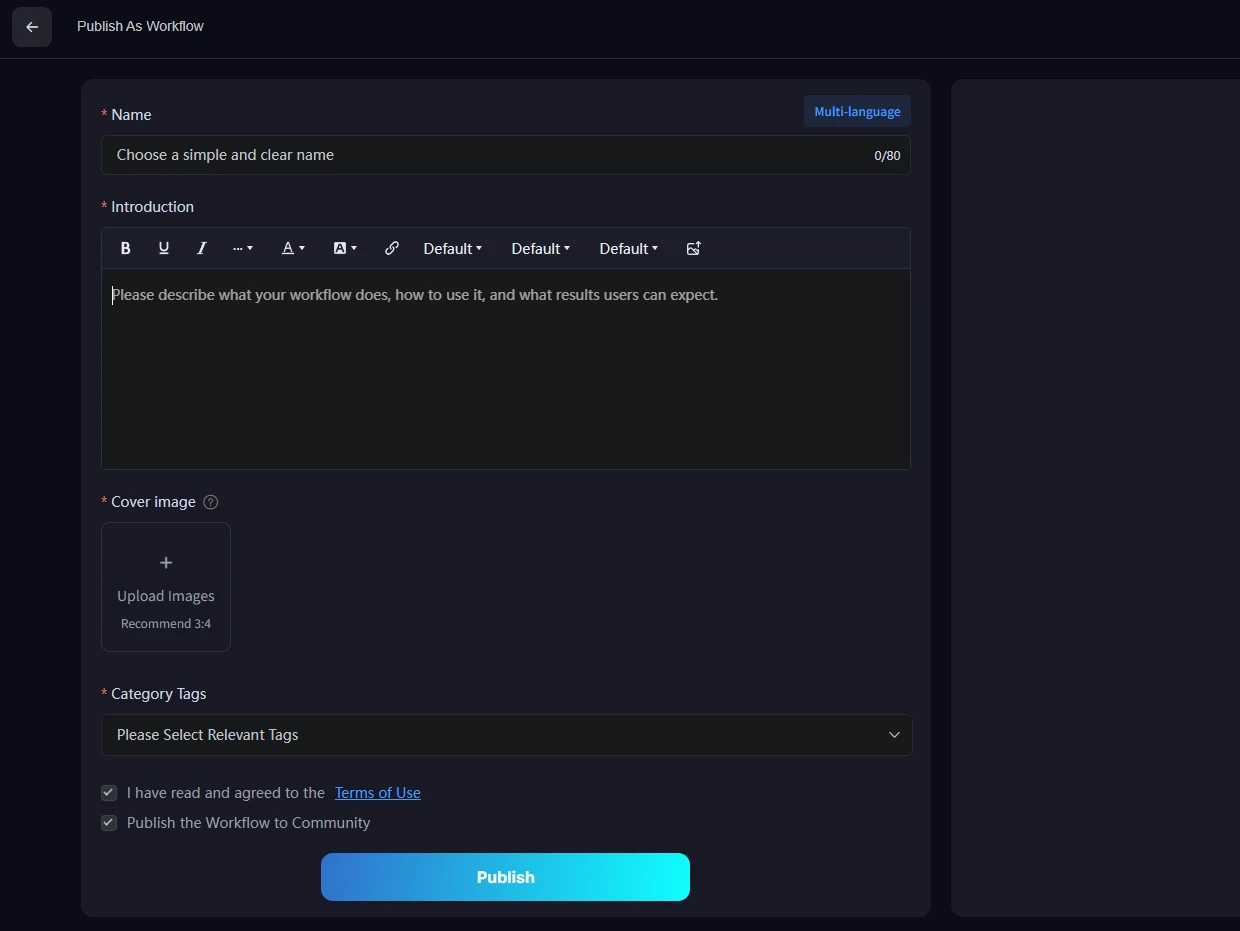
1. Workflow name
2. Workflow Introduction
3. Cover Image
4. Category Tags
5. Publication Confirmation
6. Complete Publication
Workflow Maintenance and Management
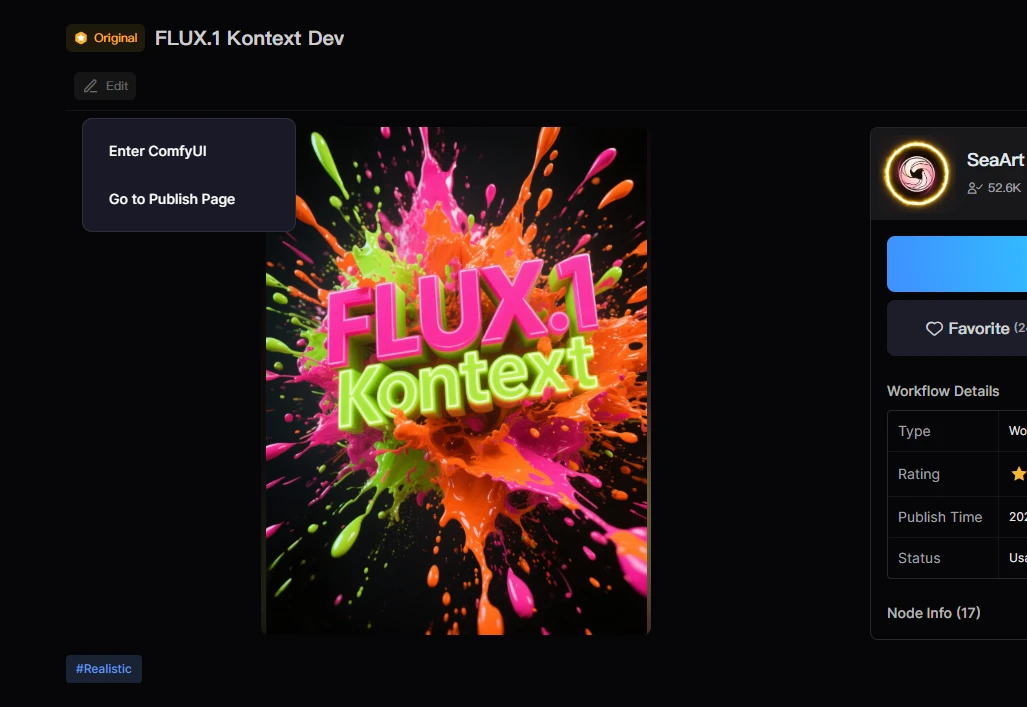
1. Edit Workflow Content
2. Update Workflow Basic Information
3. Workflow Version Management
4. Workflow Status Monitoring
5. Workflow Maintenance Best Practices
Congratulations! You've now mastered the complete process of publishing and managing ComfyUI workflows on SeaArt.ai.
Sharing your creativity not only helps other creators but also allows you to establish your influence in the AI art community. Each carefully crafted workflow is a crystallization of your creativity and technical skills, deserving to be seen and used by more people.
Start sharing your first workflow now! Looking forward to seeing your creative works in the SeaArt.ai community!