
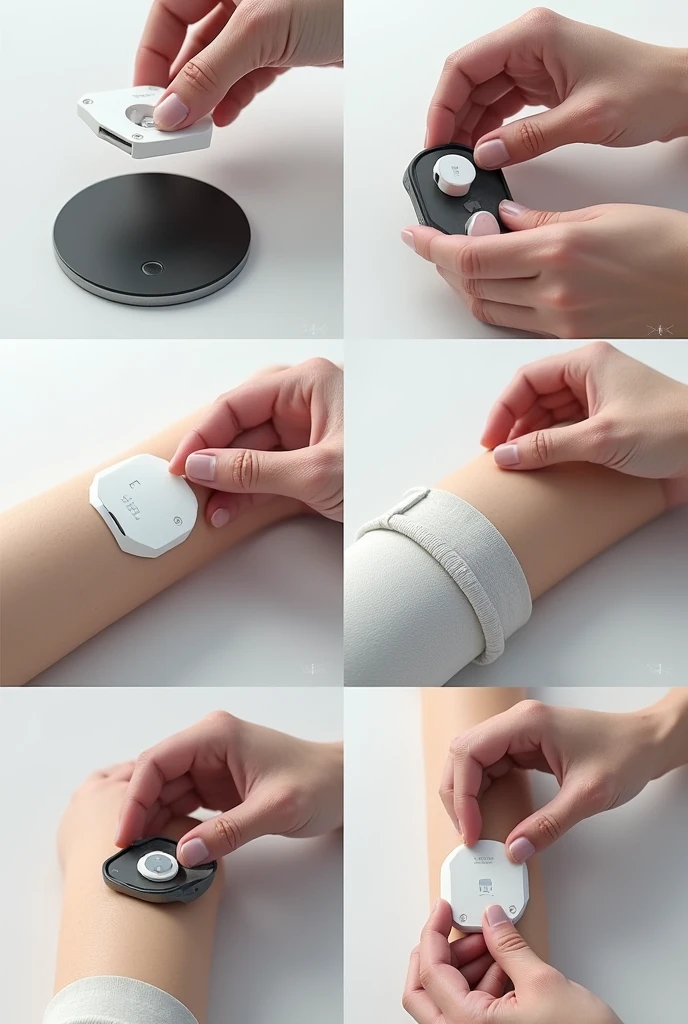
When assembling the "Smart Insulin Patch", It is important to follow an order th


M
Generation Data
Records
Prompts
Copy
When assembling the "Smart Insulin Patch"
,
It is important to follow an order that ensures that each component is placed correctly for the device to function efficiently
..
Here I present a possible assembly order:
### **Prototype Assembly Order**
1
.
**Base of the Parche**
- **Description**: Start with the base of the patch
,
which is the main structure where all the components will be placed
.
- **Details**: It can be a layer of flexible material that allows the other components to adhere
..
2
.
**Placing the Glucose Sensor**
- **Description**: Install the glucose sensor on the bottom of the patch base
,
making sure it will be in direct contact with the skin
.
- **Details**: This component is essential for continuous monitoring
,
so it must be well positioned and secured
.
3
.
**Control Circuit Installation**
- **Description**: Place the control circuit near the sensor
,
so that you receive data directly and can process it quickly
.
- **Details**: This circuit will include the processor
,
the wireless communication module and connections to other components
.
4
.
**Micro Insulin Pump Assembly**
- **Description**: Attach the micro-insulin pump to the control circuit and connect the lines required for insulin delivery from the reservoir
..
- **Details**: The micro-pump must be connected to the control circuit so that it is automatically activated as needed
..
5
.
**Insulin Reservoir Integration**
- **Description**: Place the insulin reservoir in the center of the patch
,
connecting it to the micro-pump
.
- **Details**: Make sure the reservoir is well sealed and the connection to the micro-pump is secure
..
6
.
**Battery Connection**
- **Description**: Insert the rechargeable battery into its place
,
connecting it to the control circuit to power the device
.
- **Details**: The battery must be
INFO
Checkpoint & LoRA

Checkpoint
SeaArt Infinity
#Realistic
#SeaArt Infinity
0 comment
0
0
0
SeaArt Swift AI Apps

AI Video Generation
Unleash your imagination and let AI create visual wonders for you

Face Swap Online Free
Create funny or realistic face swap videos & photos in a snap

Gender Swap
Swap genders in photos and videos with SeaArt's AI gender swapper. Enjoy fun and realistic transformations effortlessly, free online!

Studio Ghibli Filter
Transform any photo into unique Ghibli-style art in just one click.
AI Eraser
Easily remove unwanted objects, watermarks, or people from your photos.

Cartoon Avatar Maker
Turn your photos into unique cartoon avatars instantly.
Explore More AI Apps