
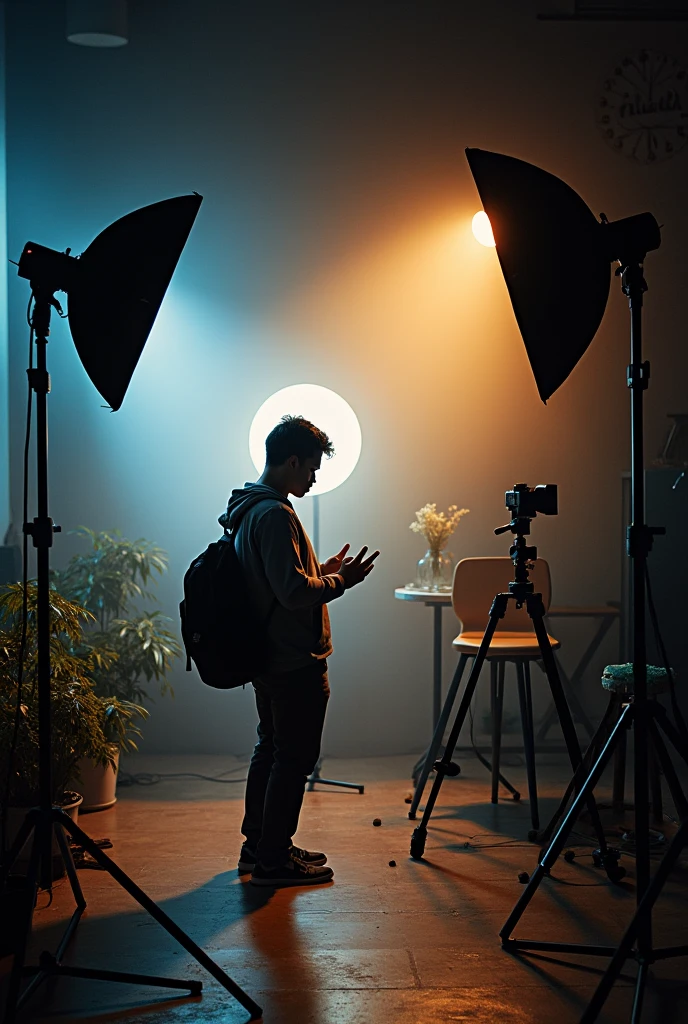
### 1. **Adjusting Lighting in Photography** - **Use Dimmer Switches


Generation Data
Records
Prompts
Copy
### 1
.
**Adjusting Lighting in Photography**
- **Use Dimmer Switches**: If you're working with physical lights
,
a dimmer switch can reduce the intensity of the light source
.
- **Reduce Light Sources**: Turn off or remove some light sources to reduce the overall brightness
.
- **Use Lower Wattage Bulbs**: Replace your current light bulbs with ones that have a lower wattage
,
which will emit less light
.
- **Add Diffusion**: Place a diffuser (like a softbox or translucent cloth) in front of your light source to soften and reduce the light
.
- **Modify the Distance**: Move the light source farther away from the subject to decrease the intensity of the light
.
### 2
.
**Editing in Software (e
.
g
.,
Photoshop
,
Lightroom)**
- **Lower Exposure**: Reduce the exposure setting in your editing software to make the entire image darker
.
- **Adjust Brightness and Contrast**: Lower the brightness setting to reduce the overall light level in the image
.
- **Use Shadows and Highlights**: Increase the shadows and reduce the highlights to decrease the light in bright areas and enhance the darker regions
.
- **Apply a Vignette**: Add a vignette effect to darken the edges of the image
,
drawing focus away from bright areas
.
### 3
.
**Using Camera Settings**
- **Lower ISO**: Reduce the ISO setting on your camera to make the sensor less sensitive to light
,
resulting in a darker image
.
- **Adjust Aperture**: Use a smaller aperture (higher f-stop number) to let in less light through the lens
.
- **Increase Shutter Speed**: A faster shutter speed will reduce the amount of light that hits the camera sensor
,
making the image darker
.
### 4
.
**Controlling Light in a Room**
- **Use Curtains or Blinds**: Close curtains or blinds to block out natural light
.
- **Use Reflective Surfaces Sparingly**: Avoid placing reflective surfaces (like mirrors or white walls) near light sources
,
as they can bounce and amplify light
.
- **Cover or Block Light Sources**: Use materi
INFO
Checkpoint & LoRA

Checkpoint
SeaArt Infinity
#Realistic
#Product Design
#SeaArt Infinity
0 comment
0
5
0
SeaArt Swift AI Apps
AI Video Generation
Unleash your imagination and let AI create visual wonders for you
Face Swap Online Free
Create funny or realistic face swap videos & photos in a snap
Change the Person in the Photo
Easily replace the person in any photo with AI.

Remove Background
Remove backgrounds from any image in seconds.
Anime to Reality
Instantly bring your favorite anime characters to life.
Video Face Swap
Create funny videos by swapping faces in any video clip.
Explore More AI Apps