
ComfyUI: How to Change the Background of Model Photography in Seconds
Have you ever felt disappointed because the background of your photo wasn't perfect? Have you wished for an easy way to change the background for a more creative and aesthetic image? Today, we're going to reveal an astonishing secret: how to use ComfyUI workflows to change the background of model photography in just seconds.
The Secret Weapon for One-Click Background Change
In the world of digital image processing, ComfyUI stands out for its powerful features and user-friendly operation. With just a few simple steps, you can quickly change the background without needing professional image editing skills. Let's unveil the magic of this incredible tool.
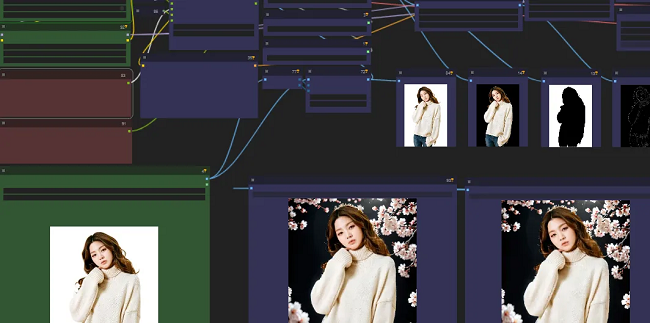
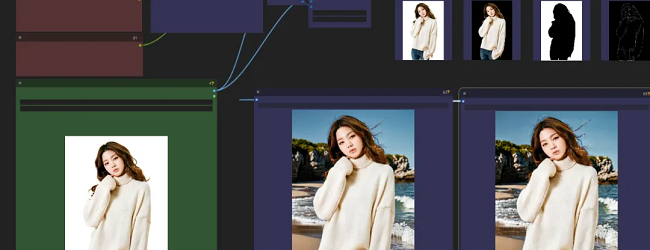
Step 1: Load the Initial Image
First, load the model image whose background you want to replace. Ensure the image is of high quality and has a simple background, as this will help with subsequent image segmentation and processing.
Step 2: Segment the Image
Use the comfyui_segment_anything node to segment the image, separating the model from the background.
Step 3: Apply Advanced Image Processing
Use the Fooocus_Nodes and ComfyMath nodes to enhance the details and quality of the image.
Step 4: Replace the Background
Use the ComfyUI-Advanced-ControlNet node to select a new background image and merge it with the model image.
Step 5: Apply Dynamic Effects (Optional)
If you want to make the image more dynamic, use the ComfyUI-AnimateDiff-Evolved node to add dynamic effects.
Step 6: Output the Final Image
Use the was-node-suite-comfyui node for the final processing and export of the image.
One-Click Operation, Infinite Possibilities
By following the steps above, you can easily change the background of model photography, adding creativity and aesthetic appeal to your images. Whether for wedding photography or creative advertising, this technique can help you get perfect results.