
日本語版
In the field of generative AI, the balance between speed and quality has always been a core proposition of model iteration. Following the widespread attention sparked by the Flux series models, the brand-new Z-Image Turbo has been officially launched.
This model can generate high quality image in few seconds.This is not only an efficient 6B model but also a performance leap based on the latest S3-DiT architecture.
`
Z-Image Series
Z-Image-Turbo Open Source
Z-Image-Base To Be Released
Z-Image-Edit To Be Released
`
Model Link:
Workflow Link:
`
How to Use:
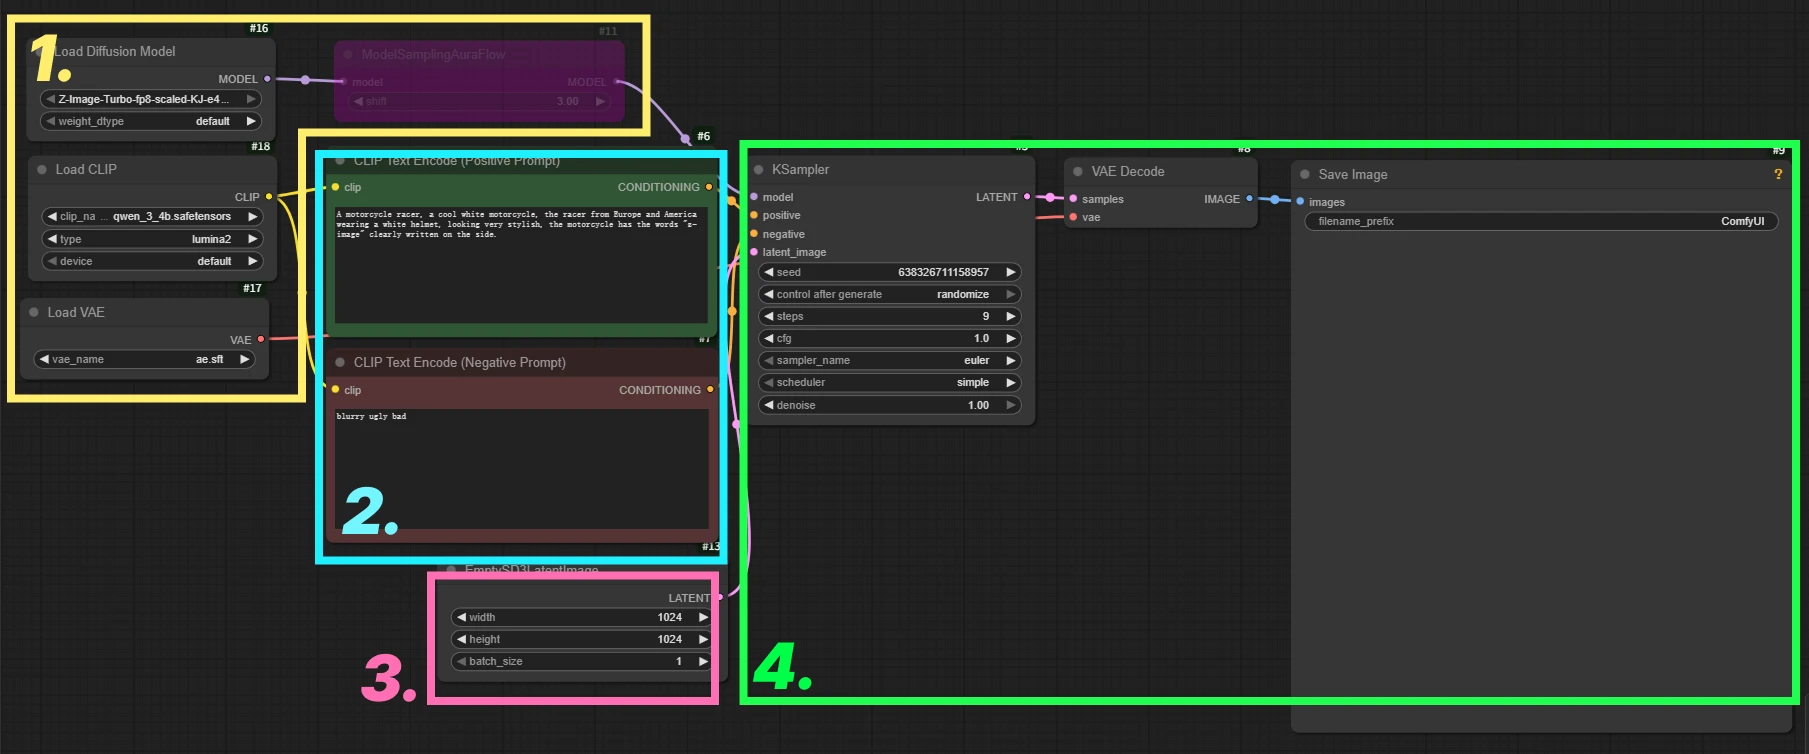
1. Model Loading
2. Prompt Input
3. Image Width/Height and Batch Processing
4. Sampling and Image Decoding Generation
`
Special Node:
[ ModelSamplingAuraFlow ] (Optional)
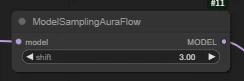
This node is bypassed by default. You can enable it by pressing Ctrl+B when needed.
🔧 What is the use of the Shift value?
Optimizes sampling time allocation.The default setting of Z-Image Turbo is 3.00. You can fine-tune the value to improve image quality and precision. Setting it too high may lead to structural collapse or incomplete content.
`
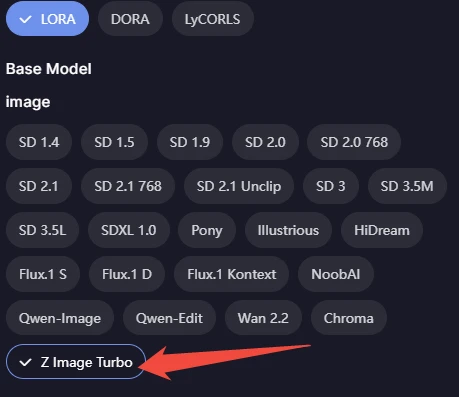
Z-Image Turbo With LoRA
Z-Image Turbo with Lora T2I Workflow Click to Jump
You can Select the corresponding model type in the model filter
Showcase
The size of the following images are all 2048x1024
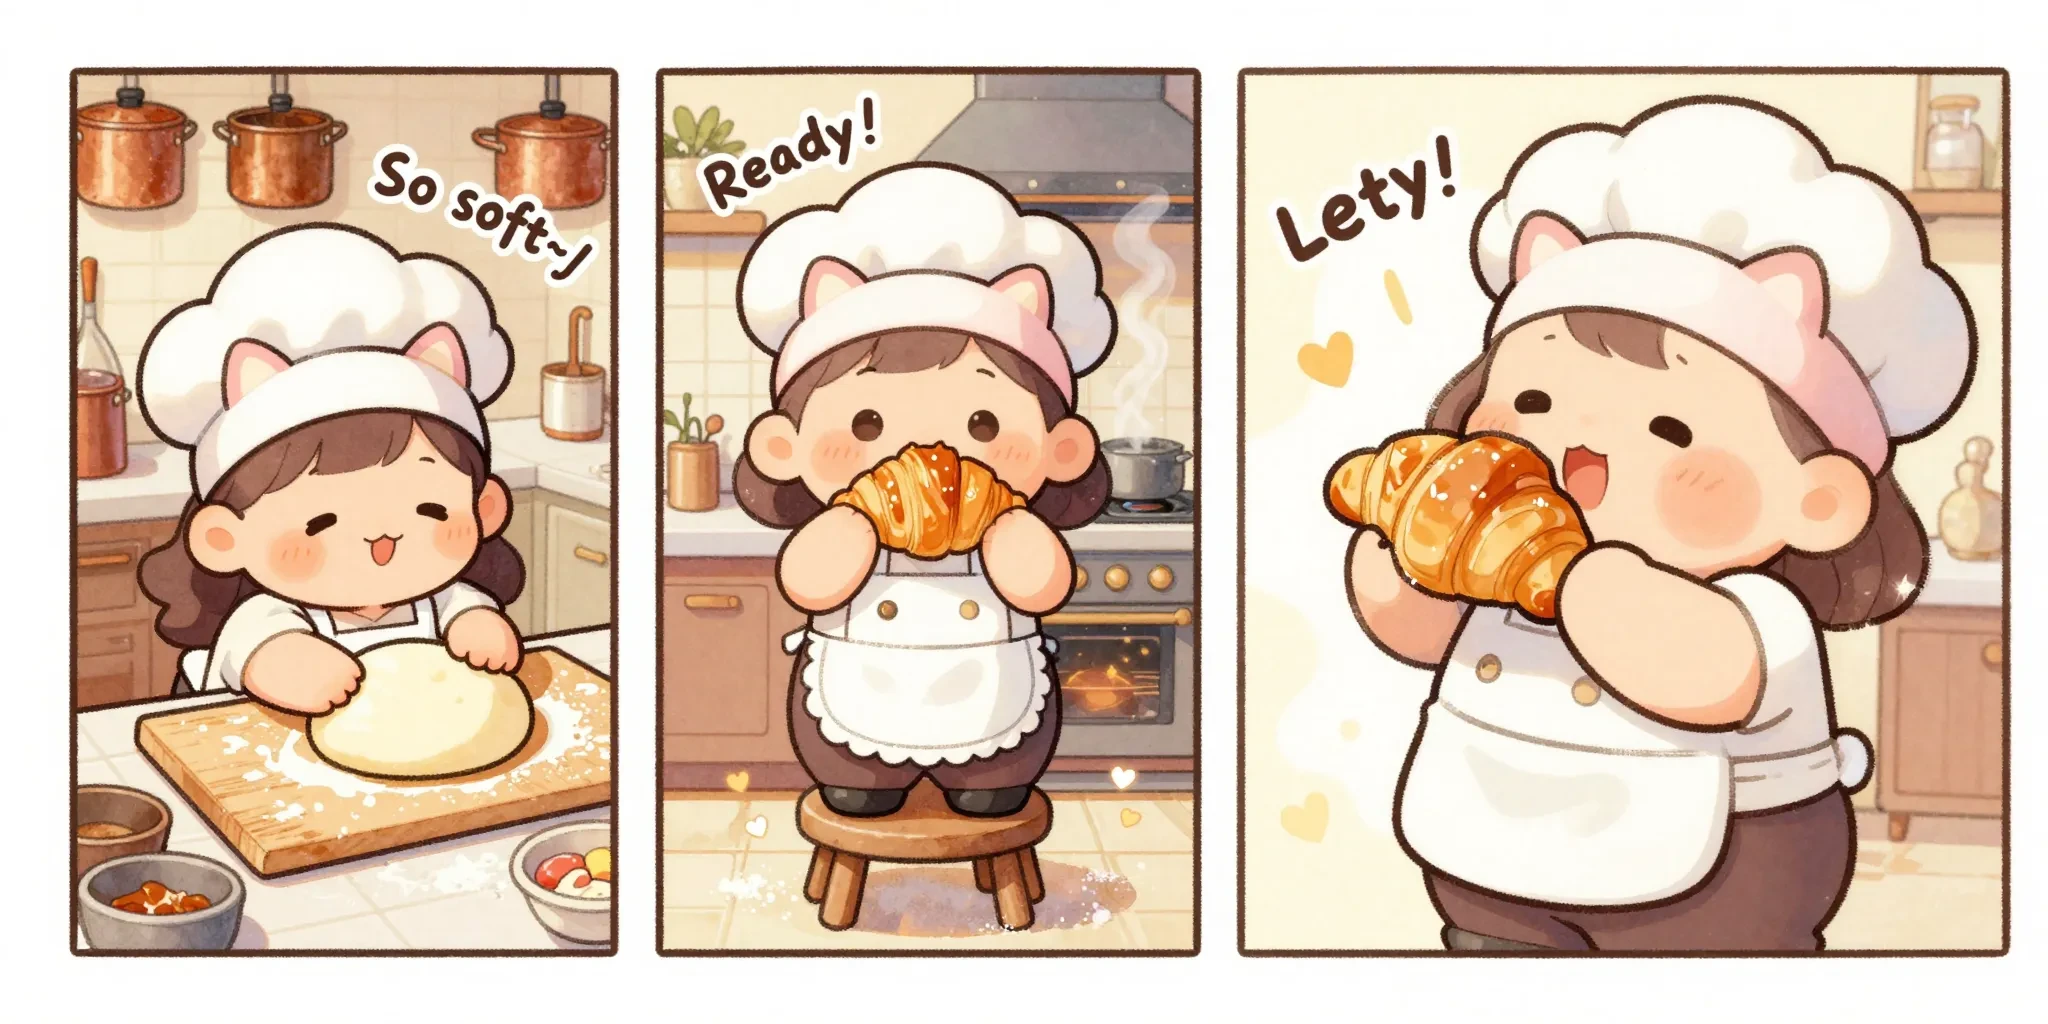
The comic book layout features three equal panels side-by-side. It depicts a chubby, chibi-style little cook with fluffy cream-colored curls, a pink cat-ear headband, and a white apron with lace trim, in a coZy, sunlit kitchen.Left panel: She's sprawled on a giant kneading mat, her cheek rubbing against the soft dough, looking blissfully content. The caption reads "So soft~♪," and the background shows a beige wall covered in copper pots.Middle panel: Standing on a small stool, she holds aloft a freshly baked caramel-colored croissant, her eyes sparkling. The caption reads "Ready!", and behind her is a warm-glowing oven with rising steam.Right panel: She's about to take a bite, her mouth agape in blissful happiness, a satisfied blush on her face. The caption reads "Let's eat!!", and she's surrounded by shimmering sugar powder and heart-shaped effects.Style Limitation: No speech bubbles, slender and strong black outlines, soft and warm distorted chibi style, full-color comic, delicate light watercolor texture, gentle and healing atmosphere, afternoon sunlight, highly saturated macaron colors, fluffy and rounded character design, very cute and warm, soft watercolor wash effect, some sugar powder and halo break the border.
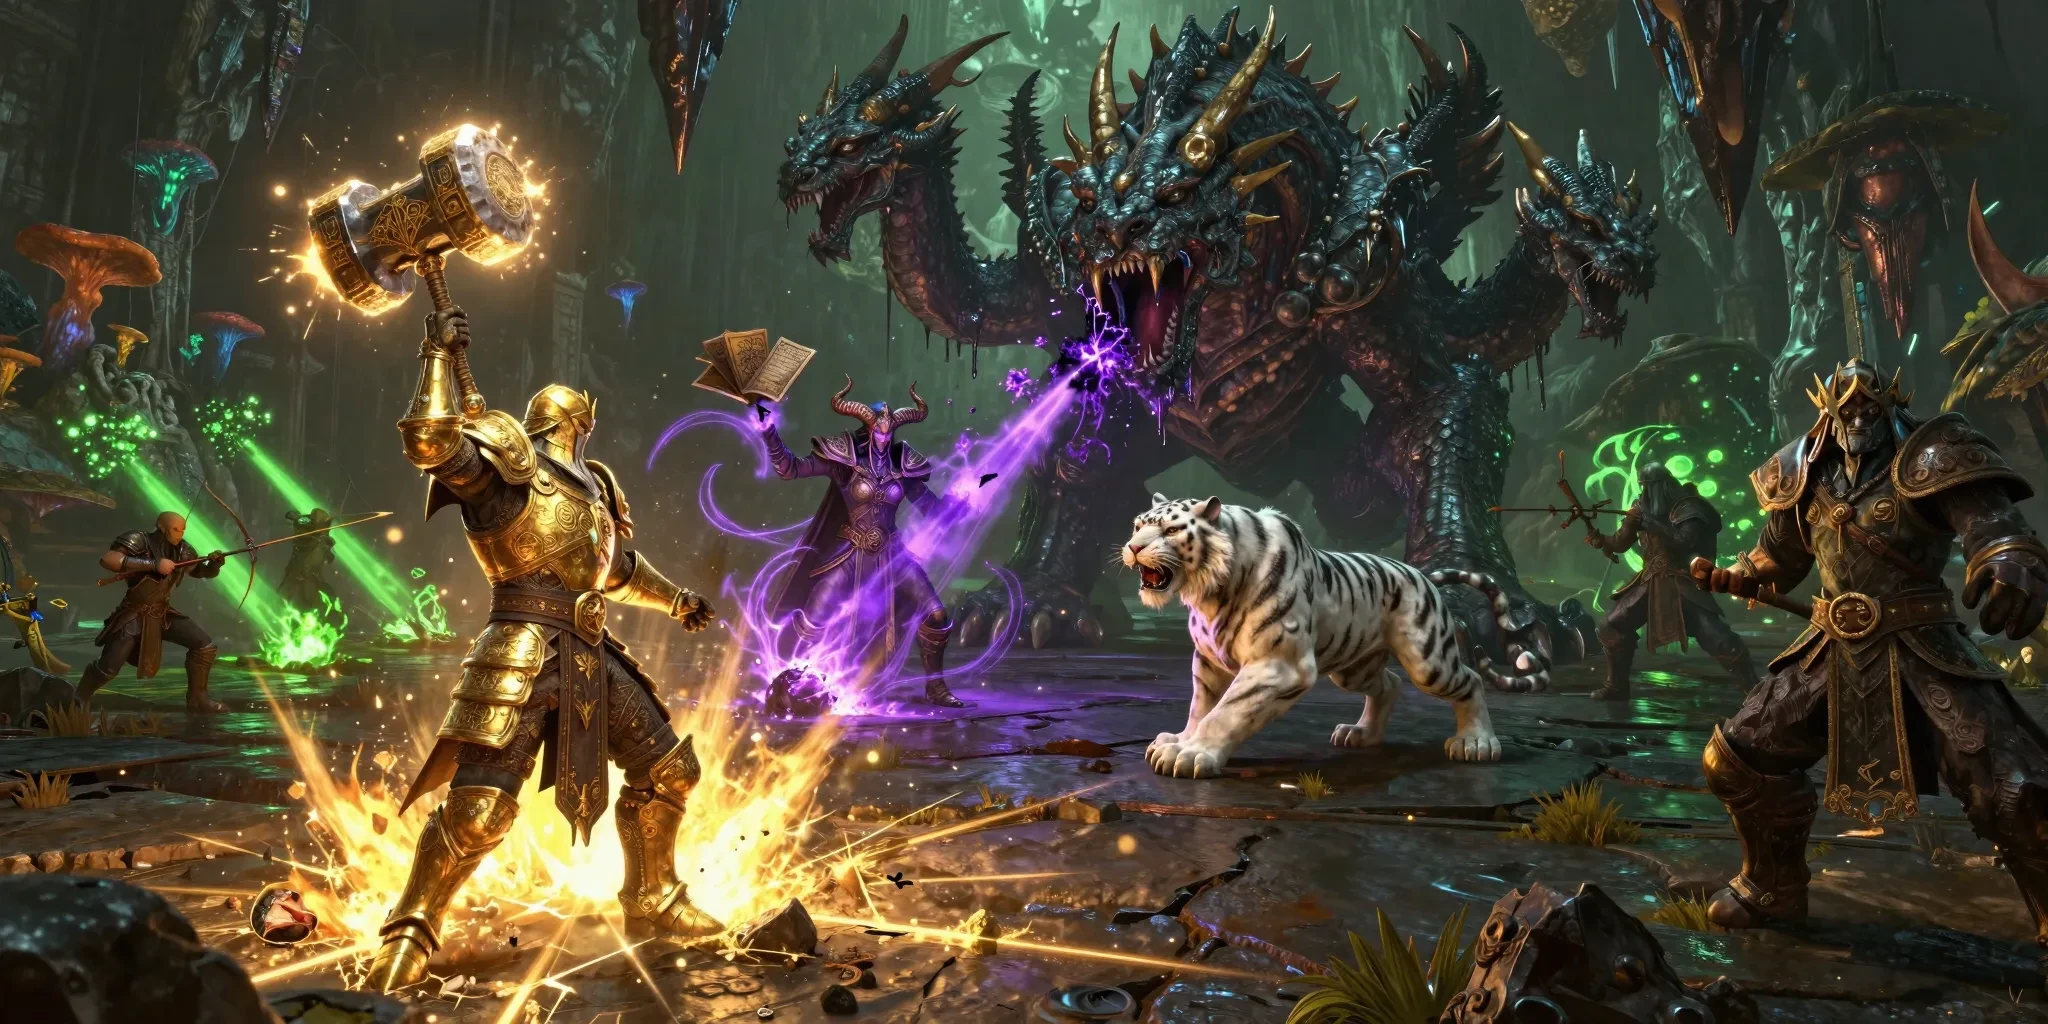
A meticulously detailed 3D MMORPG with a dark fantasy style. The chaotic raid dungeon environment features a gloomy cavern illuminated by bioluminescent fungi and eerie green fel fire. In the foreground, a dwarf paladin in gleaming golden plate armor, engraved with holy scriptures, raises a massive luminous hammer high, smashing down to create a blinding golden consecrated ground effect, cracks of holy light spreading across the dark stone floor. Directly ahead looms a grotesque, multi-headed hydra beast with scaling obsidian skin and dripping acid, roaring as one head recoils from the holy strike, purple venom splattering into the air. In the midground, a tiefling warlock with curved horns and floating grimoires channels a dark purple void beam, chaotic energy tendrils lashing out from her hands. Beside her, a beastmaster hunter commands a spectral white tiger that is pouncing onto the hydra's flank. The background reveals the rest of the raid party: healers casting green rejuvenation beams, archers raining volley shots, and massive stalactites falling from the ceiling due to the tremors. The game boasts a gritty atmosphere, hyper-realistic PBR materials, cinematic volumetric lighting, ray-tracing reflections on armor, 8K resolution, Unreal Engine 5 rendering, extremely detailed monster scales and particle effects, and an intense, boss-fight climax atmosphere.
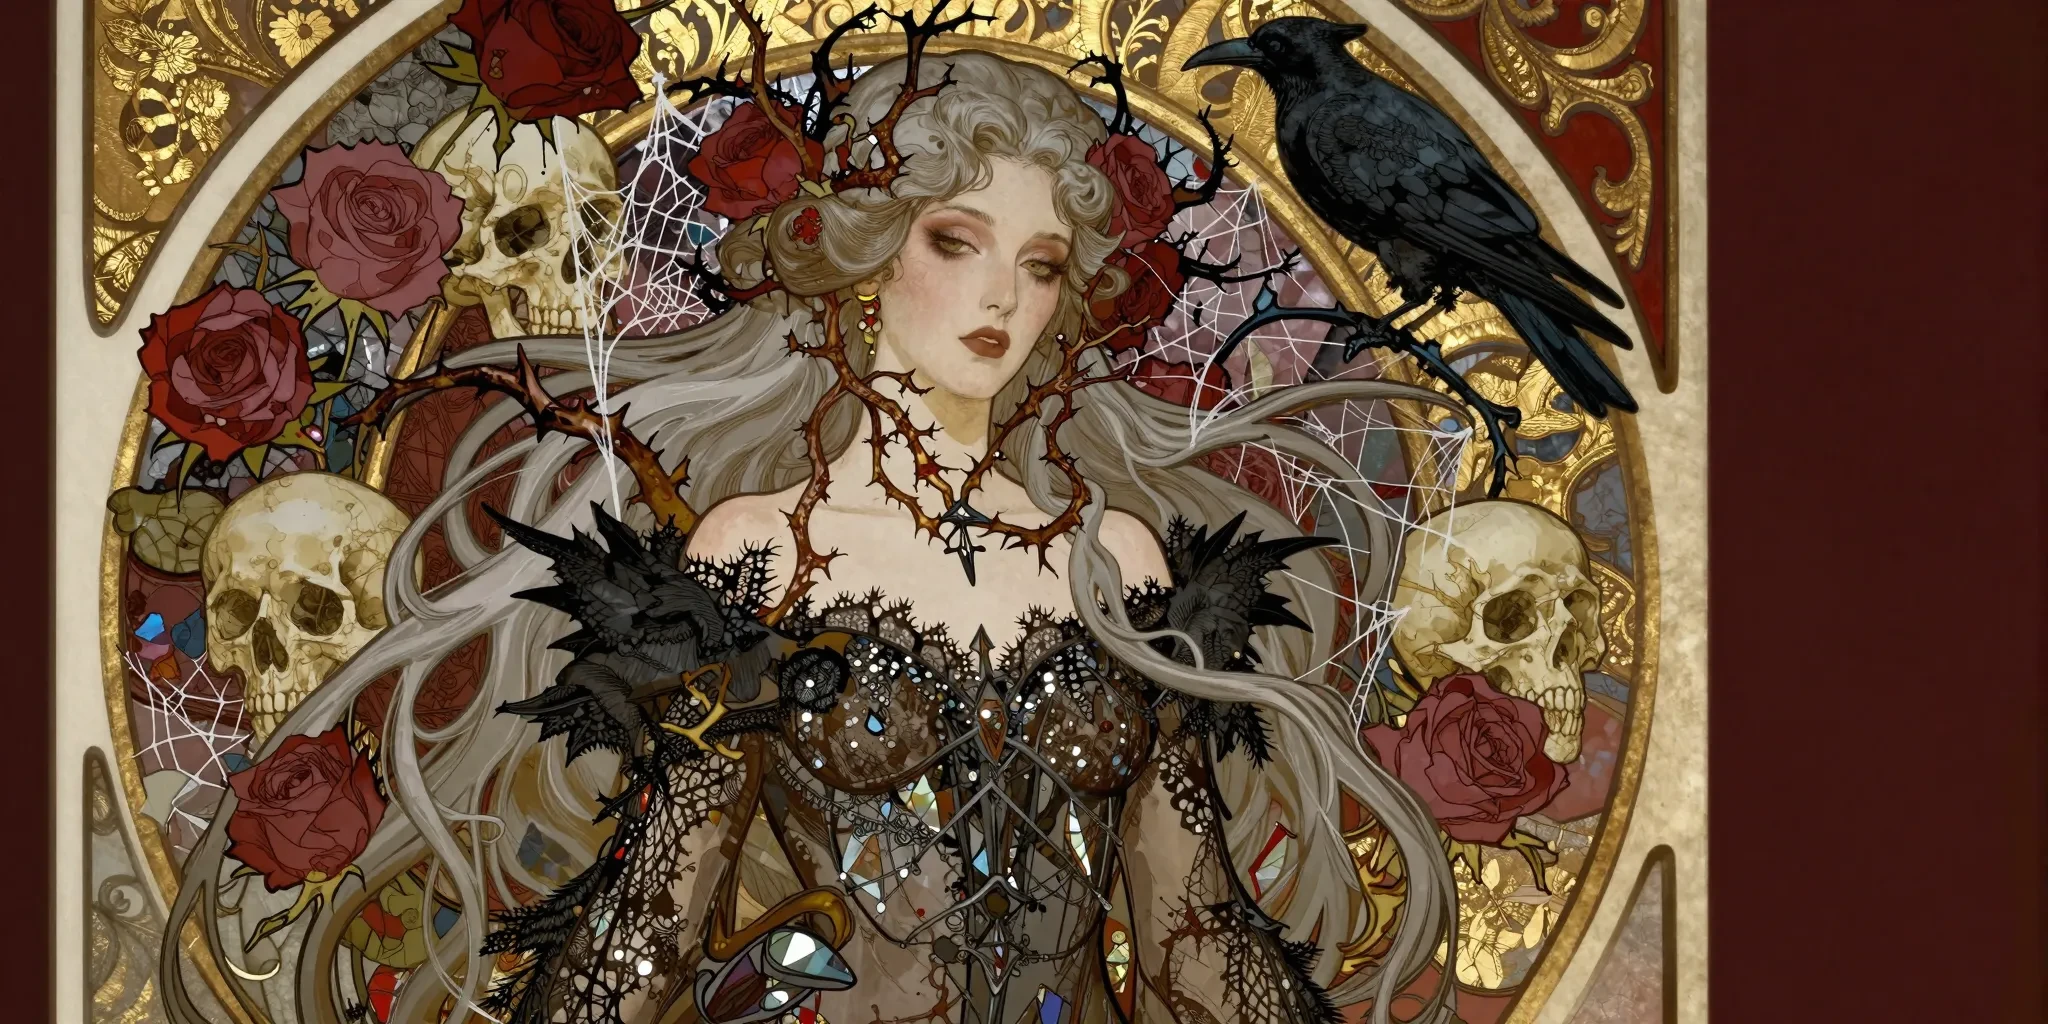
Art Nouveau style illustration, Alphonse Mucha inspired, but with a dark gothic twist. Portrait of a Pale Vampire Queen with long, flowing silver hair that turns into thorny rose vines and spiderwebs. She wears an intricate dress made of black lace and stained glass shards. The background is a decorative circle frame filled with withered roses, skulls, and ravens. Gold leaf accents, sharp outlines, flat colors with intricate line work. Melancholic and elegant atmosphere, deep red and gold and black color scheme. Masterpiece, highly detailed.
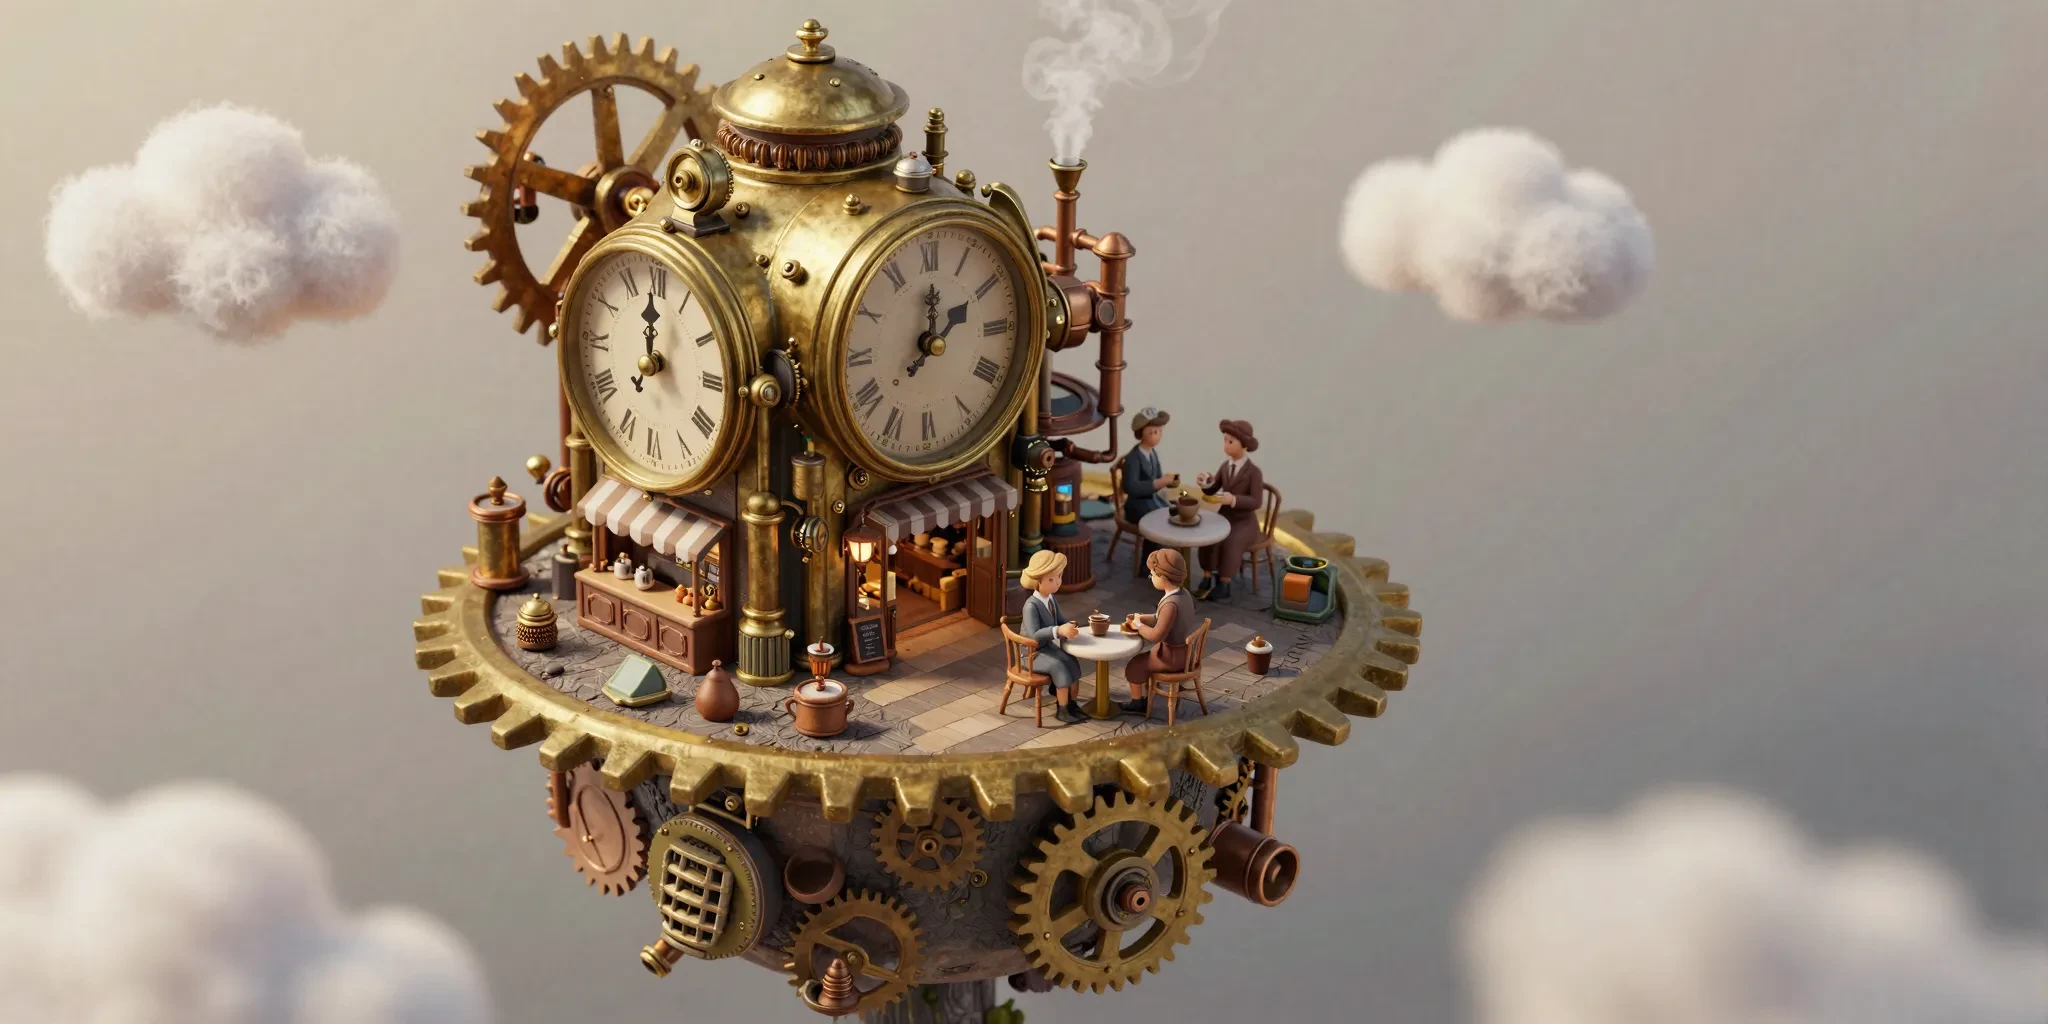
Isometric view, tilt-shift photography style, shallow depth of field. A cute, miniature floating island in the sky. On the island is a tiny, detailed steampunk coffee shop built inside a giant vintage brass clock mechanism. Tiny gears are turning, and steam puffs out of little copper pipes. Miniature people with Victorian clothes are drinking coffee on the gear-shaped terrace. Fluffy clouds surround the island. Soft natural lighting, warm tones, macro lens details, 3D render style, c4d, blender, clay texture, extremely detailed textures.
Extended Usage
Image-to-Image
Workflow:
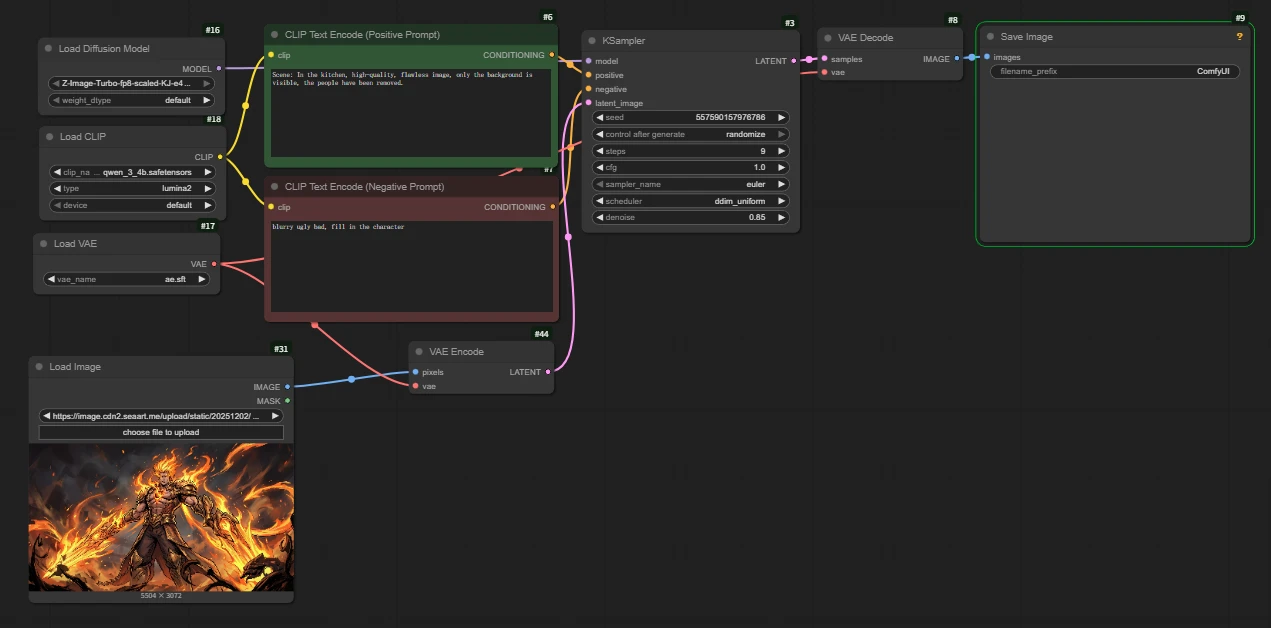
Difference with basic workflow:
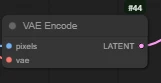
Add [ VAE Encode ]
How to connect: Connect 'pixels' on the left to the image, and 'vae' to the VAE Loader; on the right, connect `latent` to the `latent_image` input of the Sampler (Sampler).
`
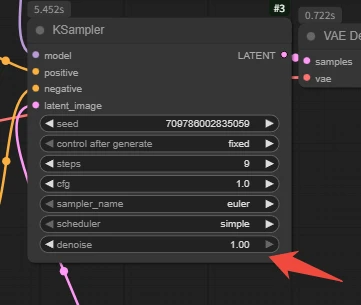
Denoise parameters can be adjusted according to the desired magnitude.
The smaller the value, the more faithful to the original image (fine-tuning); the larger the value, the more it biases towards the prompt (repainting).
Note: Setting it to 1.0 is equivalent to completely regenerating.
`
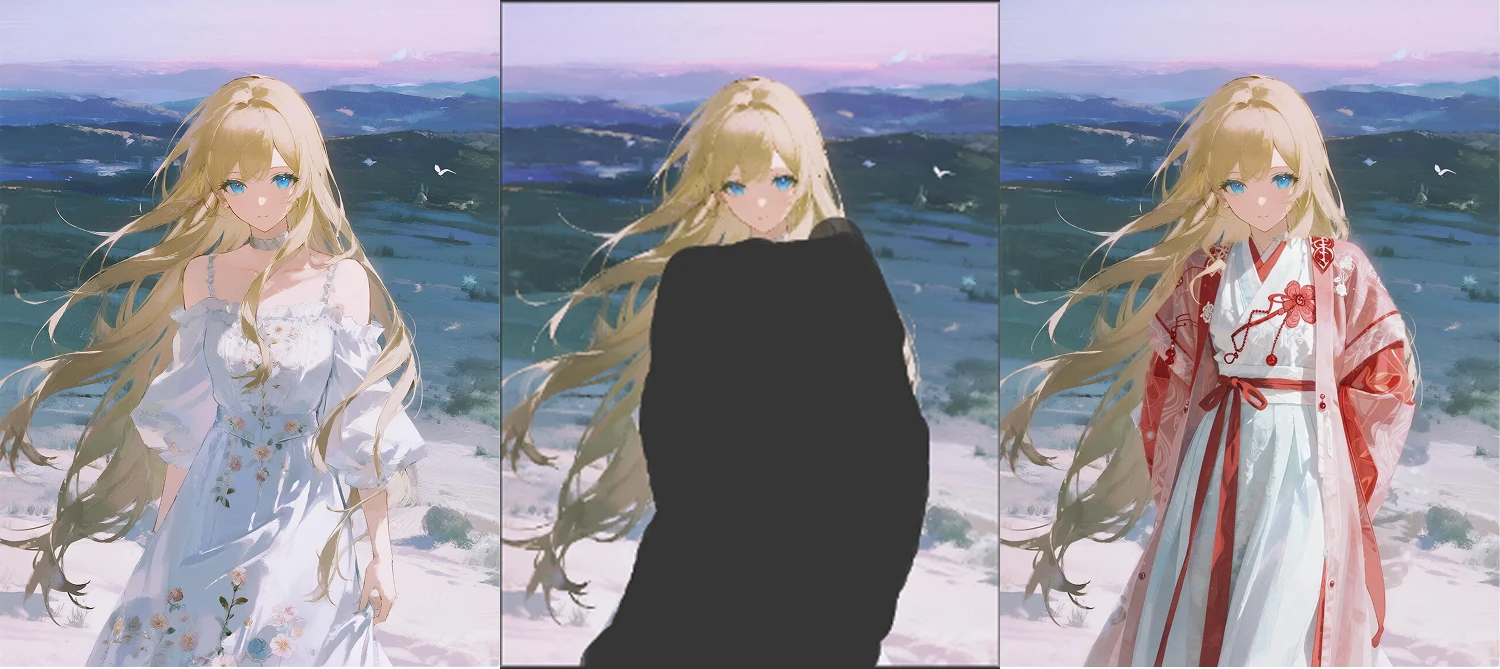
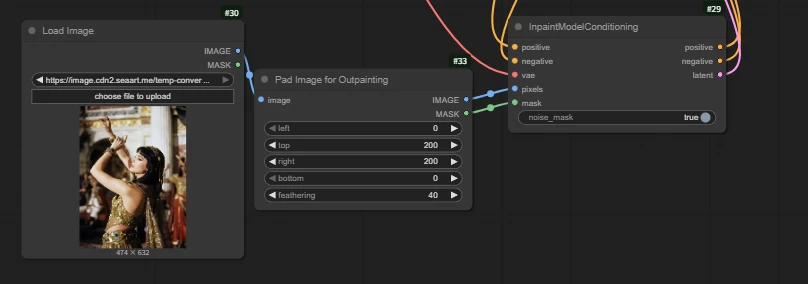
Inpainting
workflow:
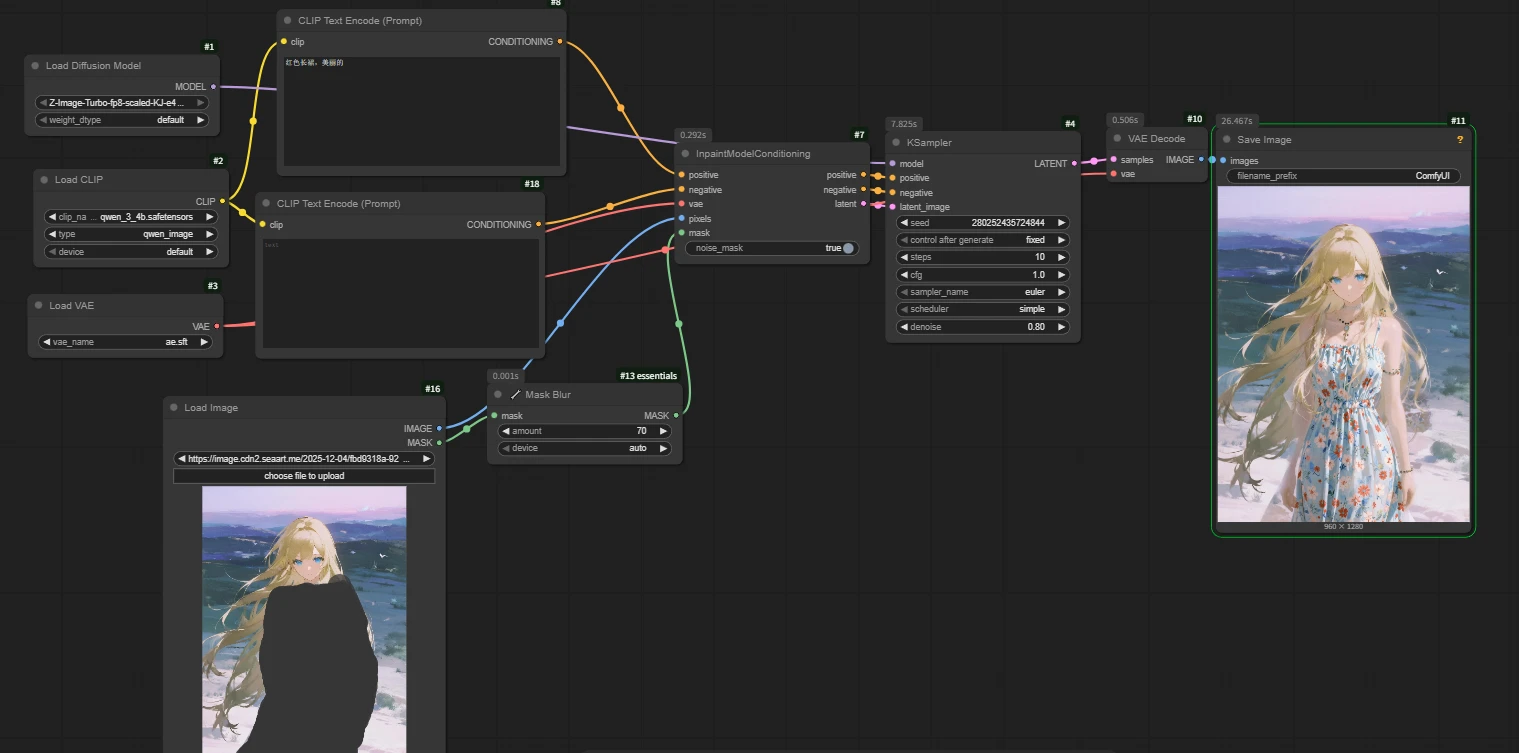
Difference with basic workflow:
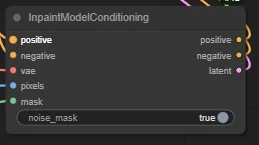
Add [ InpaintModelConditioning ]
How to connect: Right-click the image area in the Load Image node -> Select [Open in MaskEditor] -> Paint the area you want to modify. Remember to click Save after finishing the mask painting.
`
In inpainting, the denoise magnitude is adjusted according to the degree of repainting. The prompts should be written as detailed as possible.
Note: The inpainting method is not suitable for fabricating objects out of thin air in empty spaces.
`
🔧Key Node: [ Mask Blur]
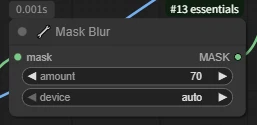
Performs Gaussian blur processing on the input mask to make the edge transitions smoother, thereby reducing hard boundary phenomena during image repainting or local repair.
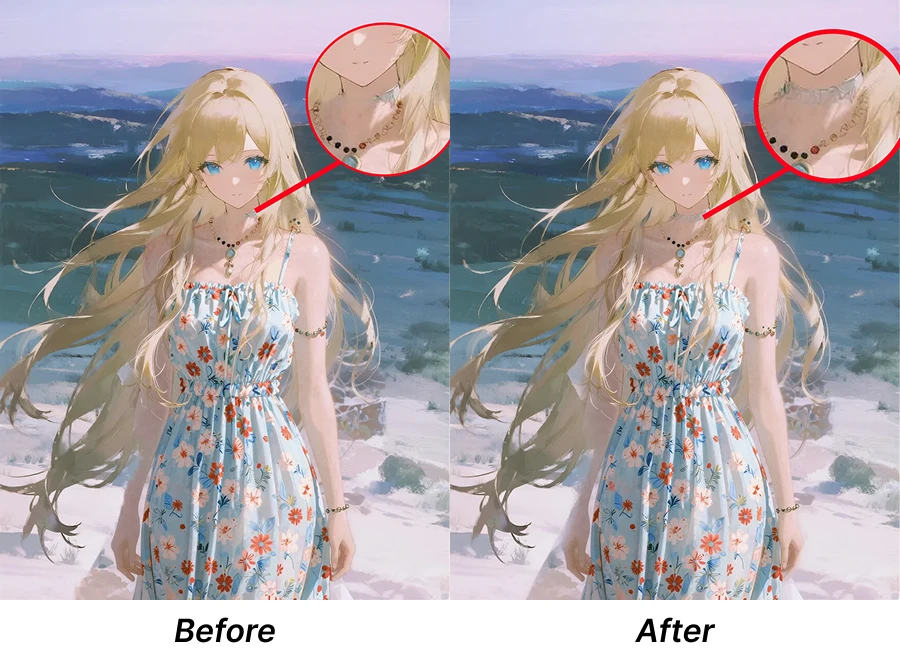
Off: There is a distinct 'sticker feel' on the edges of the repainted area, looking like a hard splice.
On: Edges are feathered, allowing new and old pixels to blend naturally through Gaussian blur.
Turn down Blur for small object repainting; turn up Blur for large environment blending.
`
Under the same seed:
Comparison before and after using this node:
`
2.Image Outpainting
On the basis of inpainting, it can be paired with the [Pad Image] for Outpainting node.
Pad Image for Outpainting
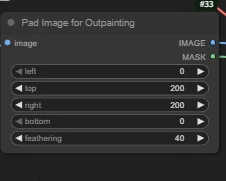
Increase the direction and size needed for expansion according to your needs.
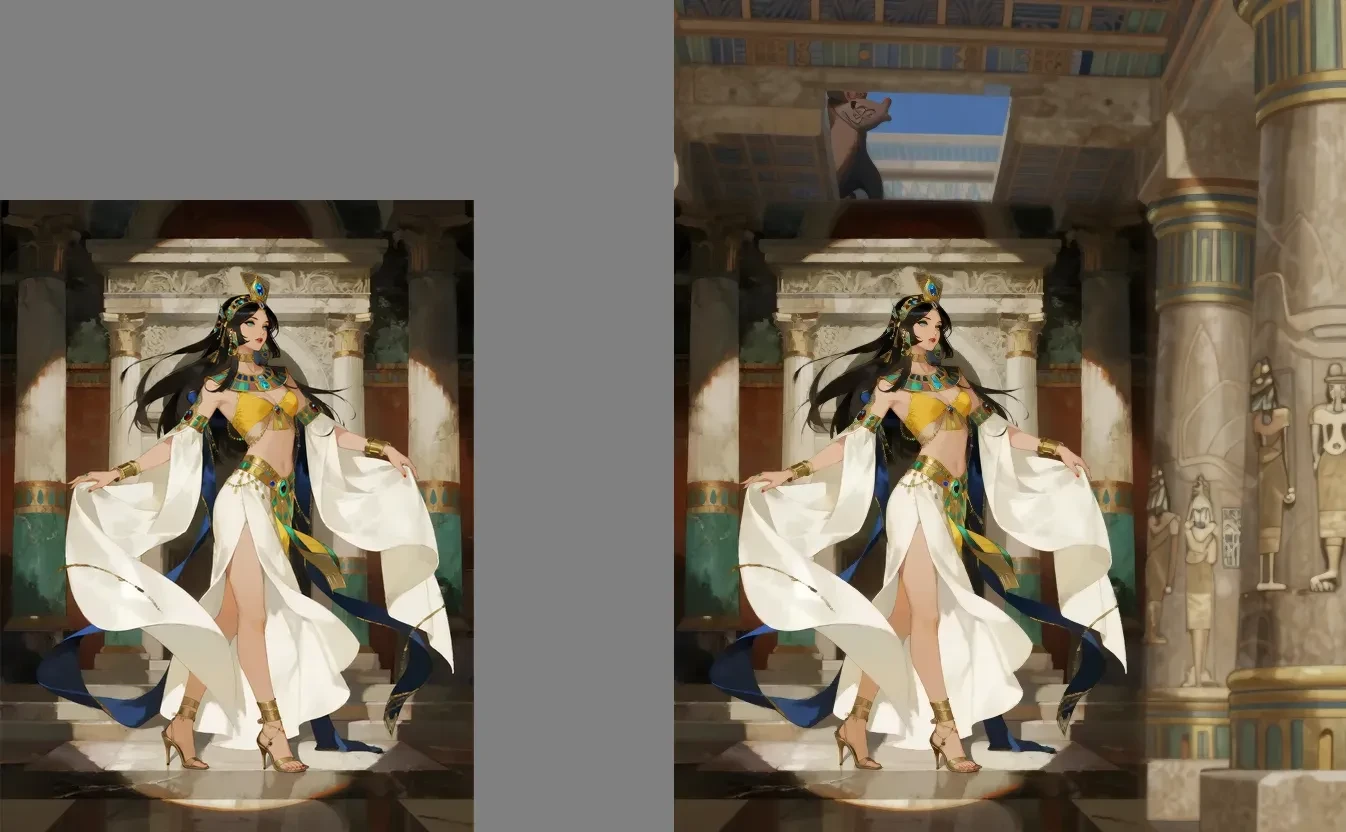
As shown in the figure: When we find the outpainting effect is too stiff or misaligned, we can appropriately adjust the denoise value between 0.85 - 1.0.
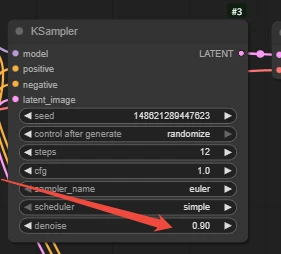
Comparison under different denoise values:
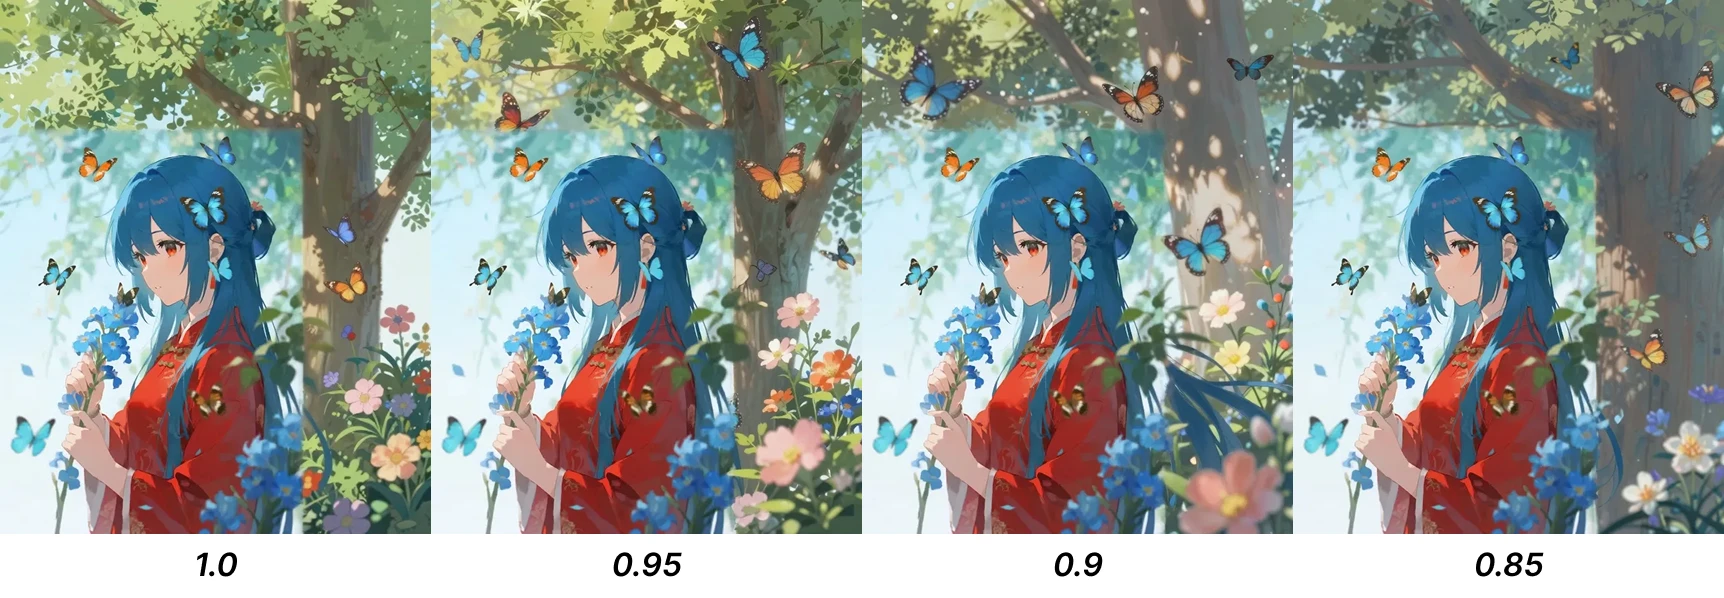
We can see that 0.85 maintains the style and outpainting effect best.
`
3.ControlNet
Showcase:
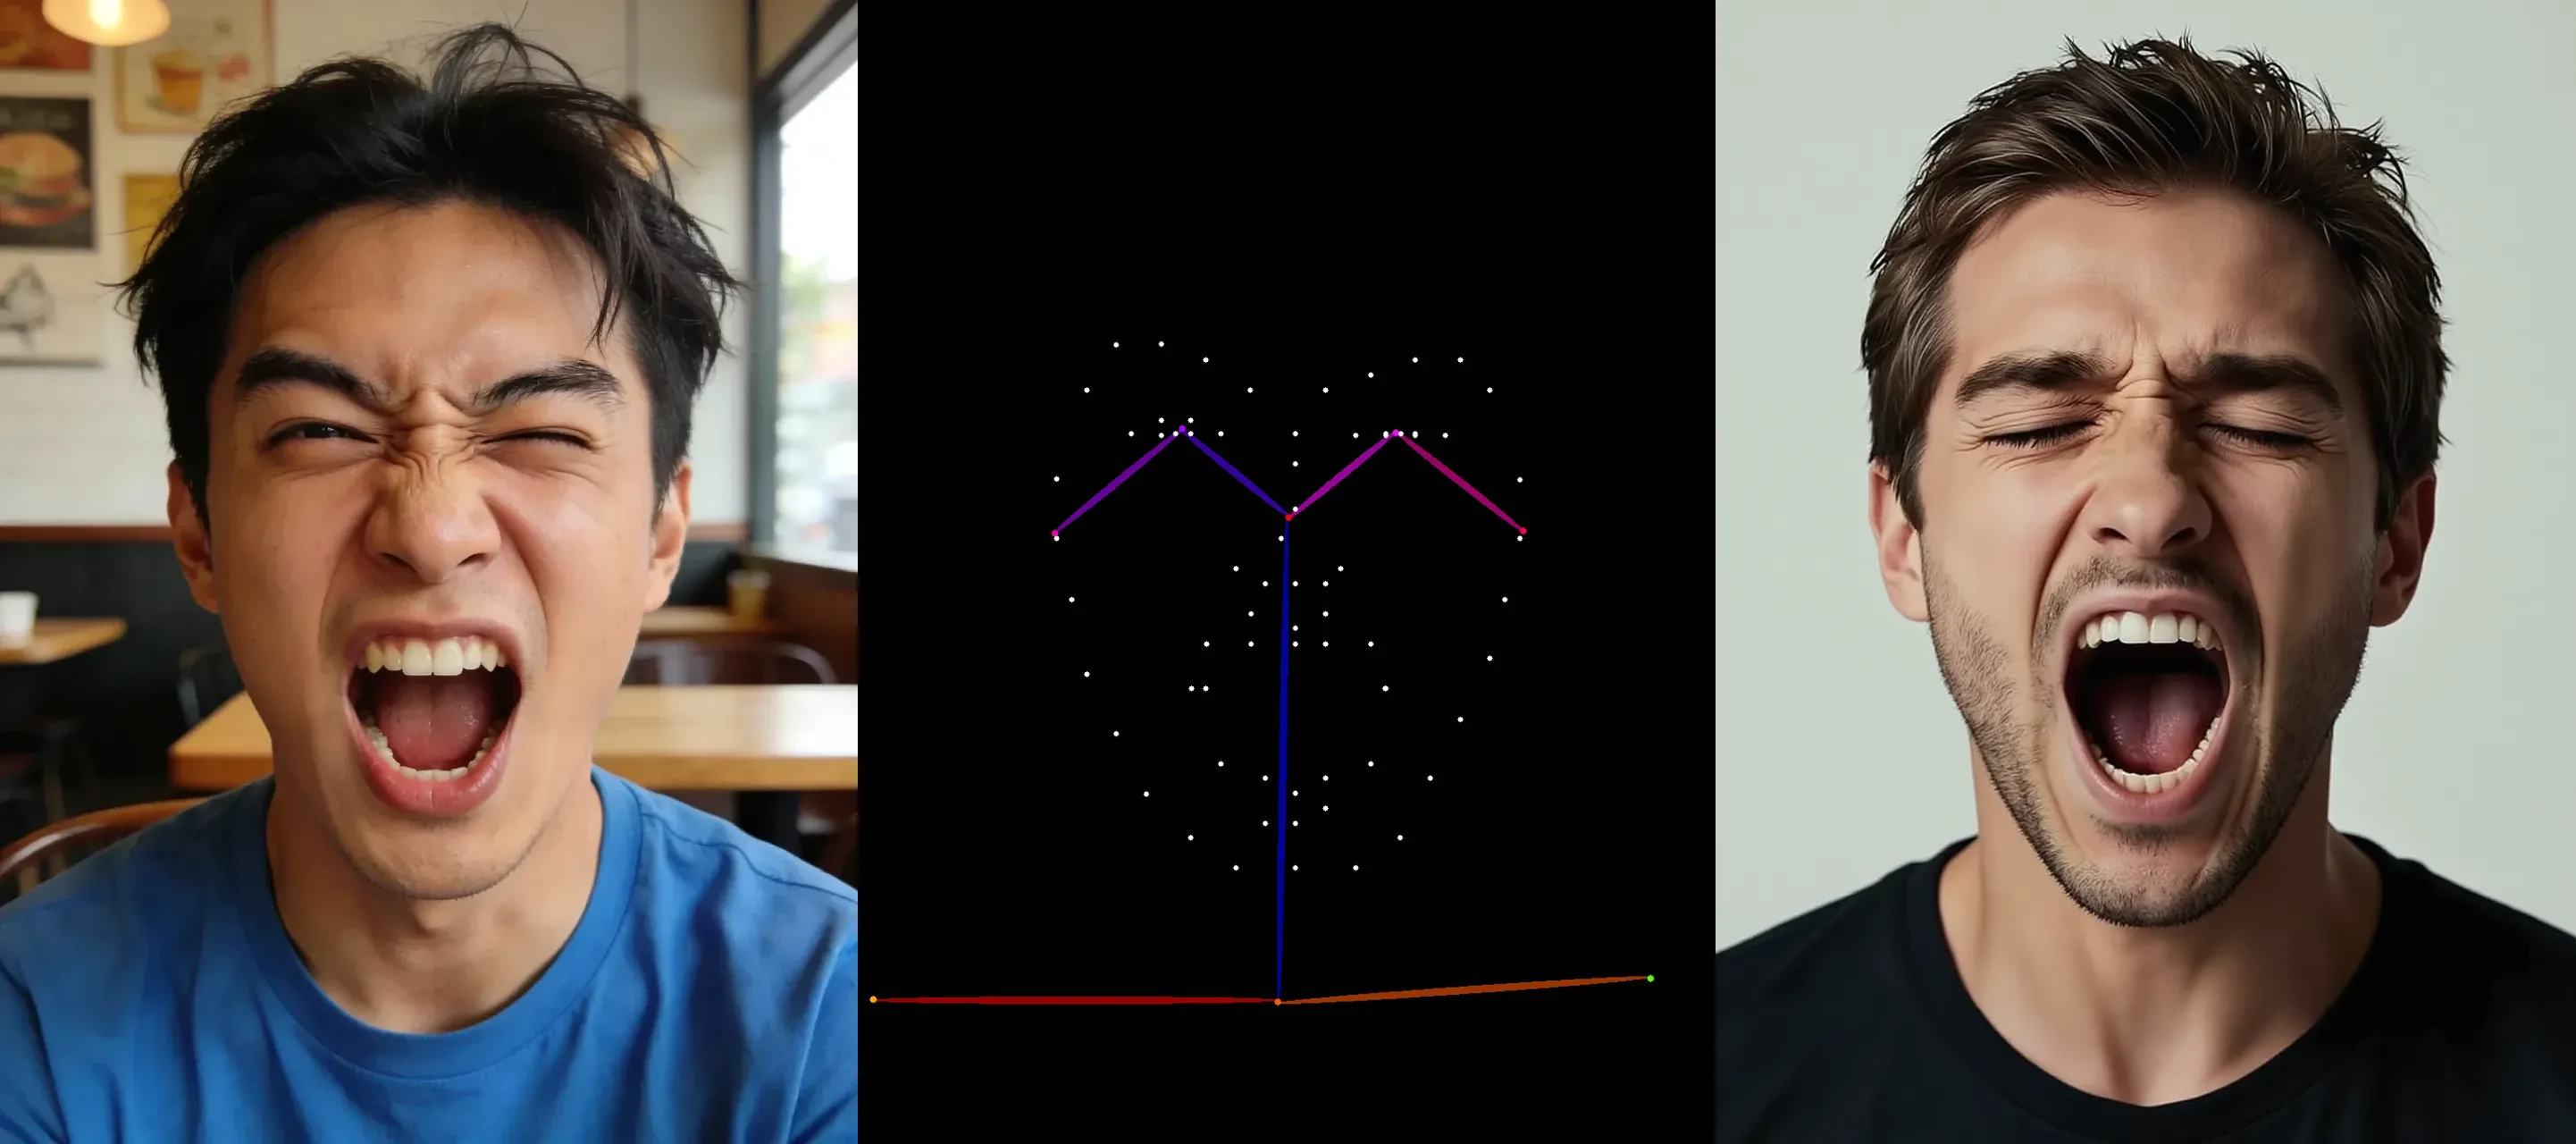
Realism, a Western man, a man shouting with his eyes closed.
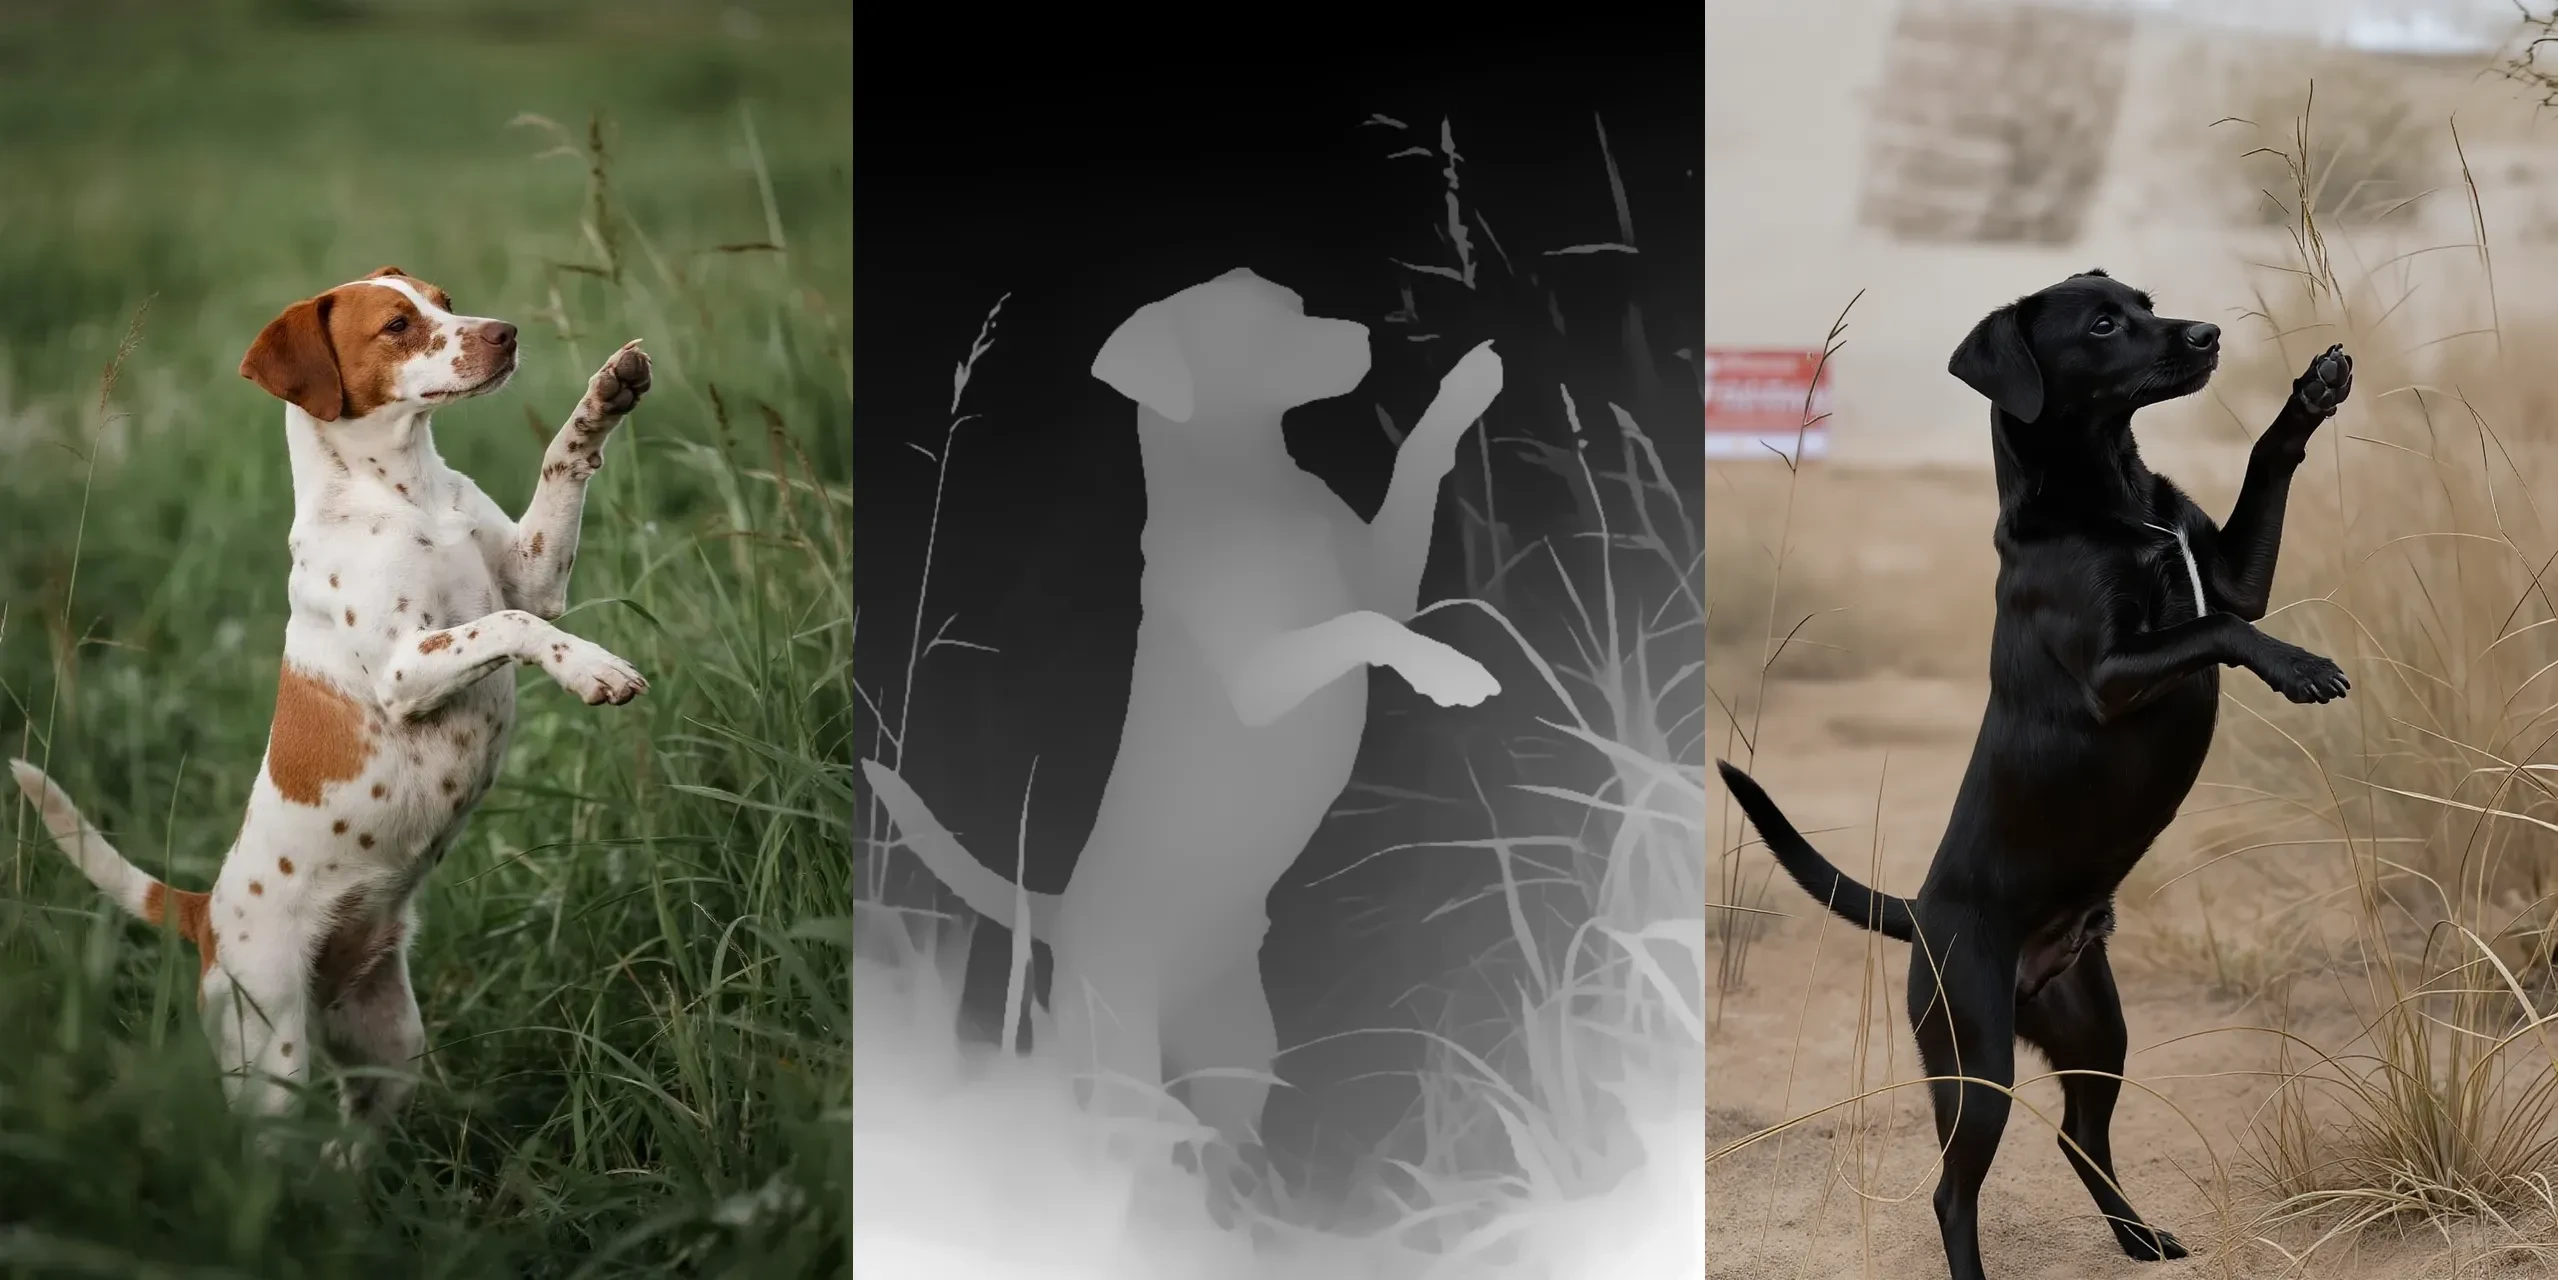
A black puppy stood in the desert.

in a large-format polaroid, soft focus edges, dreamy light leaks, vintage 1970s feel
How to Use
Model Link:Click to Jump
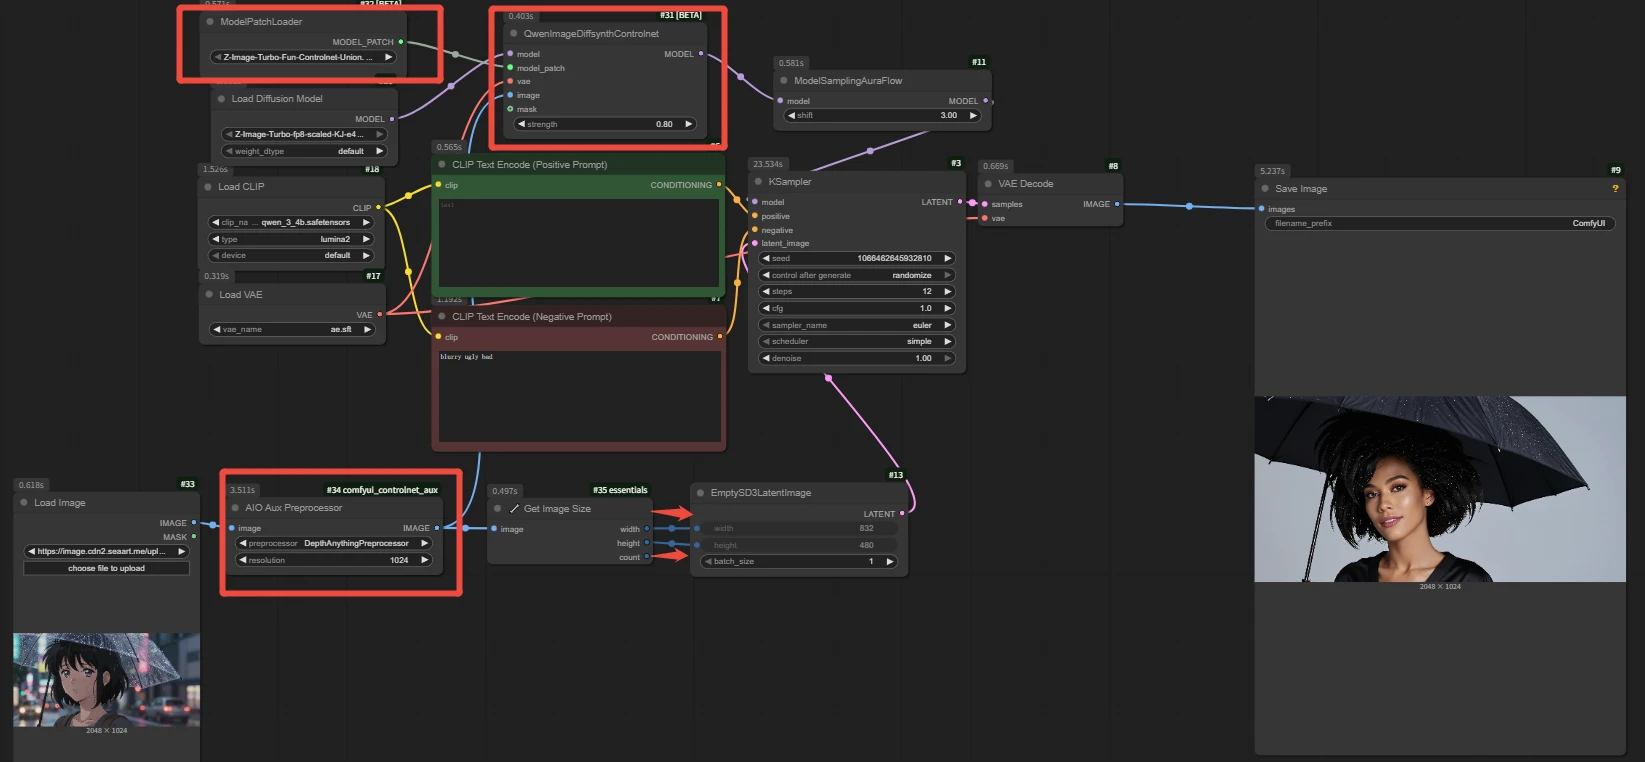
1.Load Node: [ QwenImageDiffsynthControlNet ]

strength: Enhances control and preserves more detailed details. The official Z-Image recommendation is 0.65 to 0.80, but this does not mean using 1 will result in poor effects.
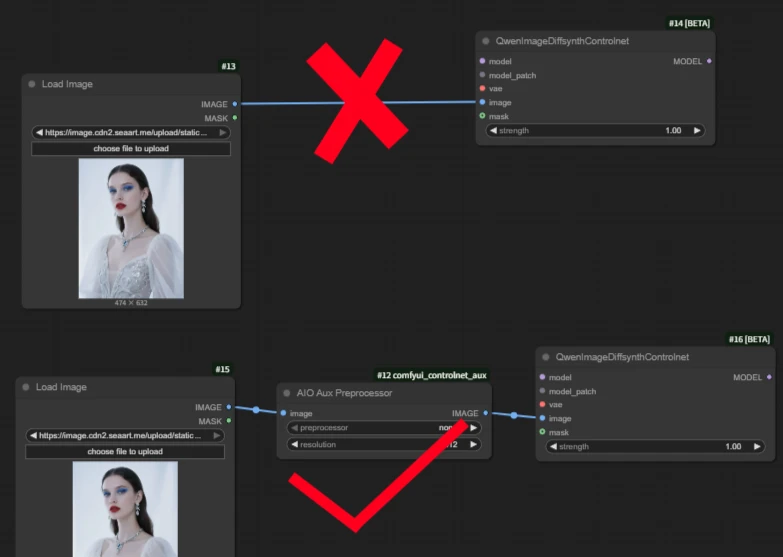
Note: Remember to connect the image output by the Preprocessor to the image interface of ControlNet, do not connect the original image directly.
2.Select the ControlNet model in the [ ModelPatchLoader node ].
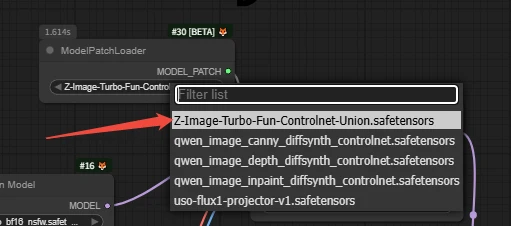
This model supports: Hard Edge, Soft Edge, Depth, Pose, and MLSD (Straight Lines).
`
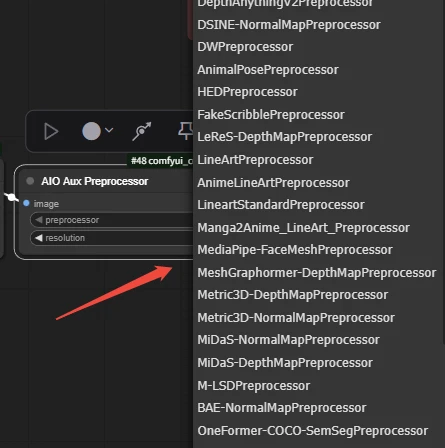
3.[ AIO Aux Preprocessor ]
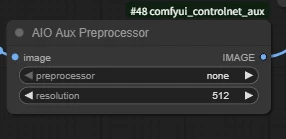
resolution: Output resolution
Select the corresponding model according to your needs.
🚨Small Tip: Aligning the image width and height will result in better effects. When the ratio is not aligned, issues with incomplete final effect display may occur.

`
Multiple Controlnet in Combination
We can connect by using two nodes.
For example: The left node connects the pose skeleton image, the right node connects depth.
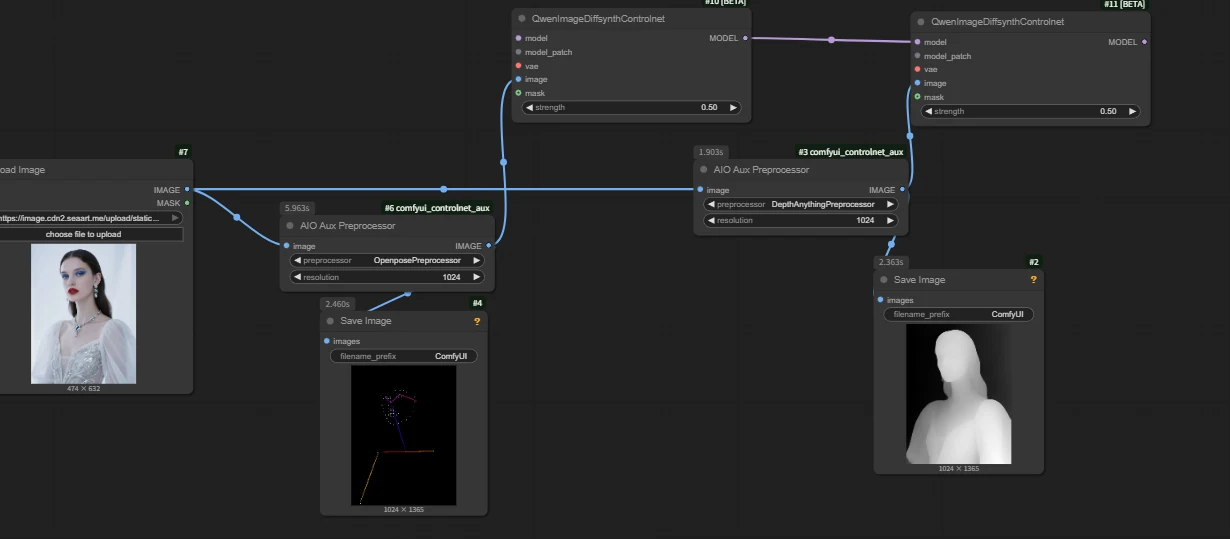
🚨Note: The strength of both nodes should take appropriate average values. If both node use high values like 1 or 0.8, the final generated image will collapse.
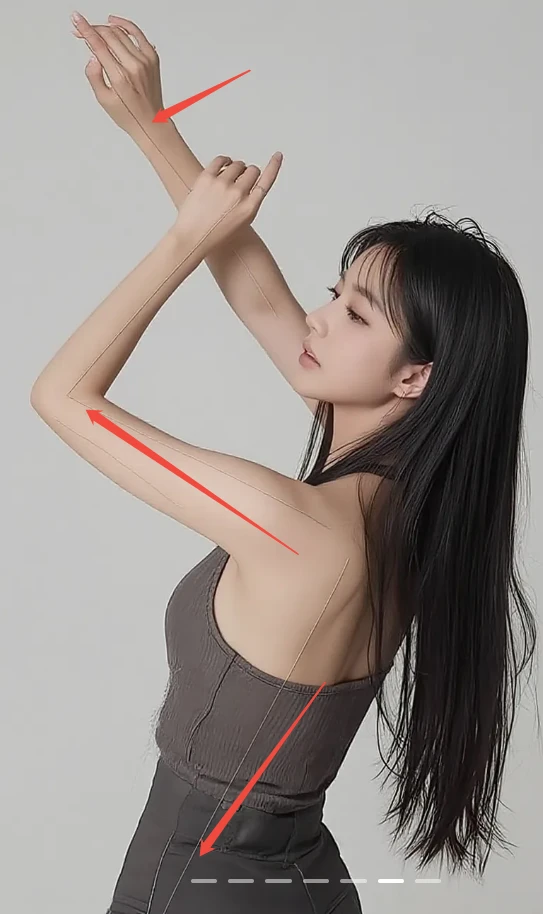
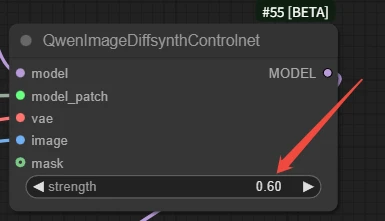
📃Tips: When we still encounter the aforementioned skeletal line issues when using the pose skeleton, we can appropriately increase the weight of the connecting node corresponding to the skeletal lines.
Showcase
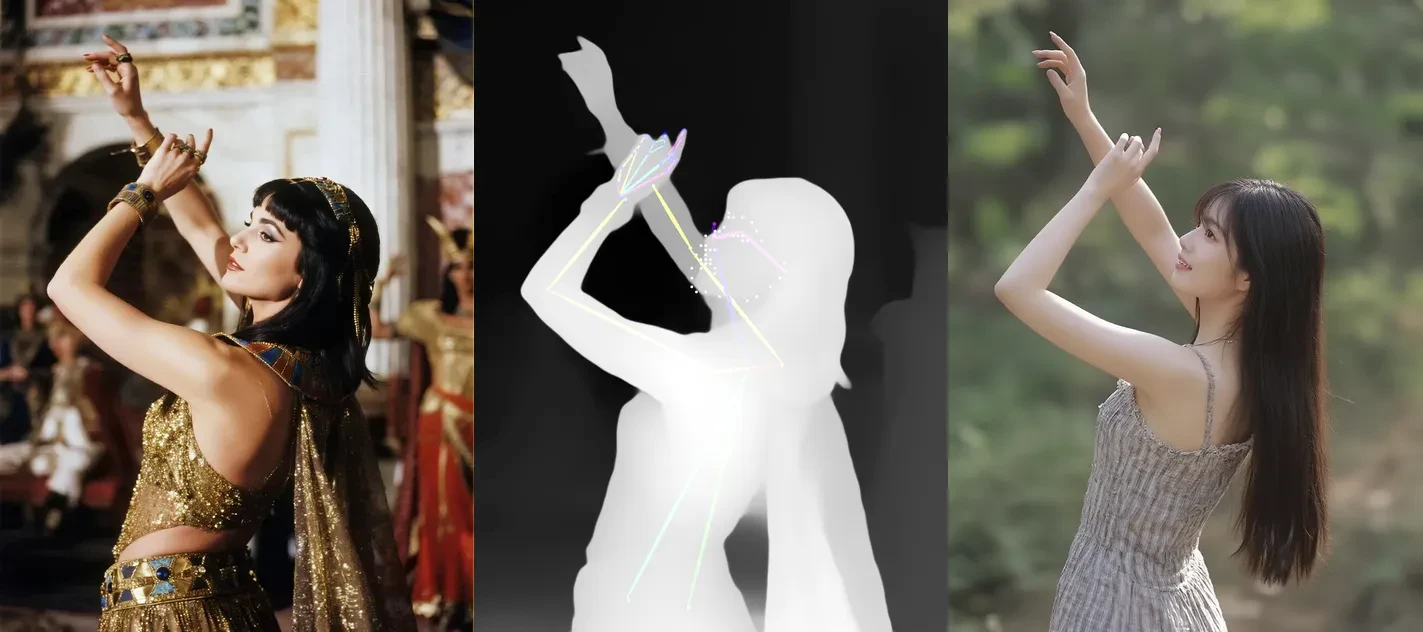
`
That's it for the Z-Image tutorial! This is just the basics—the real magic happens when you start experimenting.
So don't just sit there watching; hesitate for a second,and you might find a whole new model version has already dropped🚀
`