
A diagram of a block of material with a cut in the middle


Prompts
Copy
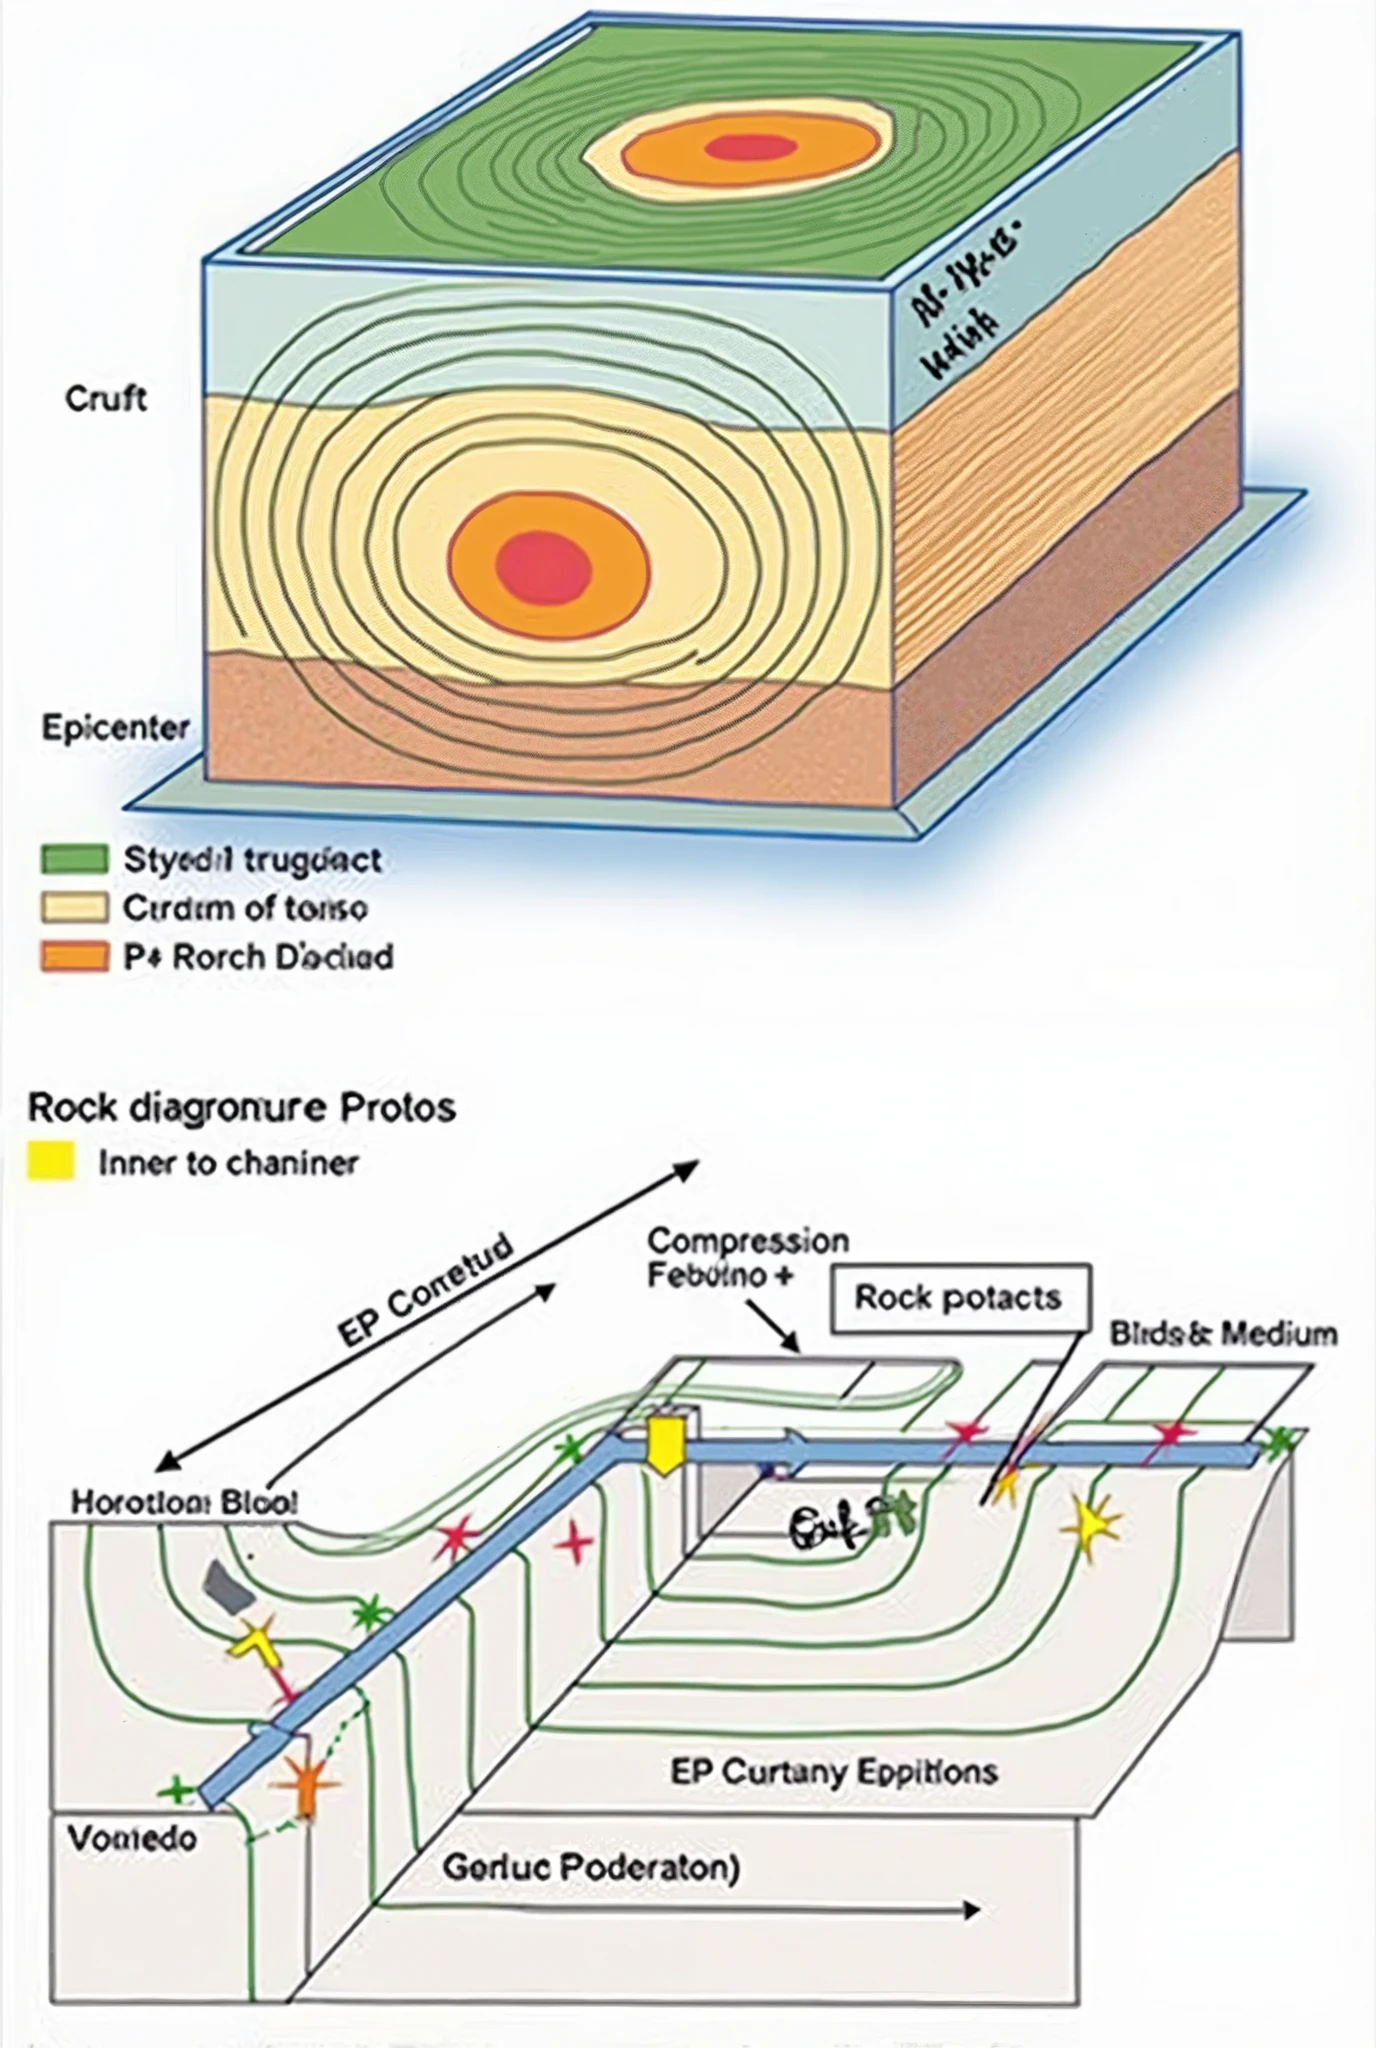
Drawing 1: Diagram of the P Wave through the Earth Step 1: Draw a big circle Objective: Represent a cross section of the Earth
.
Details: Divide the circle into different layers with concentric curved lines
,
representing the bark
,
the mantle and the core (internal and external)
.
colors: Use different colors for each layer (For example: brown for the crust
,
orange for the coat
,
yellow for the outer core
,
and grey for the inner core)
.
Step 2: Mark the epicenter Objective: Pinpointing the origin of seismic waves
.
Details: Draw a star or a small circle on the crust or on the top of the mantle
,
near the surface of the circle
.
Step 3: Draw the trajectories of the P waves Objective: Show how P waves propagate from the epicenter
.
Details: Draw straight lines radiating from the epicenter and through all the layers of the circle until reaching the other side
..
These lines should be curved in the areas where the waves change speed
.
(For example
,
when passing from the mantle to the core)
.
colors: Use a striking color
,
how red the blue
,
so that the waves are visible
.
Step 4: Add arrows on the Target lines: Indicate the direction in which the waves move
.
Details: On each line representing a P wave
,
Draw small arrows pointing in the direction the wave is moving
..
Step 5: Label the parts Objective: Identify the different layers and elements of the drawing
.
Details: Place labels next to each layer (Crust
,
cloak
,
Outer Core
,
Inner Core) and also labels the epicenter and P waves
.
Drawing 2: Behavior of P Waves in a Solid Medium Step 1: Draw a long horizontal line Target: Represent a section of the earth'
;
s crust
.
Details: The line should be long enough to show several phases of compression and expansion
..
Step 2: Draw a series of small circles Objective: Represent the particles of the medium (For example
,
rock particles)
INFO
Checkpoint & LoRA

Checkpoint
SeaArt Infinity
#SeaArt Infinity
0 comment
0
0
0
SeaArt Swift AI Apps
AI Video Generation
Unleash your imagination and let AI create visual wonders for you
Face Swap Online Free
Create funny or realistic face swap videos & photos in a snap
Disney Filter
Instantly transform your photos into Disney characters.

Wan 2.1 Image to Video
Animate photos with realistic motion and cinematic effects.
AI Eraser
Easily remove unwanted objects, watermarks, or people from your photos.

Remove Background
Remove backgrounds from any image in seconds.
Explore More AI Apps