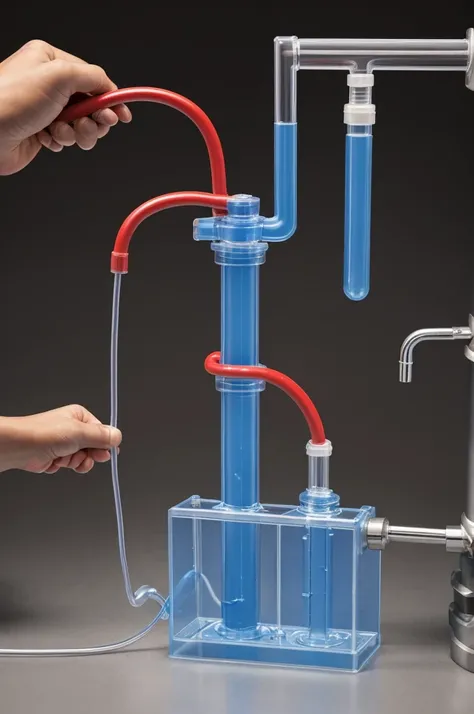
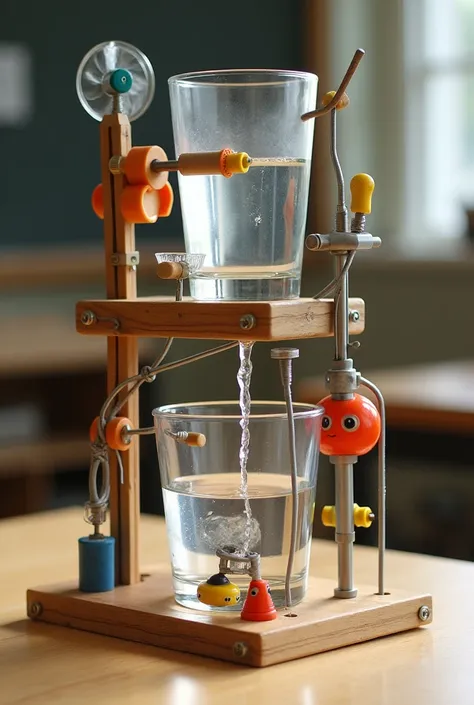
To make a 3D model of the circulatory system that shows how fluid circulates
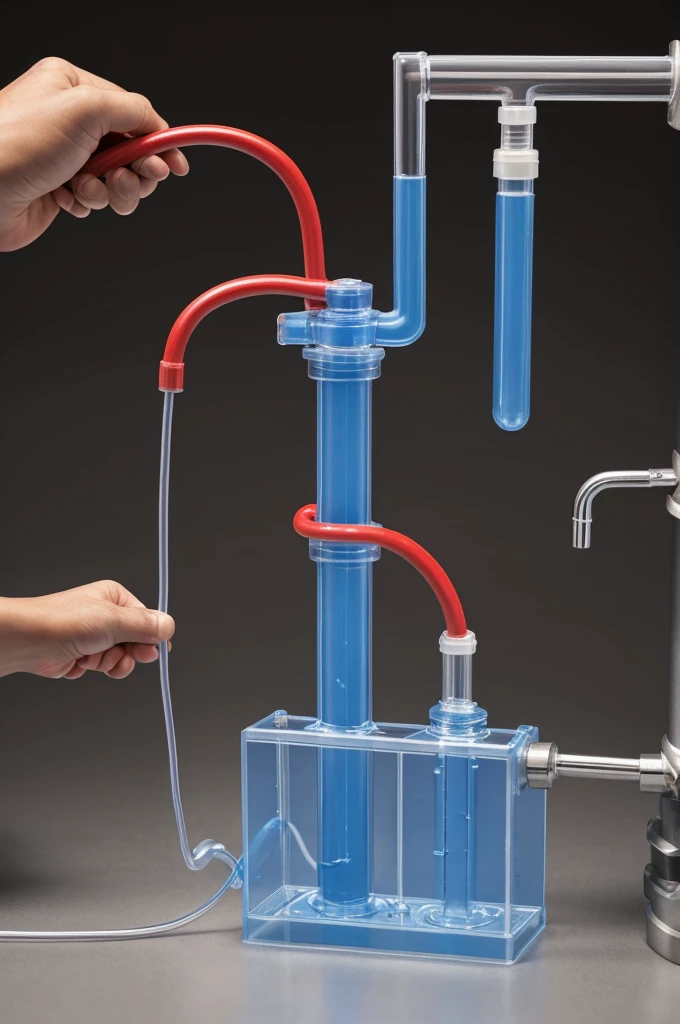


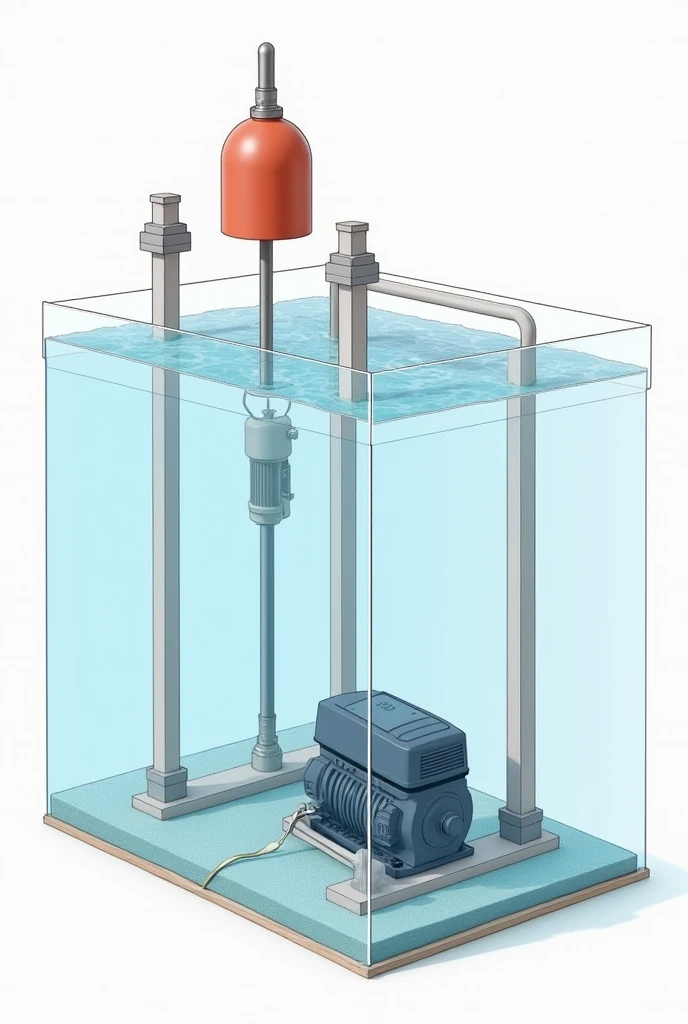
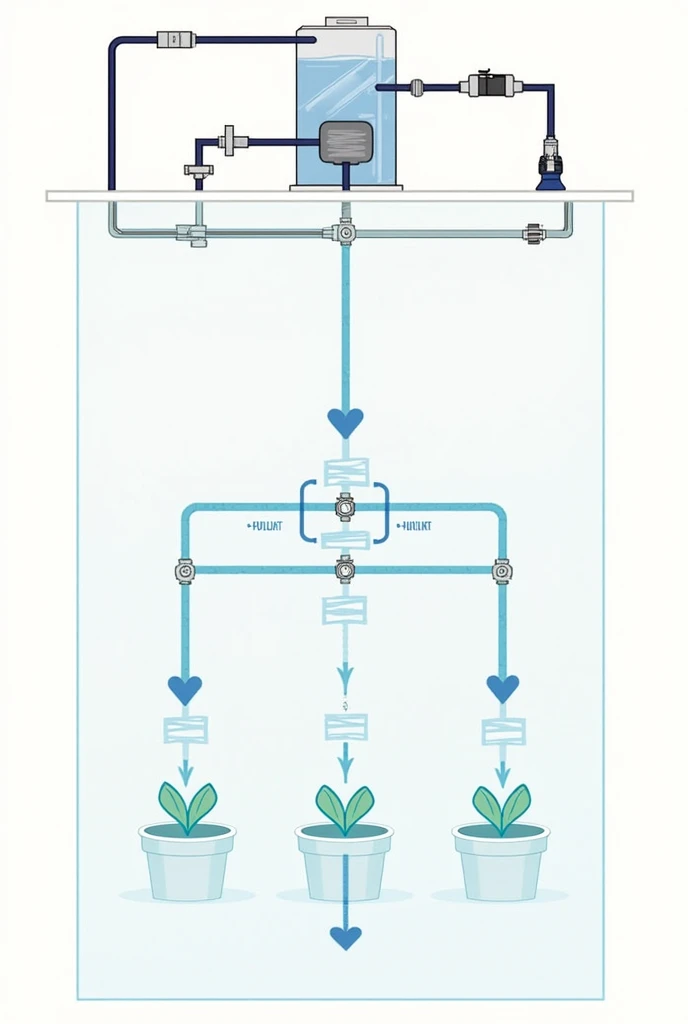
To make a 3D model of the circulatory system that shows how fluid circulates, you can follow a series of detailed steps. This project requires a little more complexity and use of specific materials, but here you have a complete guide: ### Materials Needed 1. **Support base**: It can be a wooden board or sturdy cardboard.. 2. **Transparent plastic tubes**: To represent the arteries and veins. 3. **small water pump**: Para simular el heart bombeando blood. 4. **Small tank or reservoir**: To store the fluid that will circulate. 5. **Red and blue dye**: To color the water and differentiate arteries and veins. 6. **clay, clay or 3D printing**: Para modelar el heart y otros órganos. 7. **Paints and brushes**: For details and finishes. 8. **Strong glue and hot silicone**: To assemble the pieces. 9. **Small check valves**: To ensure unidirectional flow. 10. **Air pump or a suitable power source**: To feed the water pump. 11. **Connector tubes and adapters**: To connect the tubes to the pump and tank. 12. **Some LED lights (optional)**: To highlight fluid flow. ### Steps to Follow 1. **Model Design and Preparation**: - Draw a diagram of the circulatory system on the support base. - Identifica la ubicación del heart, major arteries and veins. 2. **Modeling of the Heart and Organs**: - One plasticine, arcilla o una impresora 3D para crear un modelo del heart y otros órganos principales. - Paint and detail the organs for greater realism. 3. **Water Pump Installation**: - Place the water pump on the support base, making sure it is securely fastened. - Connect the water pump to the fluid reservoir (this will be the tank "blood"). 4. **Piping system (Arteries and Veins)**: - Connects clear plastic tubes from the pump (heart) to different parts of the body
คำพรอมต์
คัดลอกคำพรอมต์
To make a 3D model of the circulatory system that shows how fluid circulates
,
you can follow a series of detailed steps
.
This project requires a little more complexity and use of specific materials
,
but here you have a complete guide:
### Materials Needed 1
.
**Support base**: It can be a wooden board or sturdy cardboard
..
2
.
**Transparent plastic tubes**: To represent the arteries and veins
.
3
.
**small water pump**: Para simular el heart bombeando blood
.
4
.
**Small tank or reservoir**: To store the fluid that will circulate
.
5
.
**Red and blue dye**: To color the water and differentiate arteries and veins
.
6
.
**clay
,
clay or 3D printing**: Para modelar el heart y otros órganos
.
7
.
**Paints and brushes**: For details and finishes
.
8
.
**Strong glue and hot silicone**: To assemble the pieces
.
9
.
**Small check valves**: To ensure unidirectional flow
.
10
.
**Air pump or a suitable power source**: To feed the water pump
.
11
.
**Connector tubes and adapters**: To connect the tubes to the pump and tank
.
12
.
**Some LED lights (optional)**: To highlight fluid flow
.
### Steps to Follow 1
.
**Model Design and Preparation**:
- Draw a diagram of the circulatory system on the support base
.
- Identifica la ubicación del heart
,
major arteries and veins
.
2
.
**Modeling of the Heart and Organs**:
- One plasticine
,
arcilla o una impresora 3D para crear un modelo del heart y otros órganos principales
.
- Paint and detail the organs for greater realism
.
3
.
**Water Pump Installation**:
- Place the water pump on the support base
,
making sure it is securely fastened
.
- Connect the water pump to the fluid reservoir (this will be the tank "blood")
.
4
.
**Piping system (Arteries and Veins)**:
- Connects clear plastic tubes from the pump (heart) to different parts of the body
ข้อมูล
Checkpoint & LoRA
Checkpoint
CyberRealistic
0 ความคิดเห็น
0
1
0
แอป SeaArt Swift AI
การสลับหน้า AI
สำรวจอัตลักษณ์ที่แตกต่างและค้นพบตัวตนใหม่ของคุณด้วยการคลิกเพียงครั้งเดียว

AI โปรแกรมปรับปรุงภาพ
สัมผัสกับงานเลี้ยงภาพ HD ได้แล้ววันนี้!
ลบพื้นหลัง
AI ตัดพื้นหลังโดยอัตโนมัติ
เครื่องมือสร้างภาพ AI จากข้อความ
เปลี่ยนข้อความง่ายๆ ให้เป็นงานศิลปะที่น่าทึ่ง

AI Portrait
คลิกเดียวเพื่อเปิดเผยเสรีภาพถ่าย ปลดล็อคสไตล์ต่าง ๆ ของฉัน
ตัวกรอง AI
ทำให้ภาพถ่ายทุกภาพกลายเป็นศิลปะ
สำรวจเครื่องมือ Swift AI ของเรา